family · health and wellbeing · recipes

Quake

Presently based in Mexico City, my daughter endured the terrifying experience of an earthquake. Standing in a queue on nightclub stairwell (where most twenty-somethings living on the other side of the world from home should be) the quake hit. Fearing its likely collapse, she had the presence of mind to push herself and those ahead of her off the stairs and into the club – where they safely waited it out.

Although she was physically unscathed, the experience has remained within her protective recesses. The nights are very hot in Mexico and for maximum sleeping comfort the minimum in sleeping attire is required. Never sure now when the next tremor may strike, she keeps a pair of pants within arm’s reach next to her bed should she need to evacuate to the street in the wee hours. Affectionately termed her ”earthquake pants” they provide the security she currently needs to sleep well through unsettling circumstances.

And today I thought, we all need earthquake pants, something or someone we know we can reach for when life trembles. I am lucky. I have some very sound quake strides that have supported me, so I urge you to think about what are yours. For many the fabric is woven from religion, a parent, a partner or a social network. Whatever guise your pants may be, cherish them and keep them close.

I hope I am the earthquake pants for my children.

Maybe you also have a pair fashioned from the strongest material available, but have not yet discovered them or have forgotten they are there, folded securely within you. These are the pants that you slide into when the fault lines of life shift and separate beneath you. Their warp and weft threads are tightly bound by the inner strength of your human spirit – and nothing, not even a shift in the physical earth will ever separate them.

If you are experiencing or have endured your own personal instability, this is a lovely piece to help restore calm.


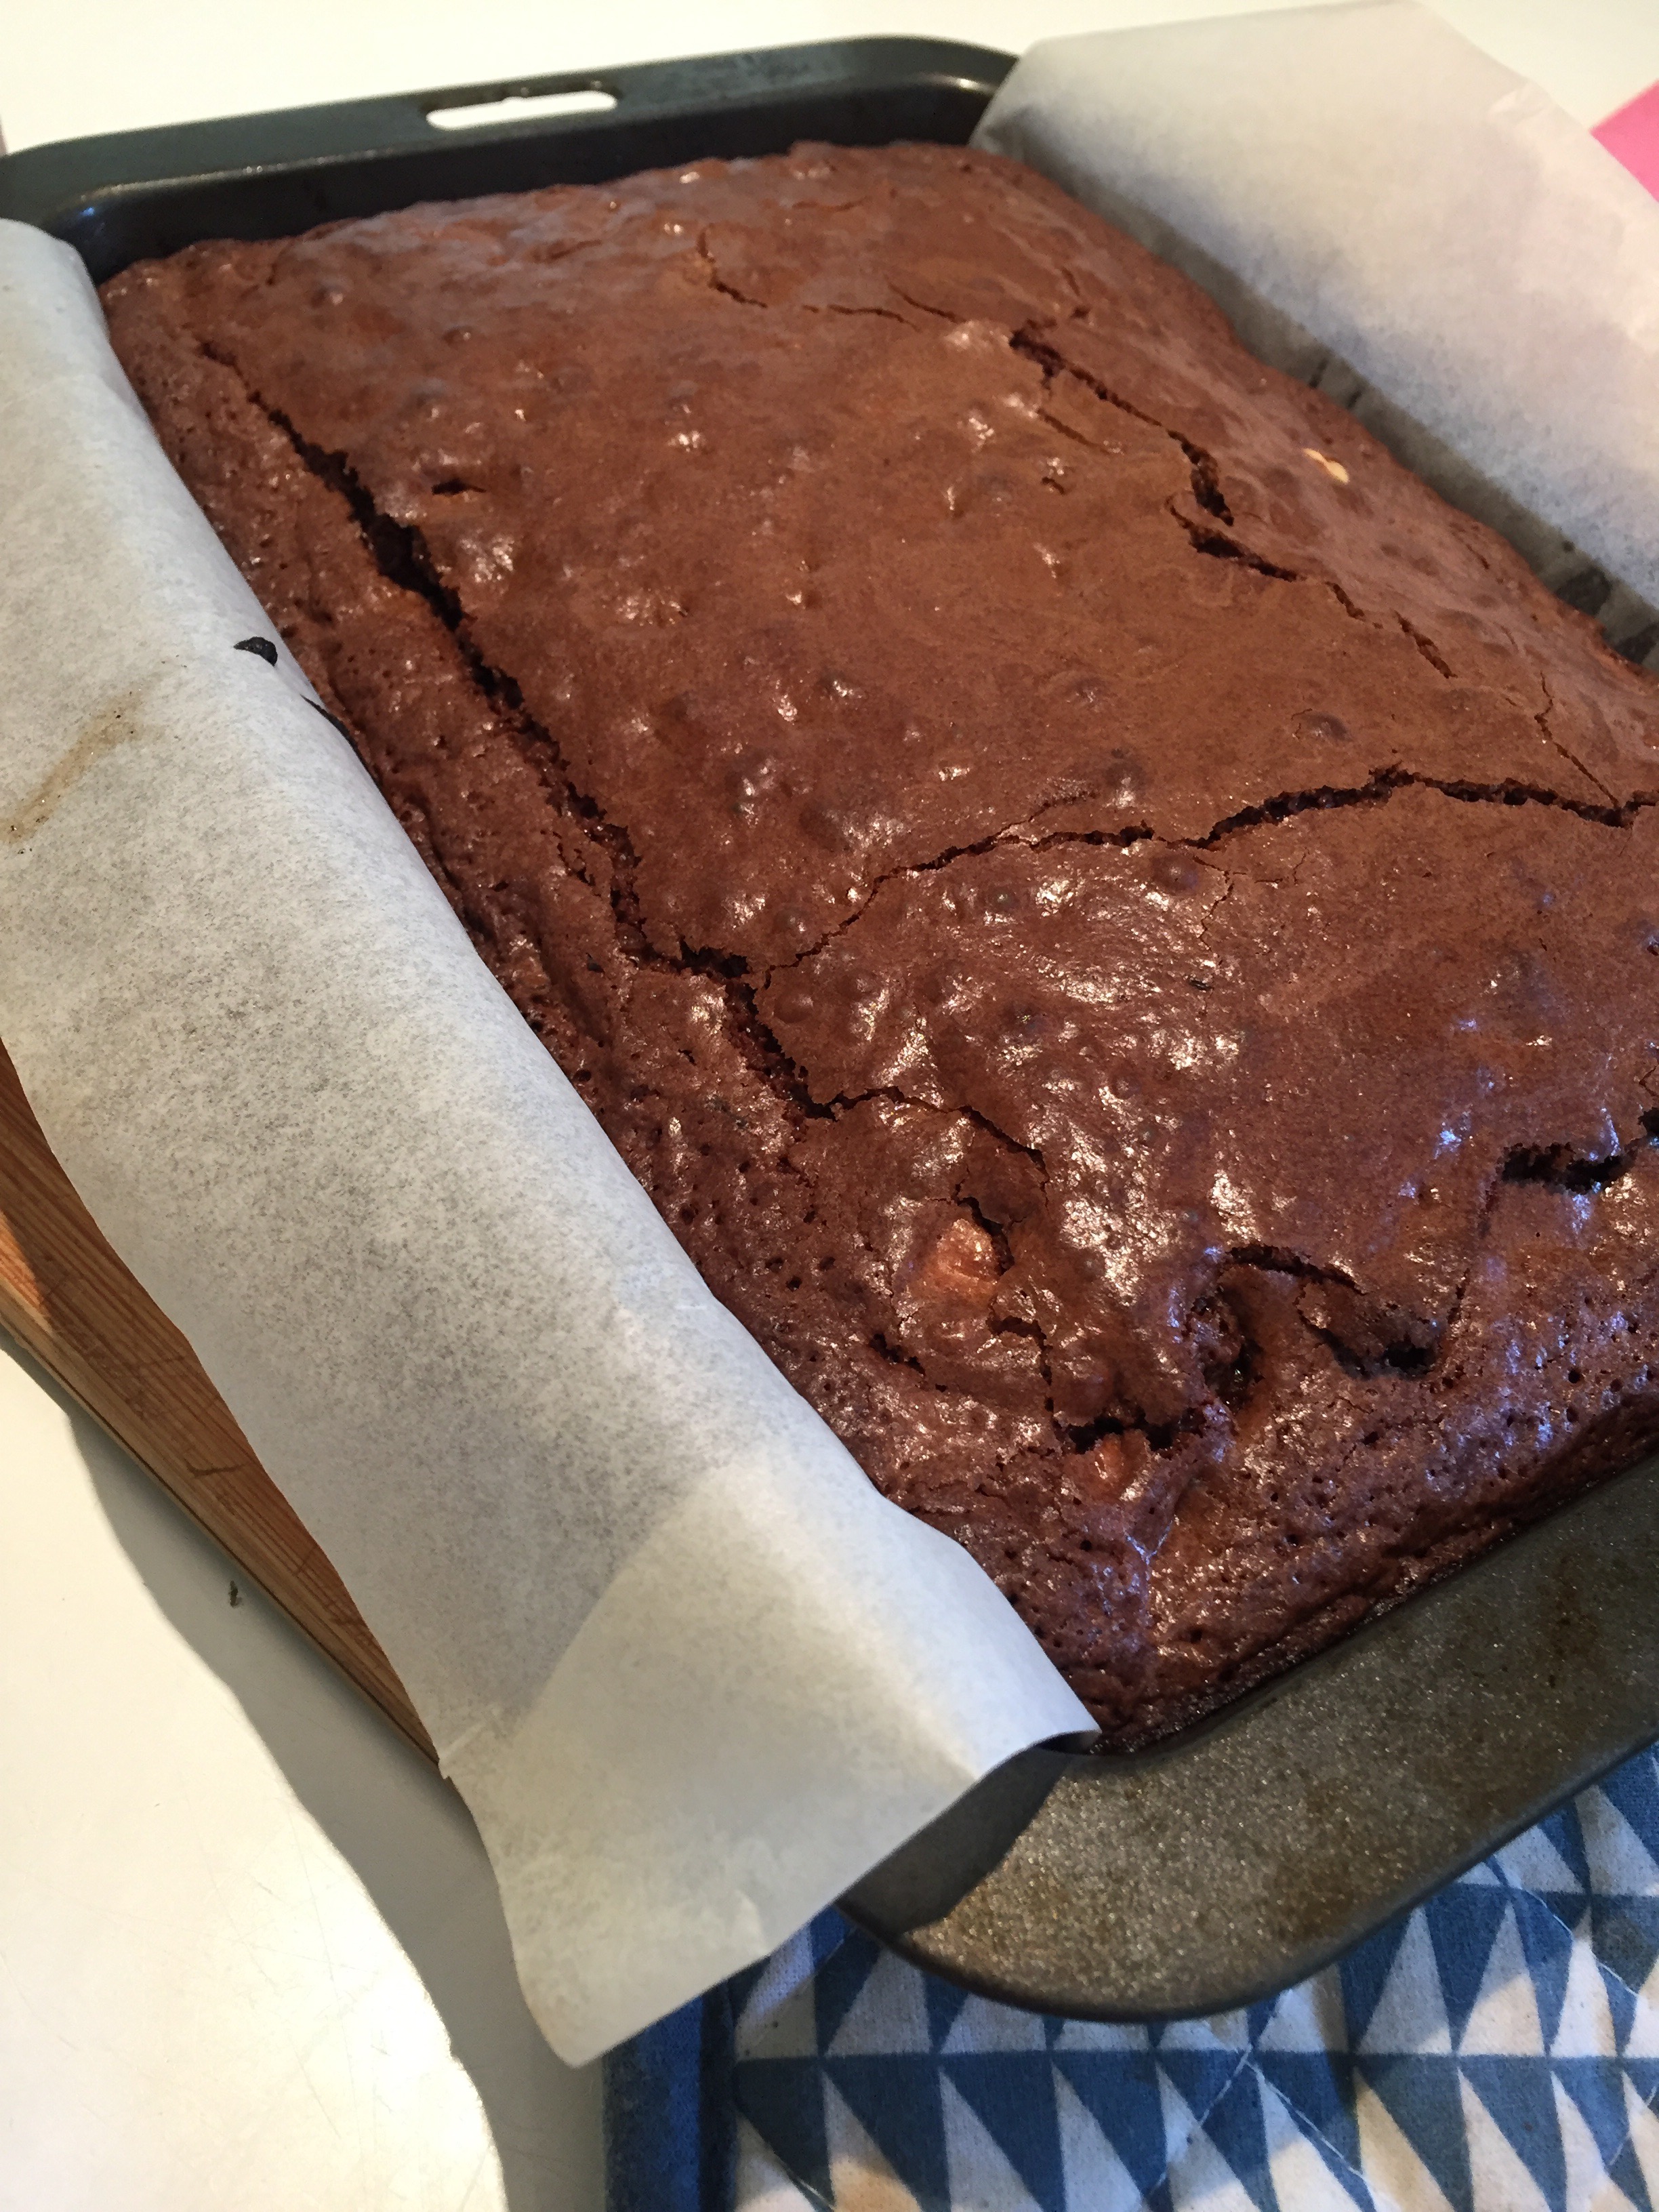
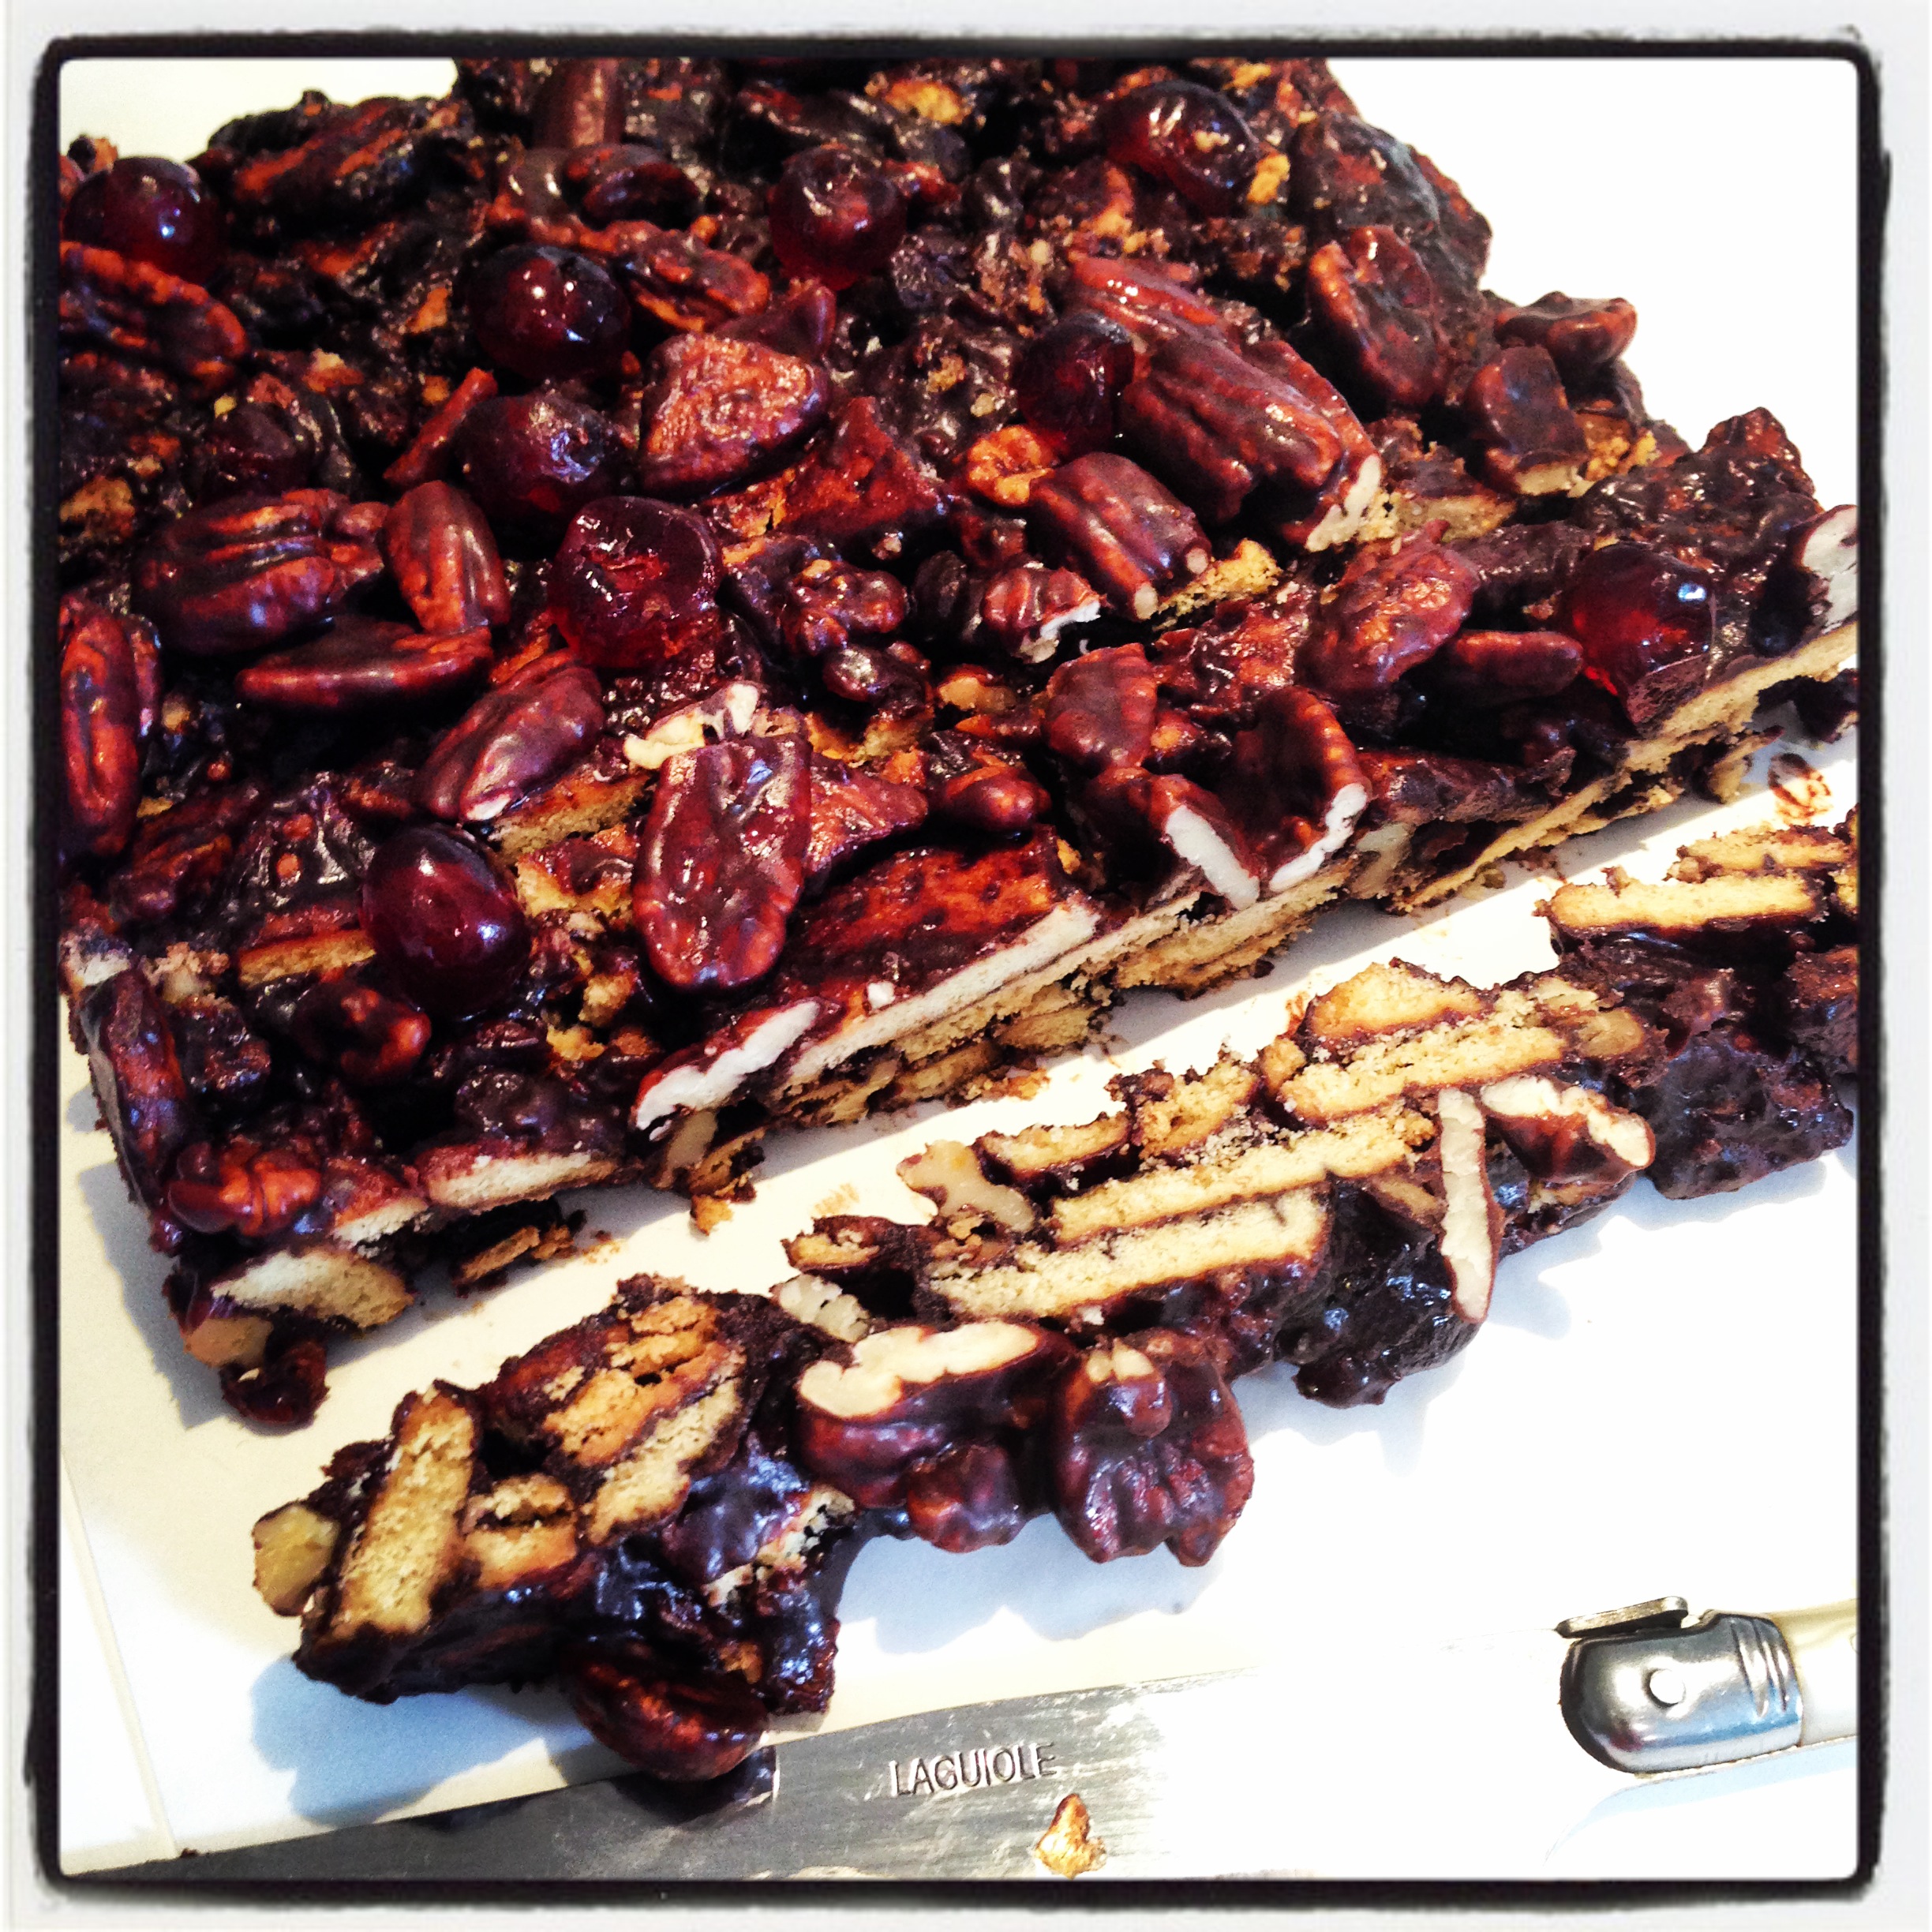
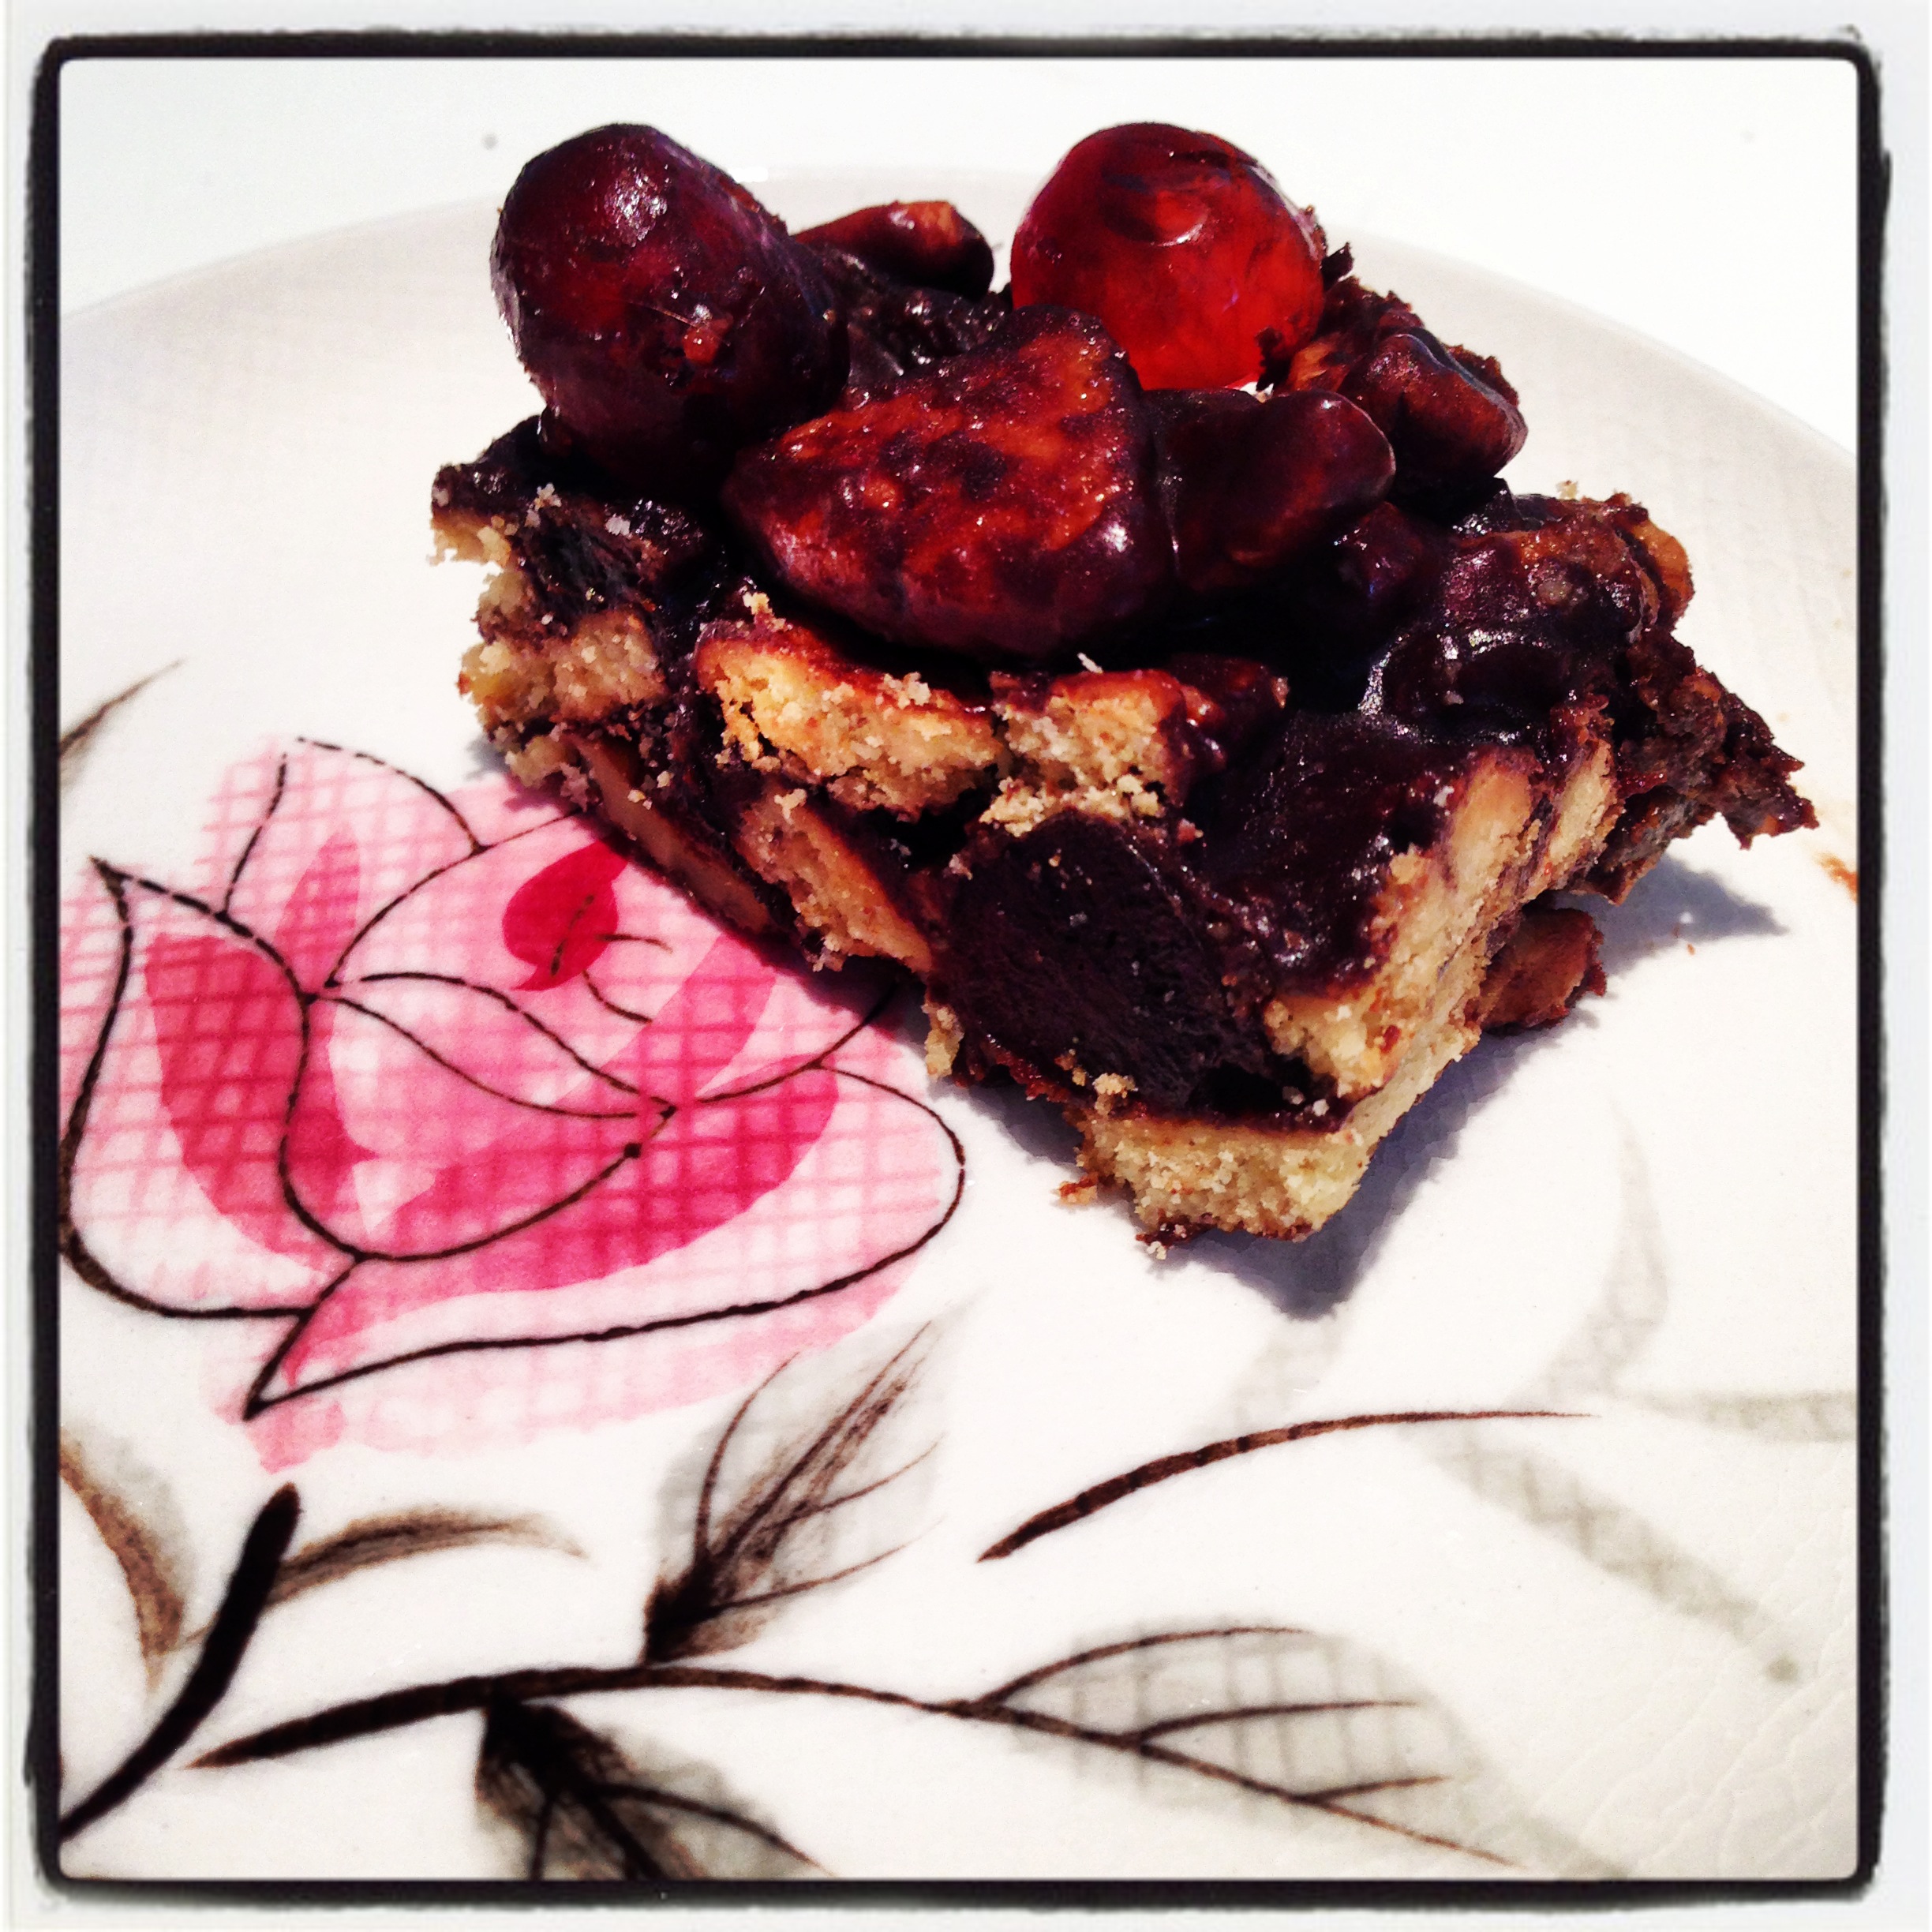
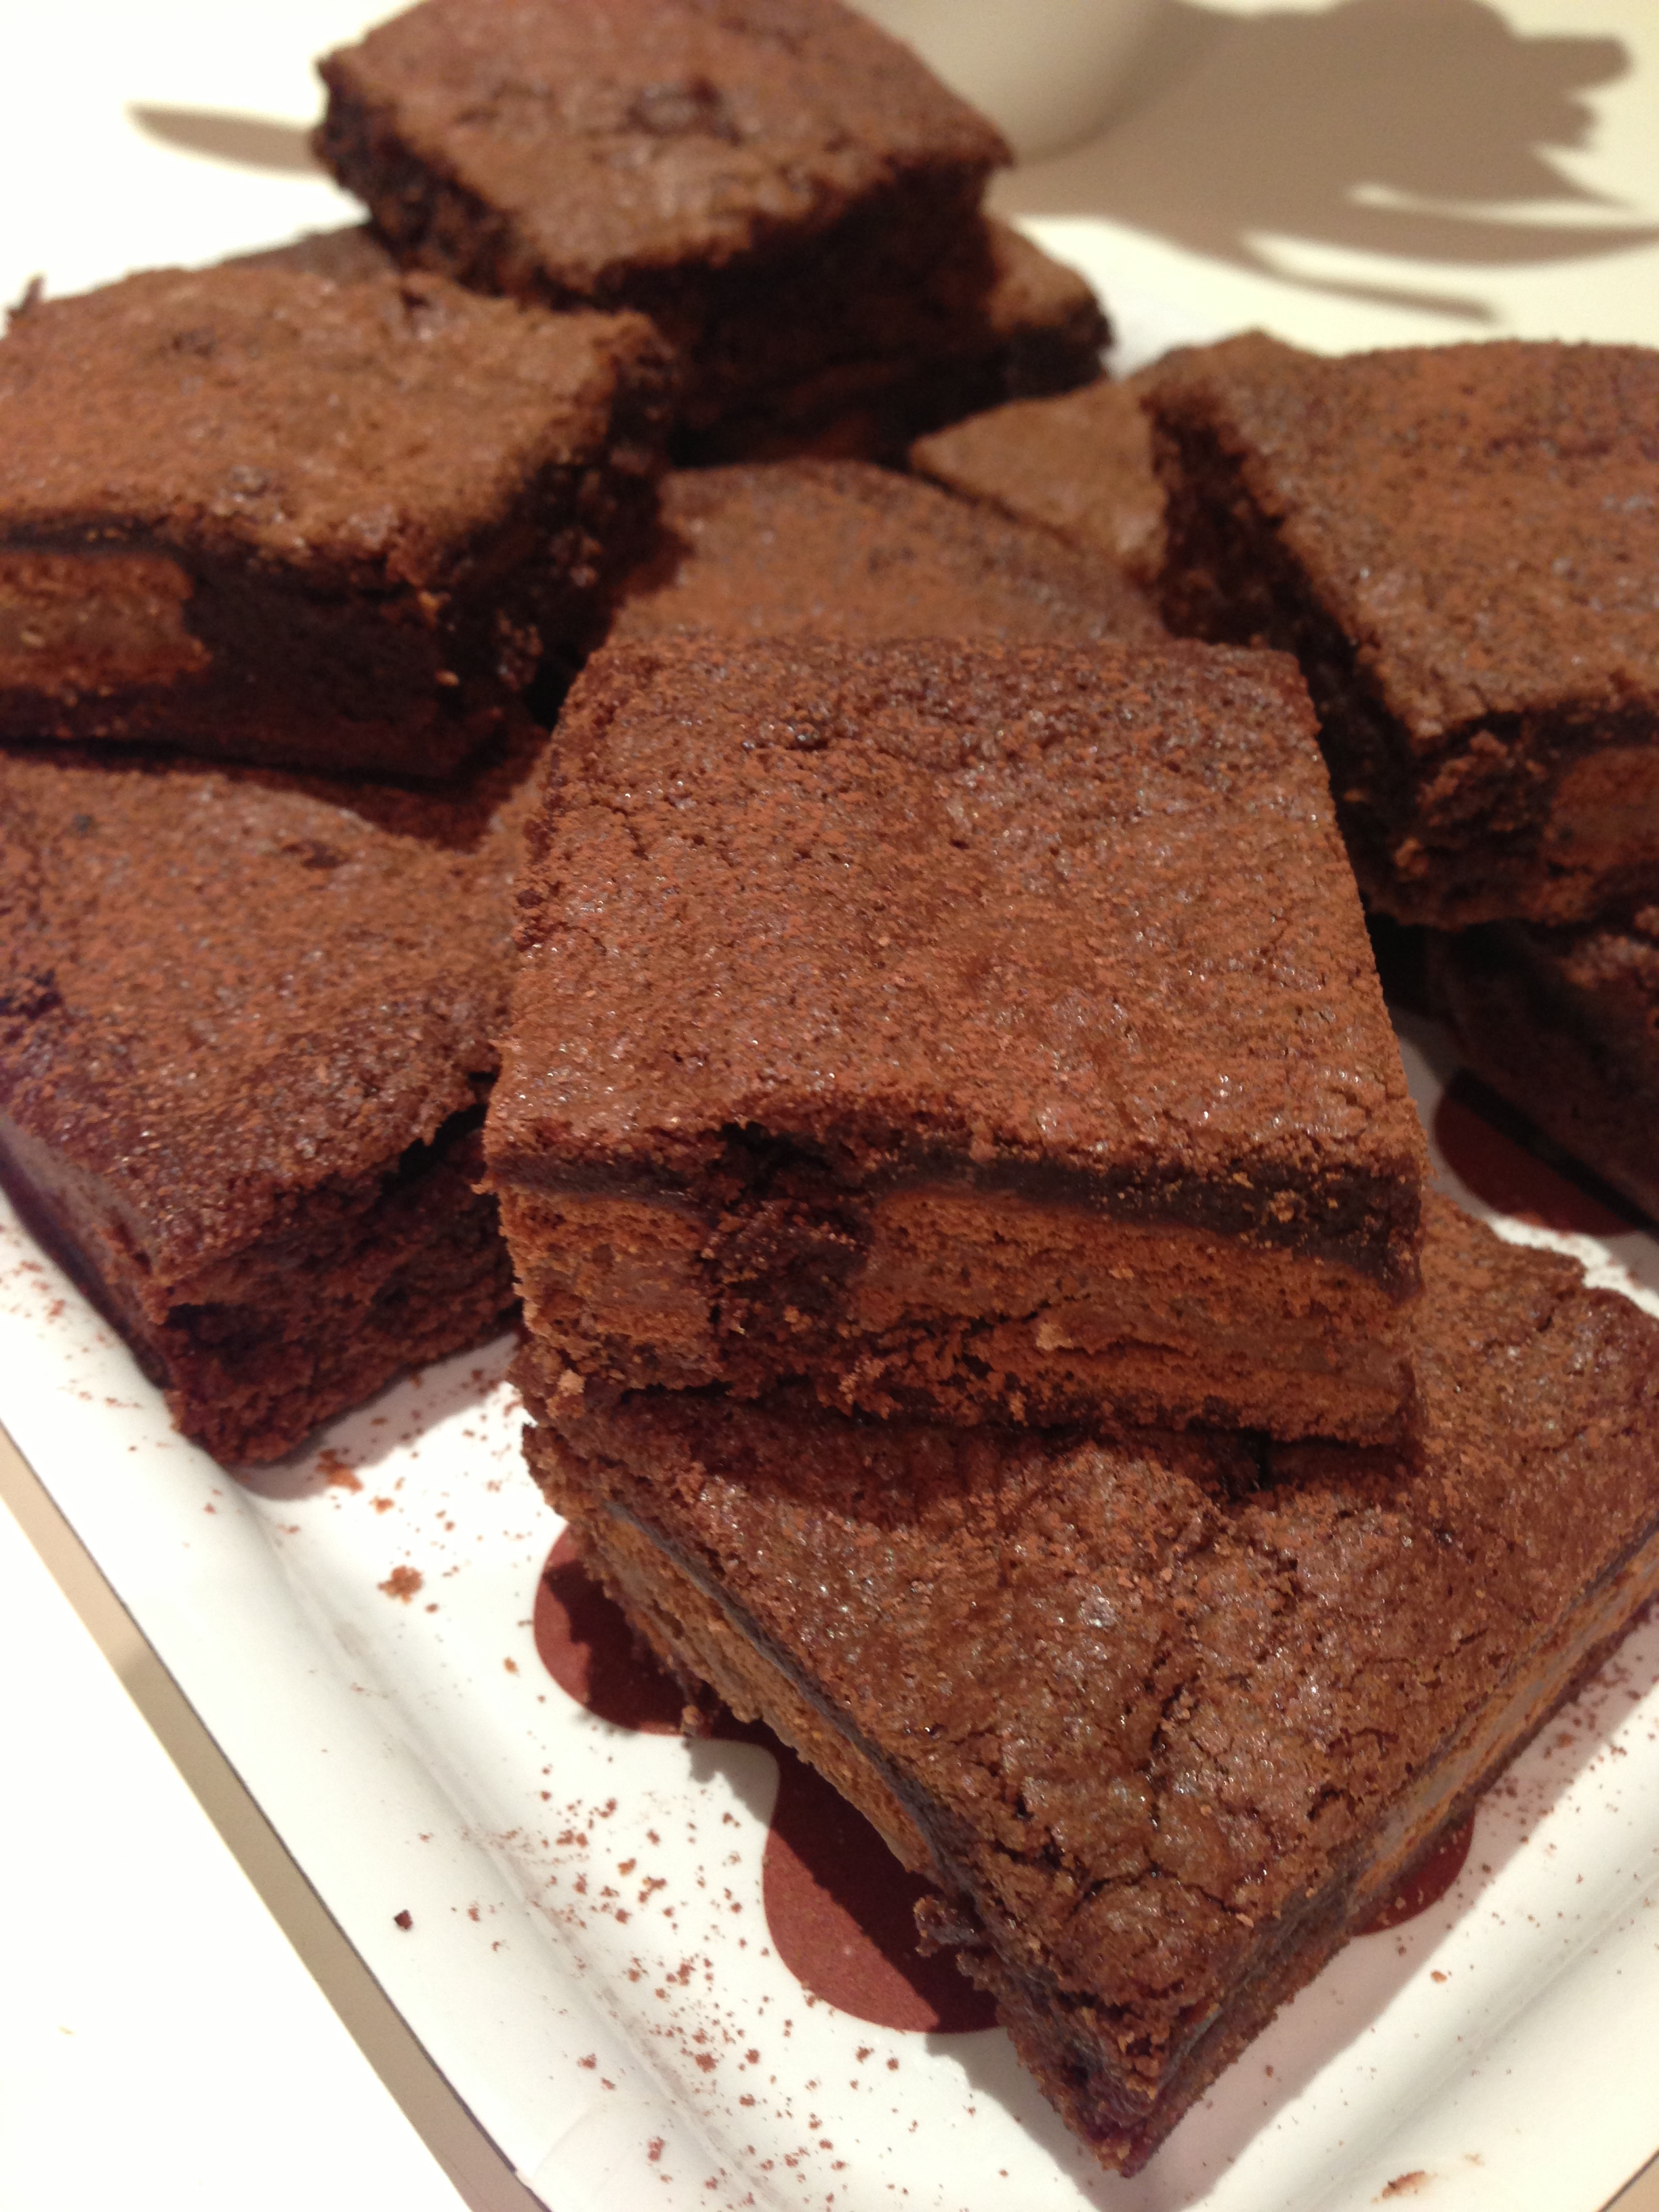
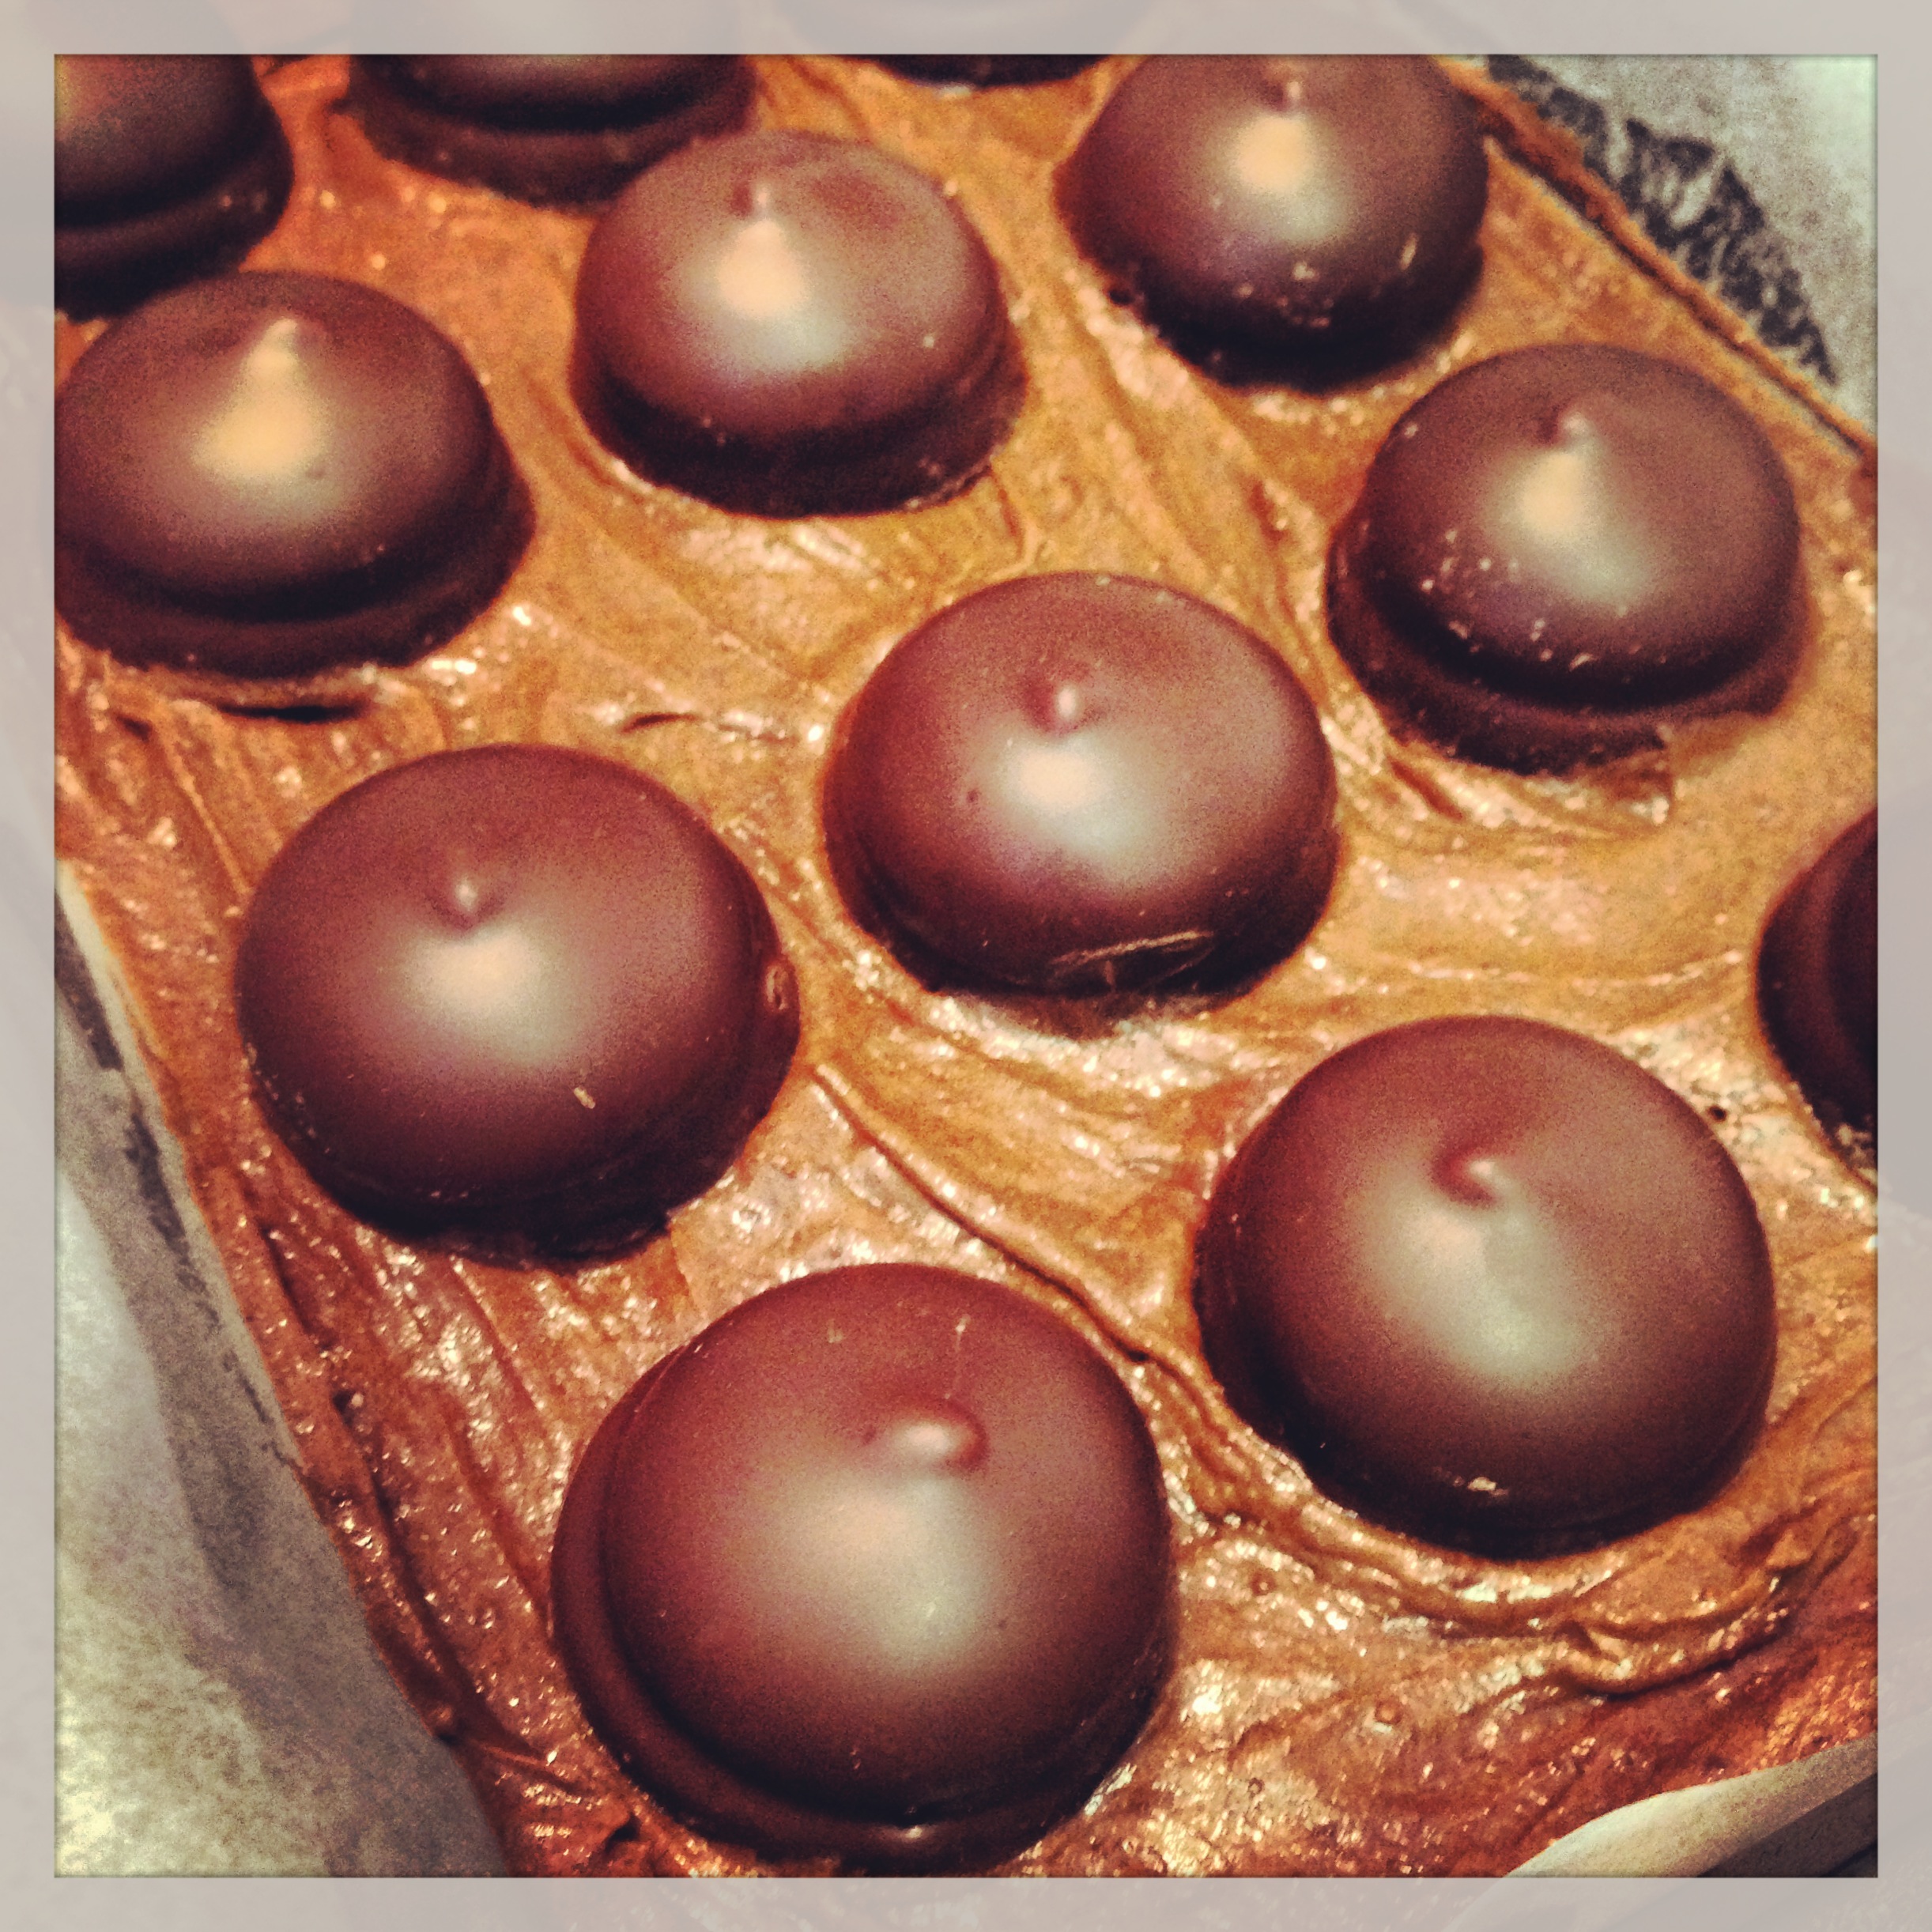
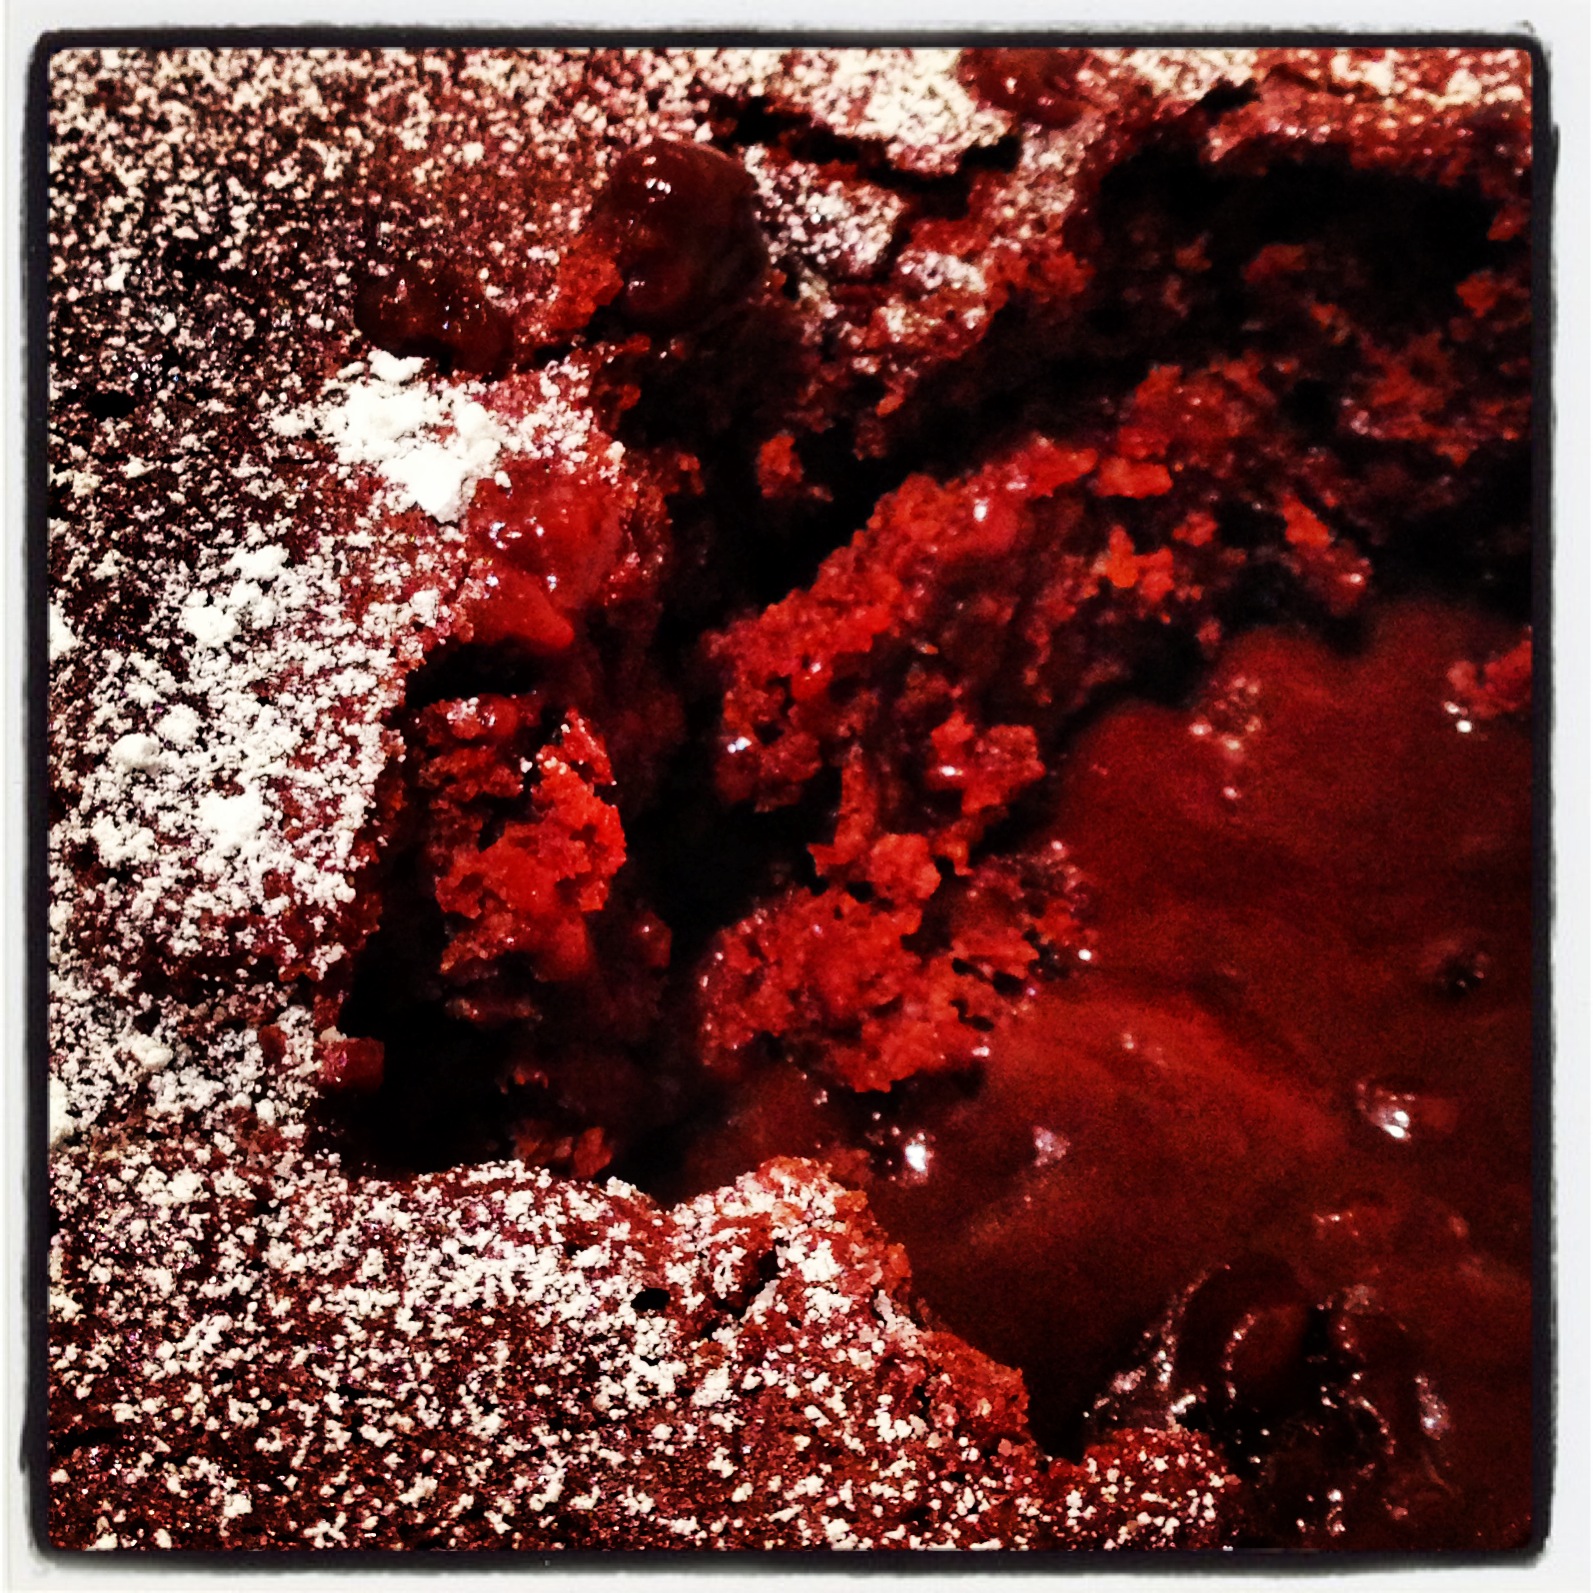
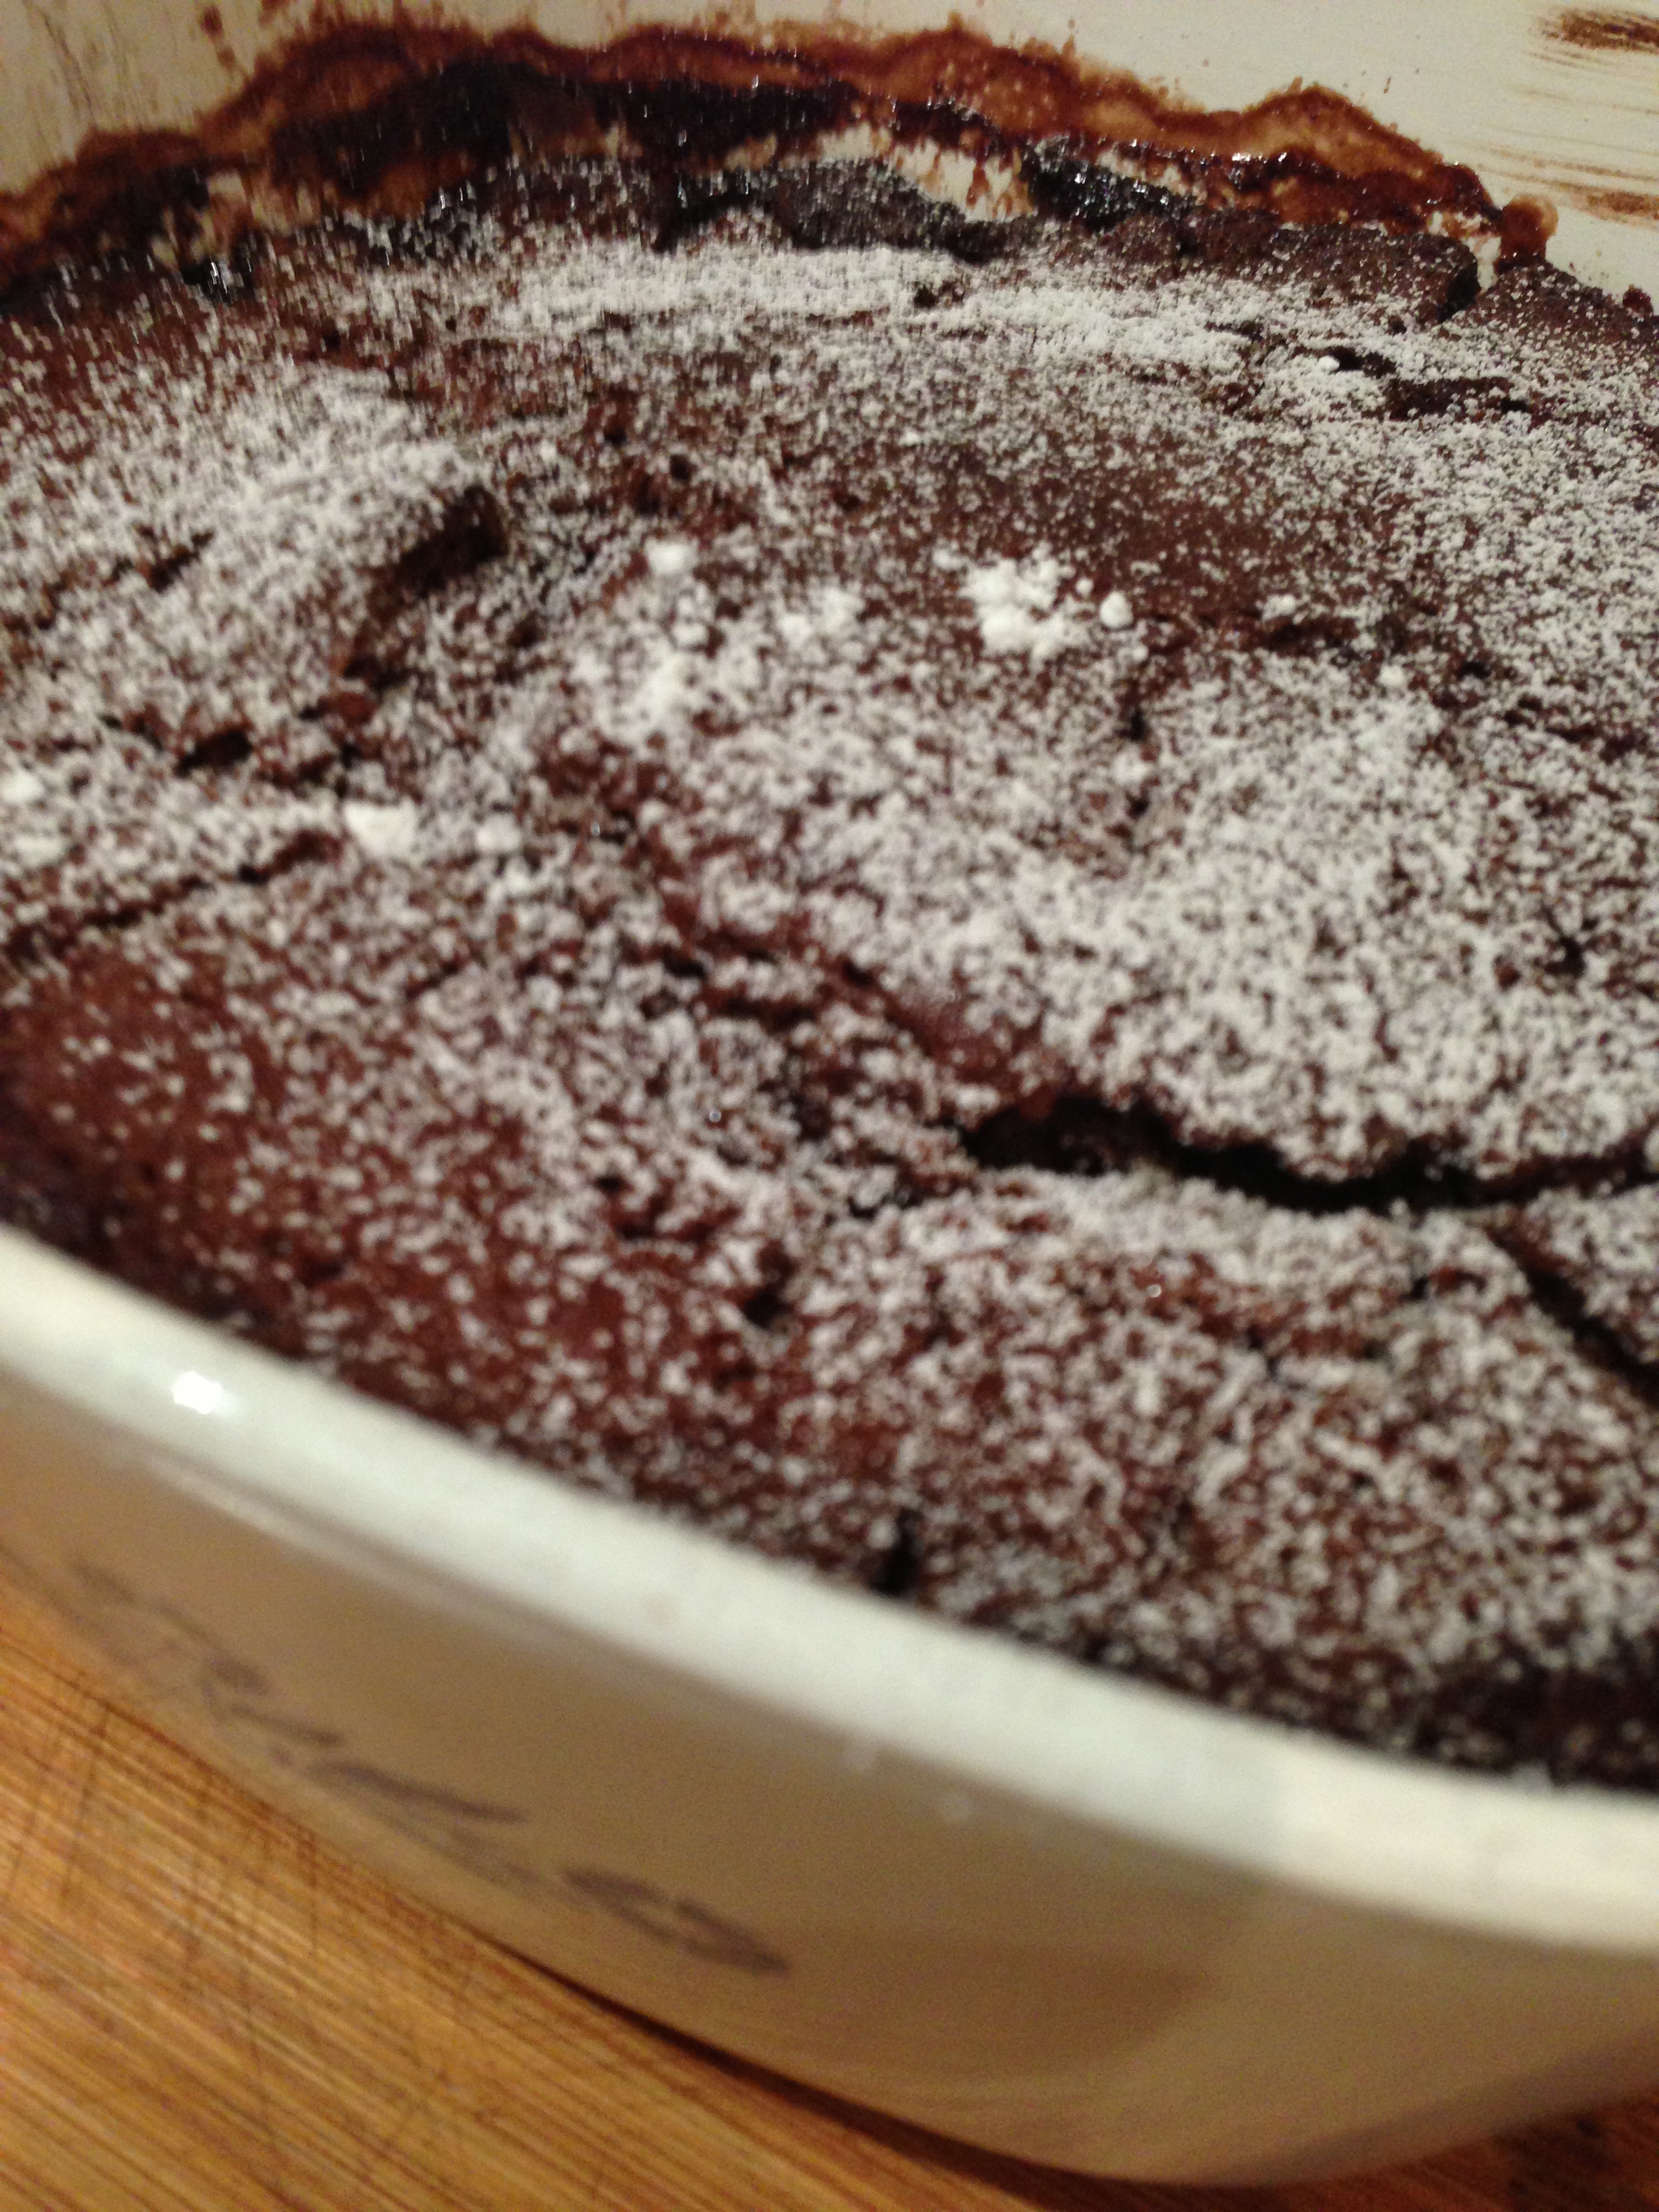
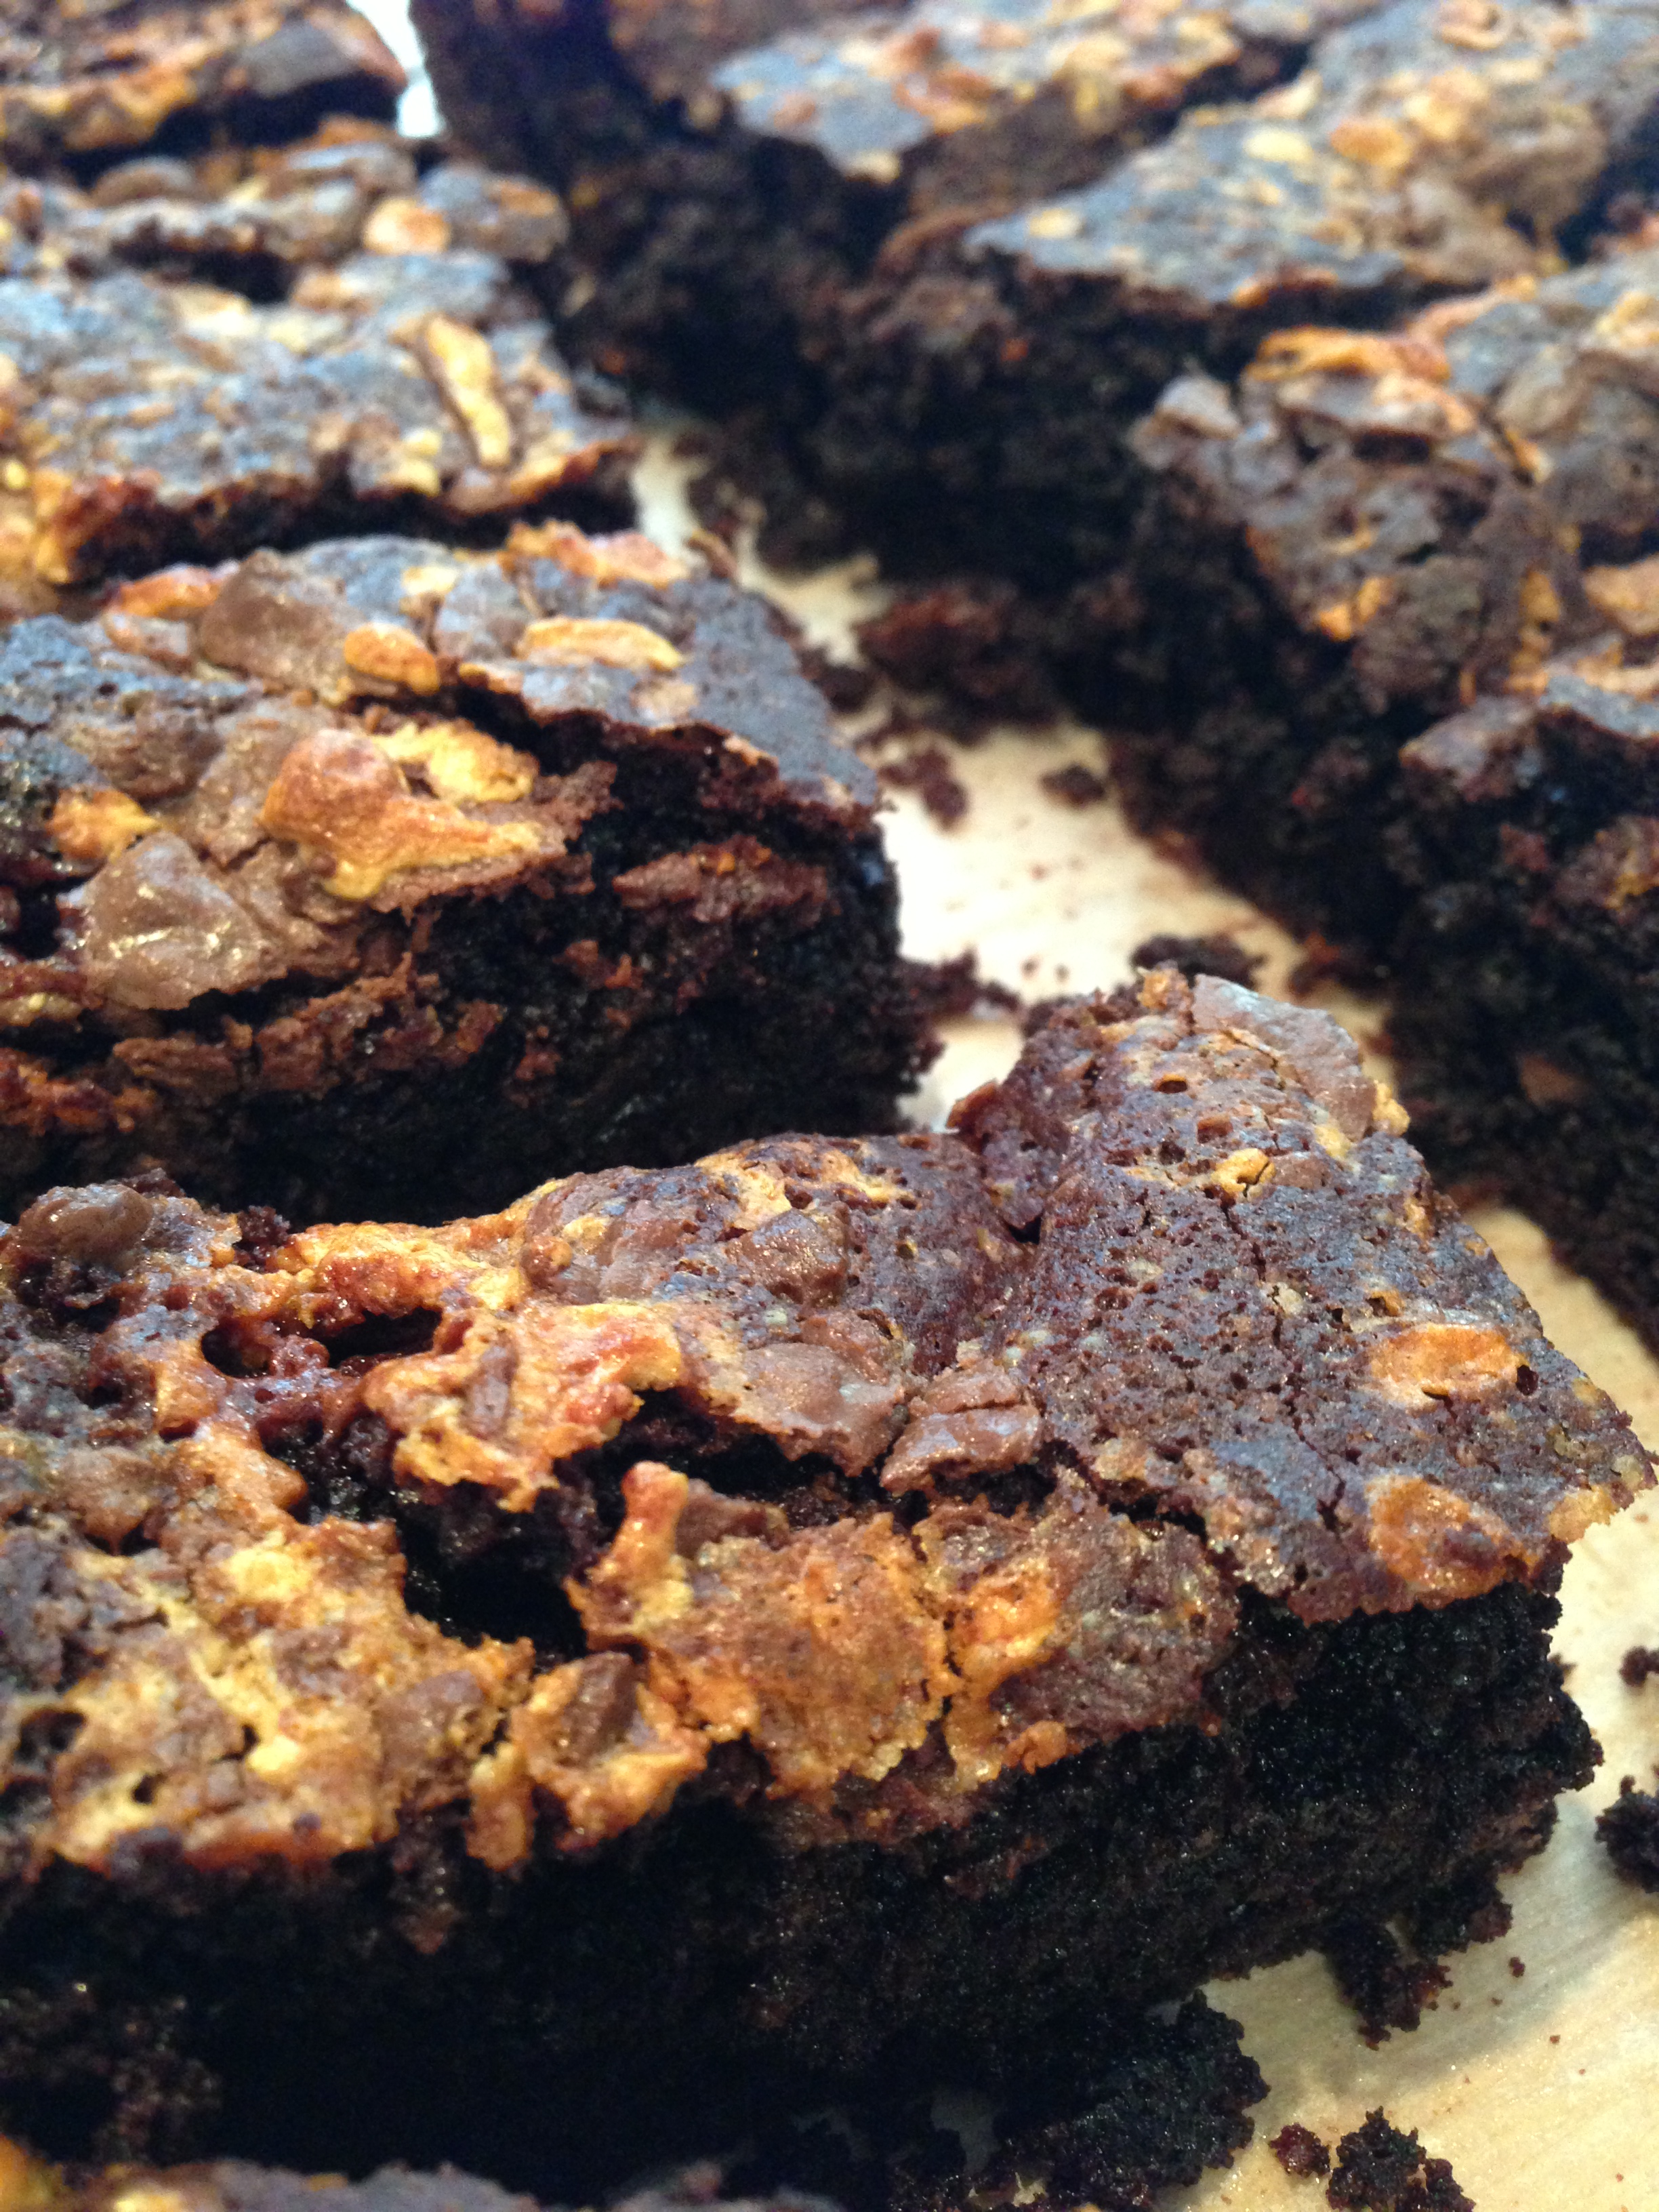
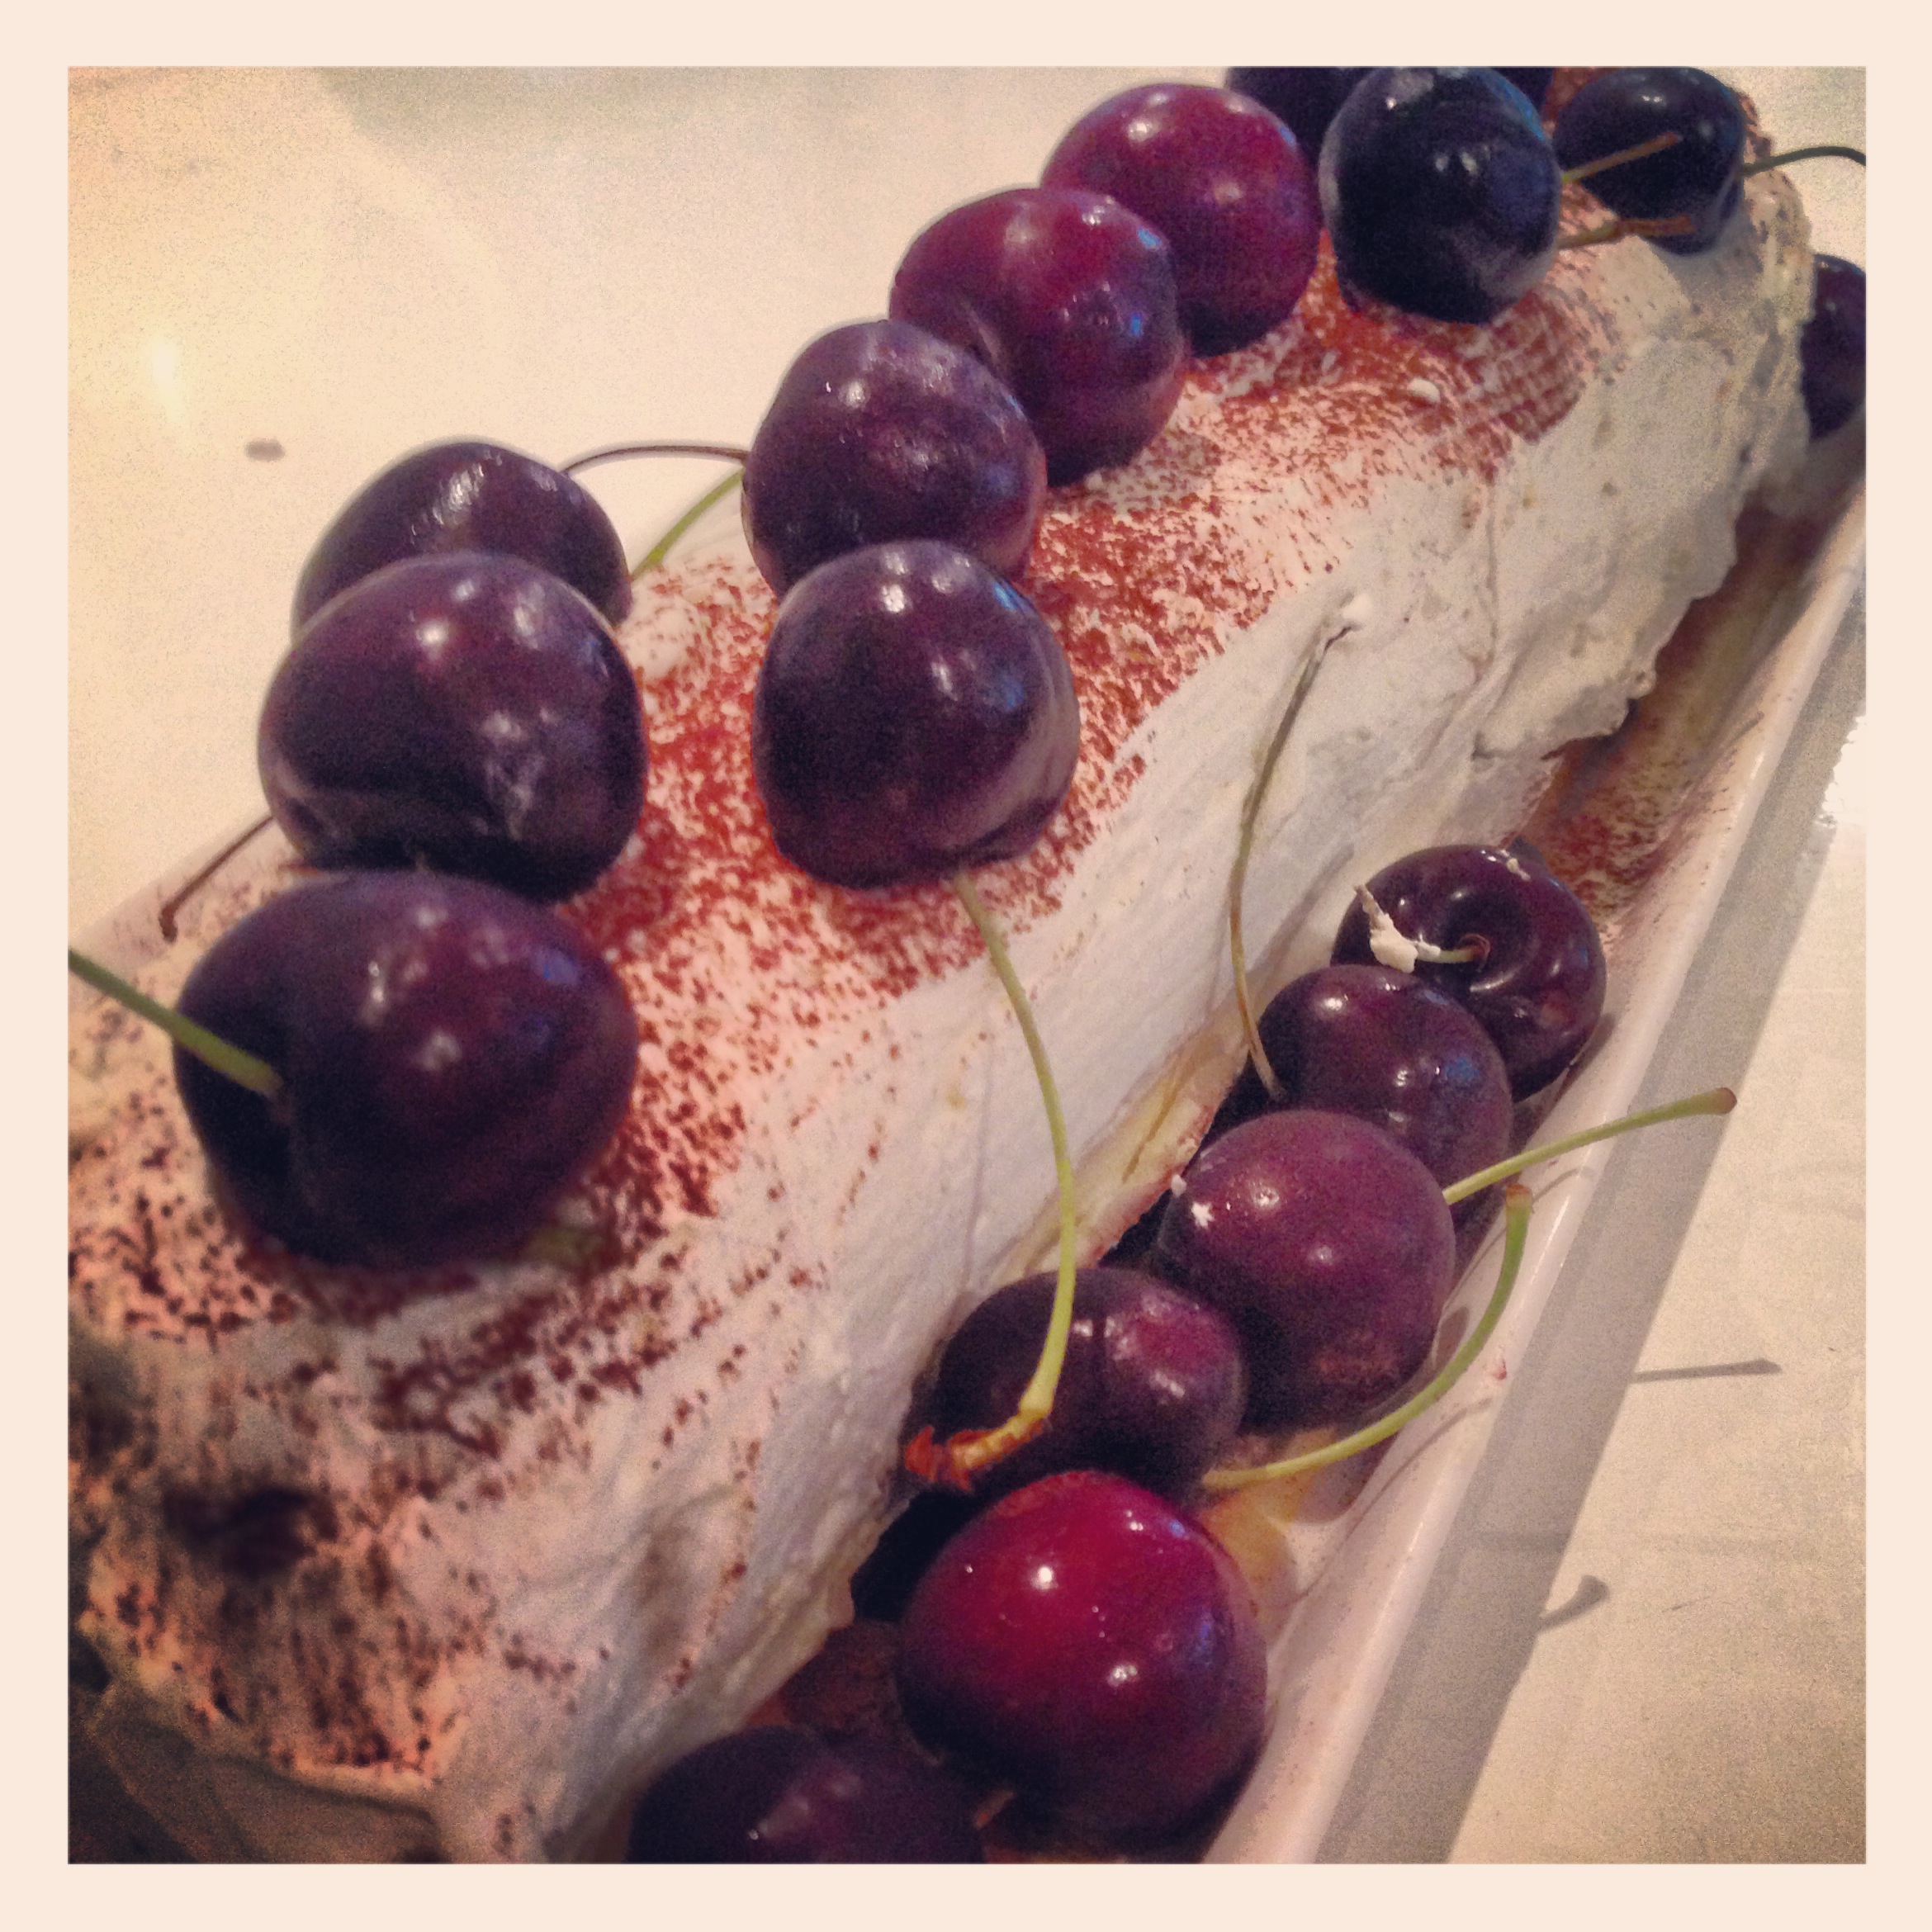
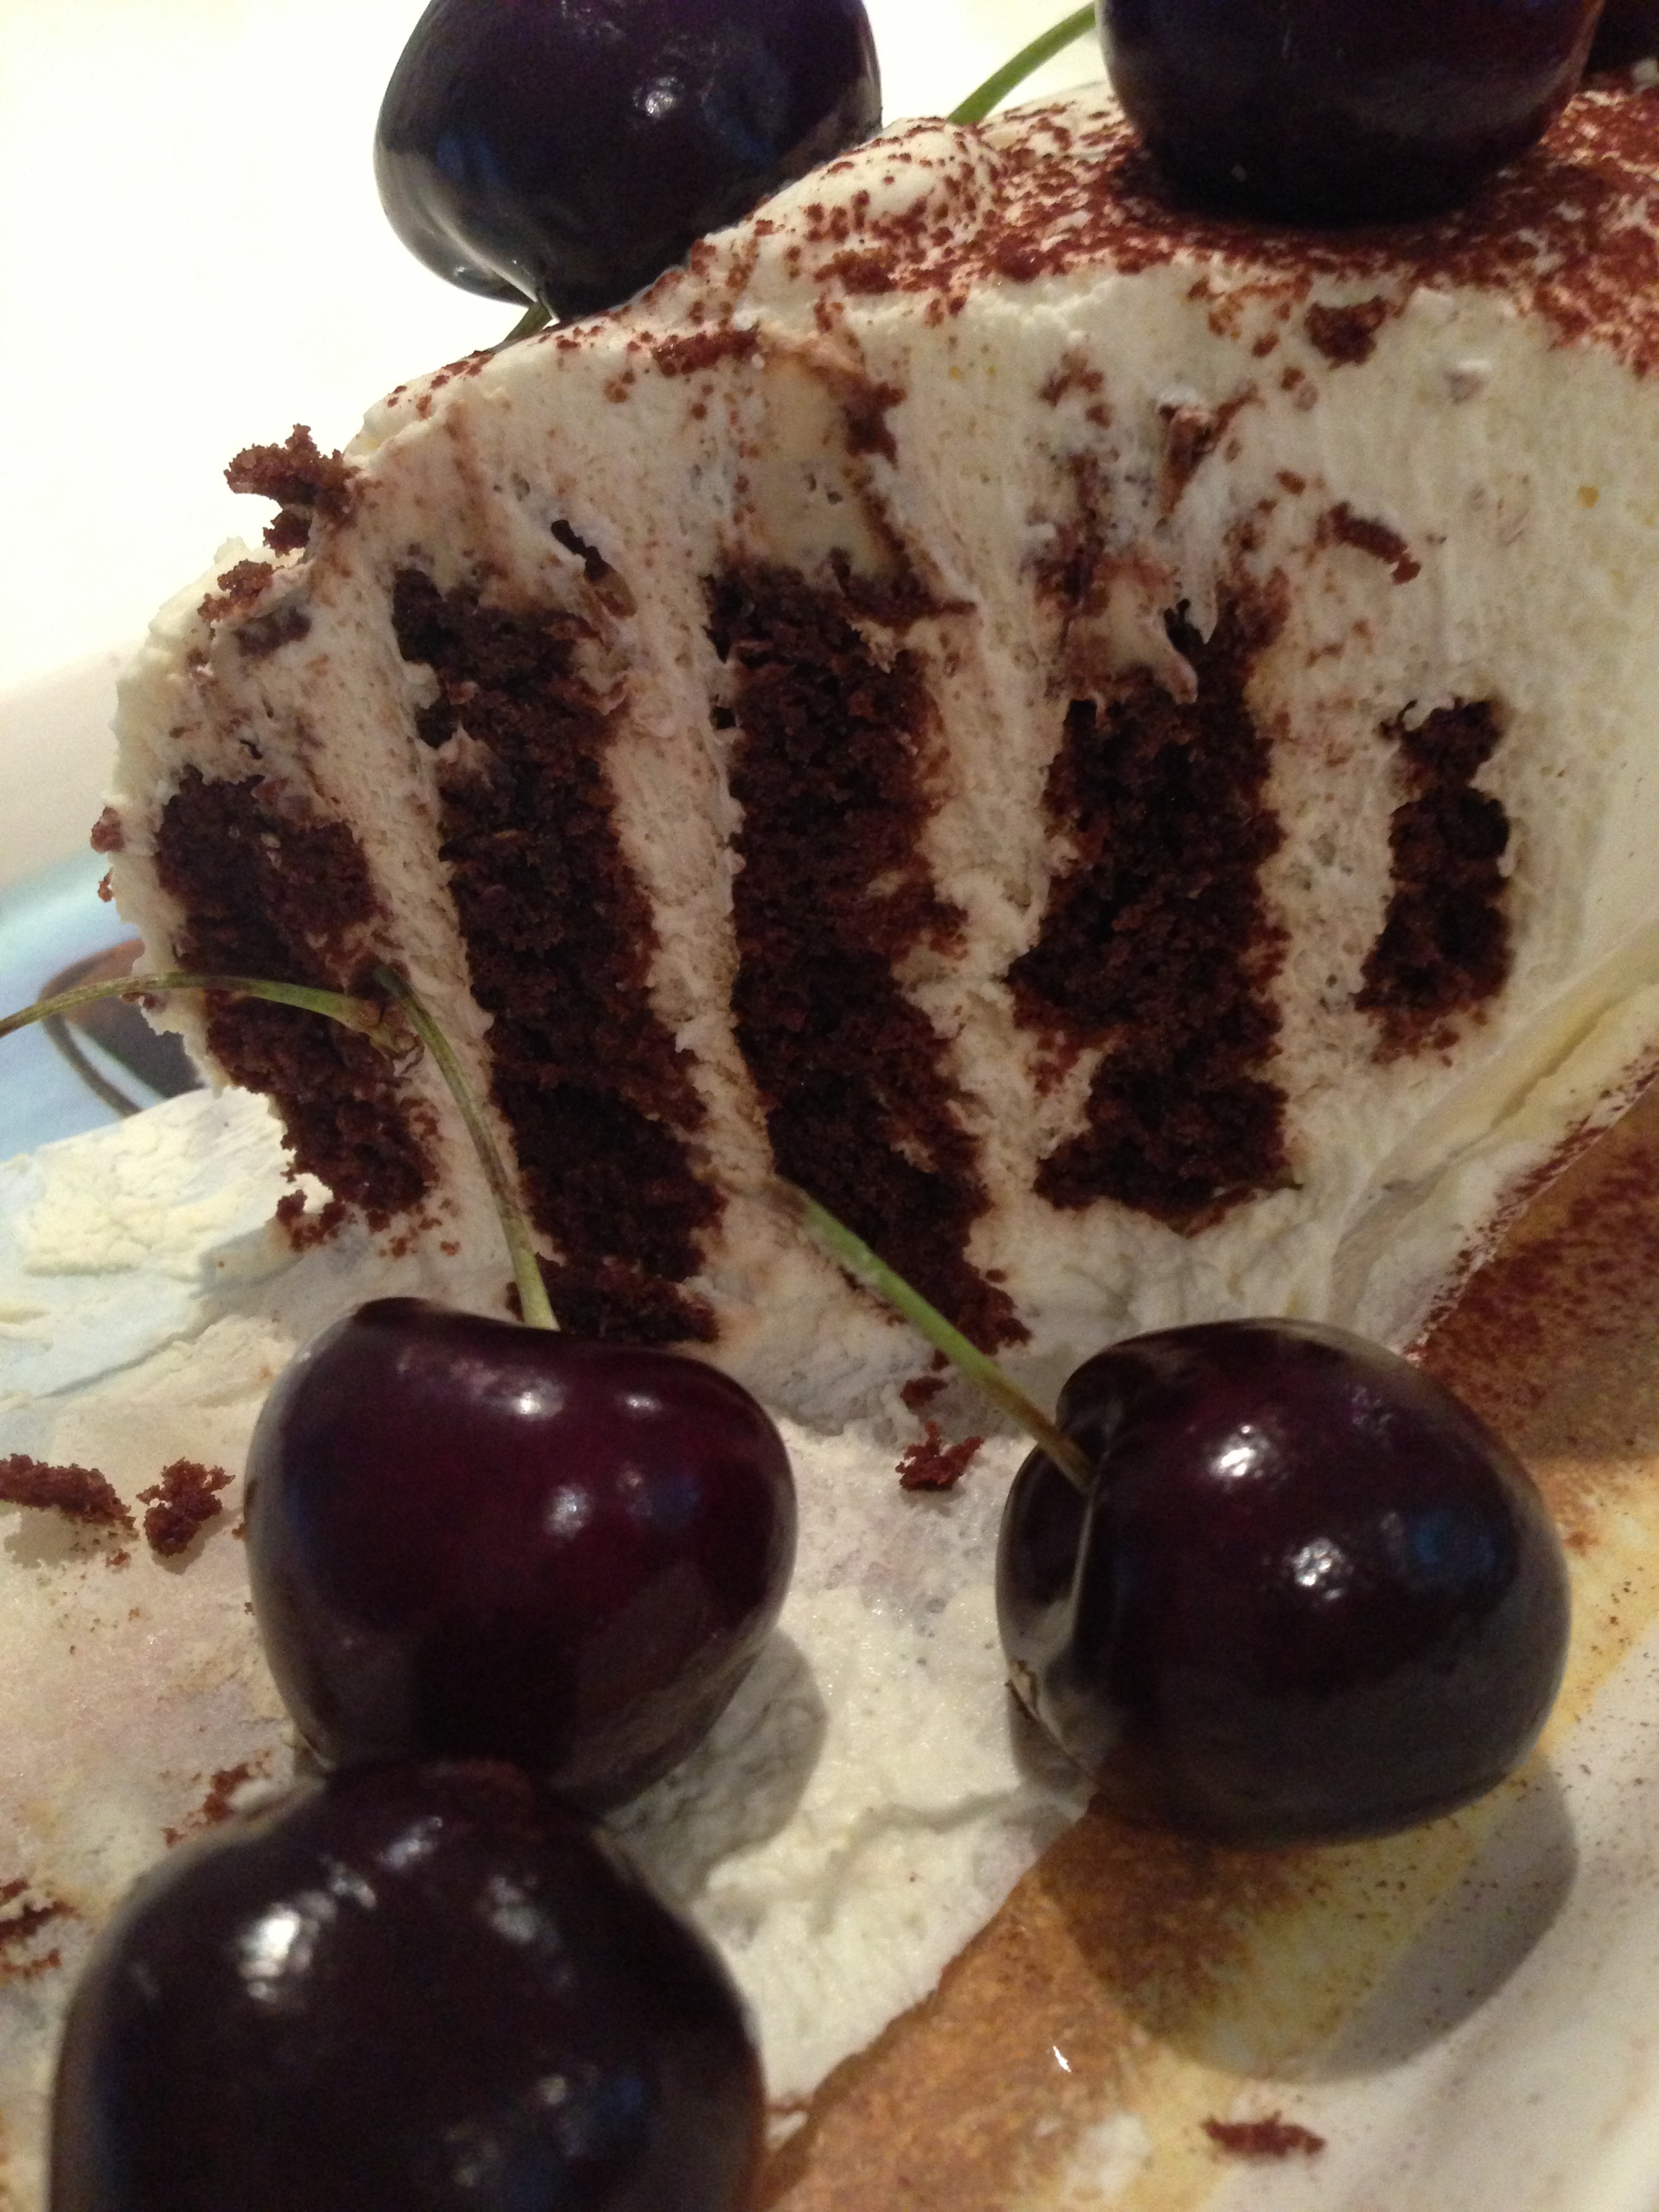
And here is the recipe for this brownie, with all of its cracks, splits and crevices.

Cranberry and Mixed Nut Brownie
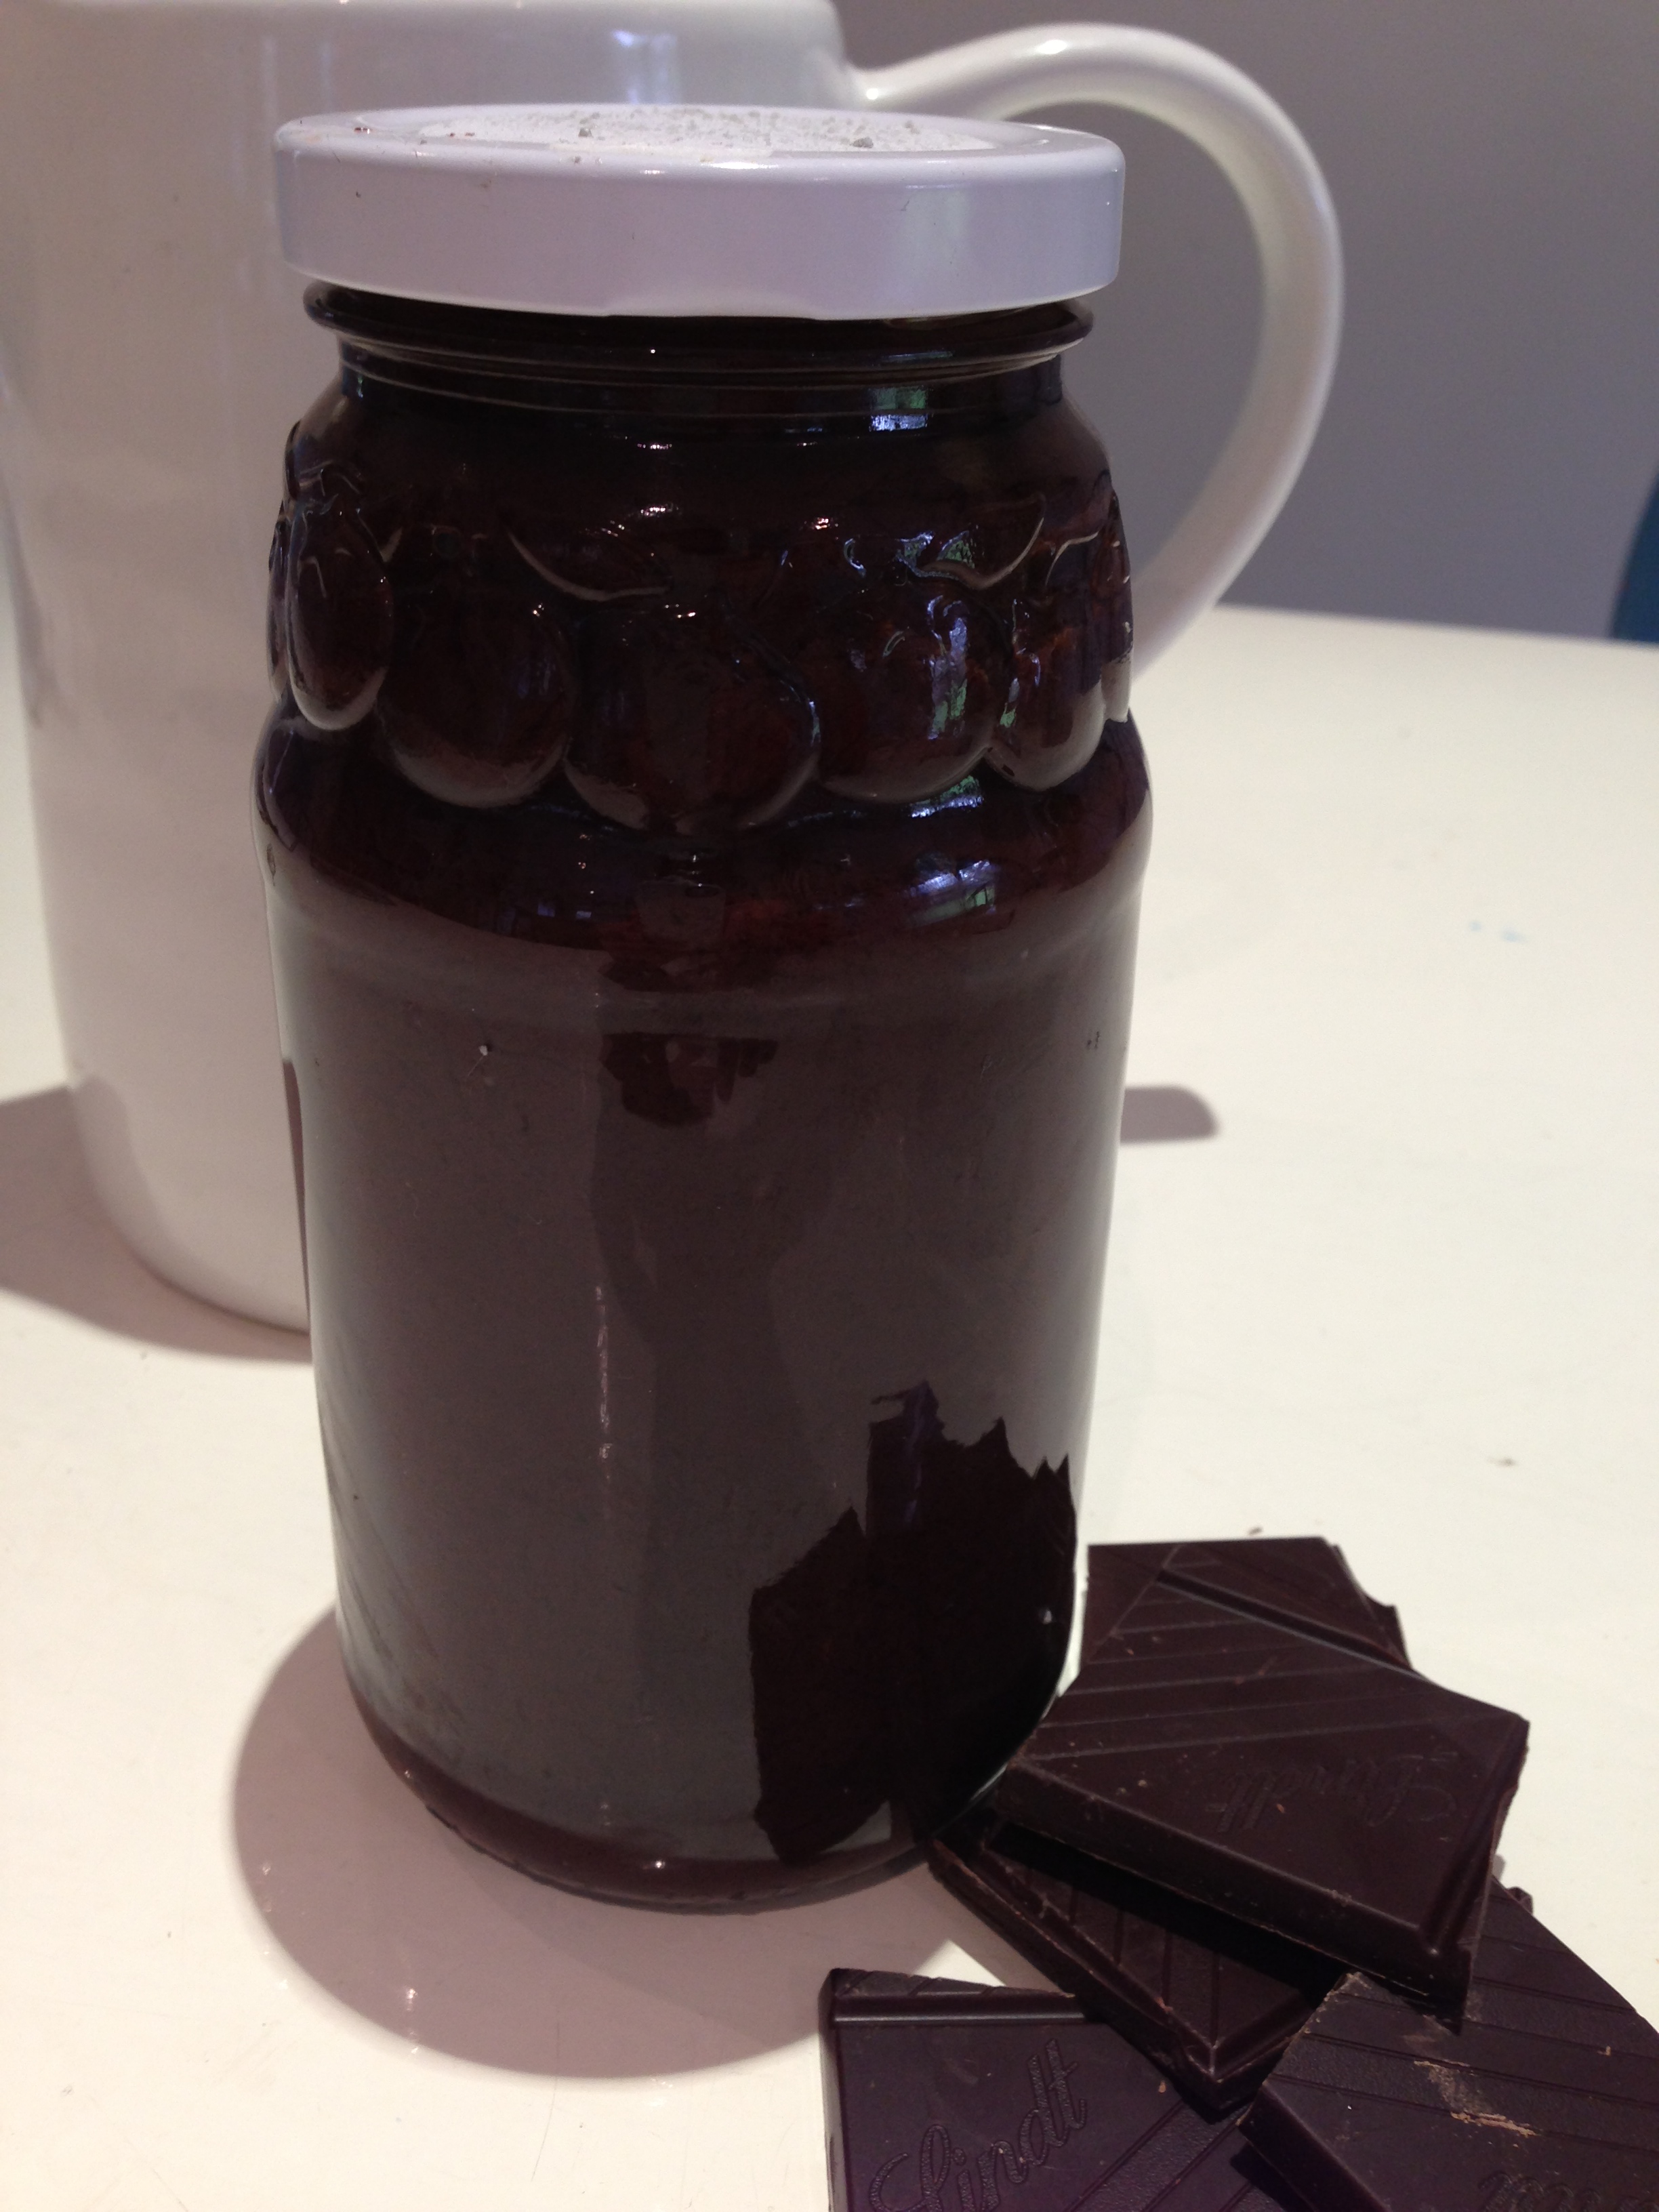
125g dark chocolate
175g butter
3 eggs
275g caster sugar
75g plain flour
1 teaspoon baking powder
1/4 tsp salt
small handful of dried cranberries
150g mixed unsalted nuts, chopped

  1. Pre-heat the oven to 170 degrees (fan-forced).
  2. Grease and line a slice tin with baking paper overhanging the sides.
  3. Place chocolate and butter in a heat proof bowl and melt over a saucepan of simmering water. Stir constantly and cool for a few minutes once melted.
  4. Beat eggs and sugar.
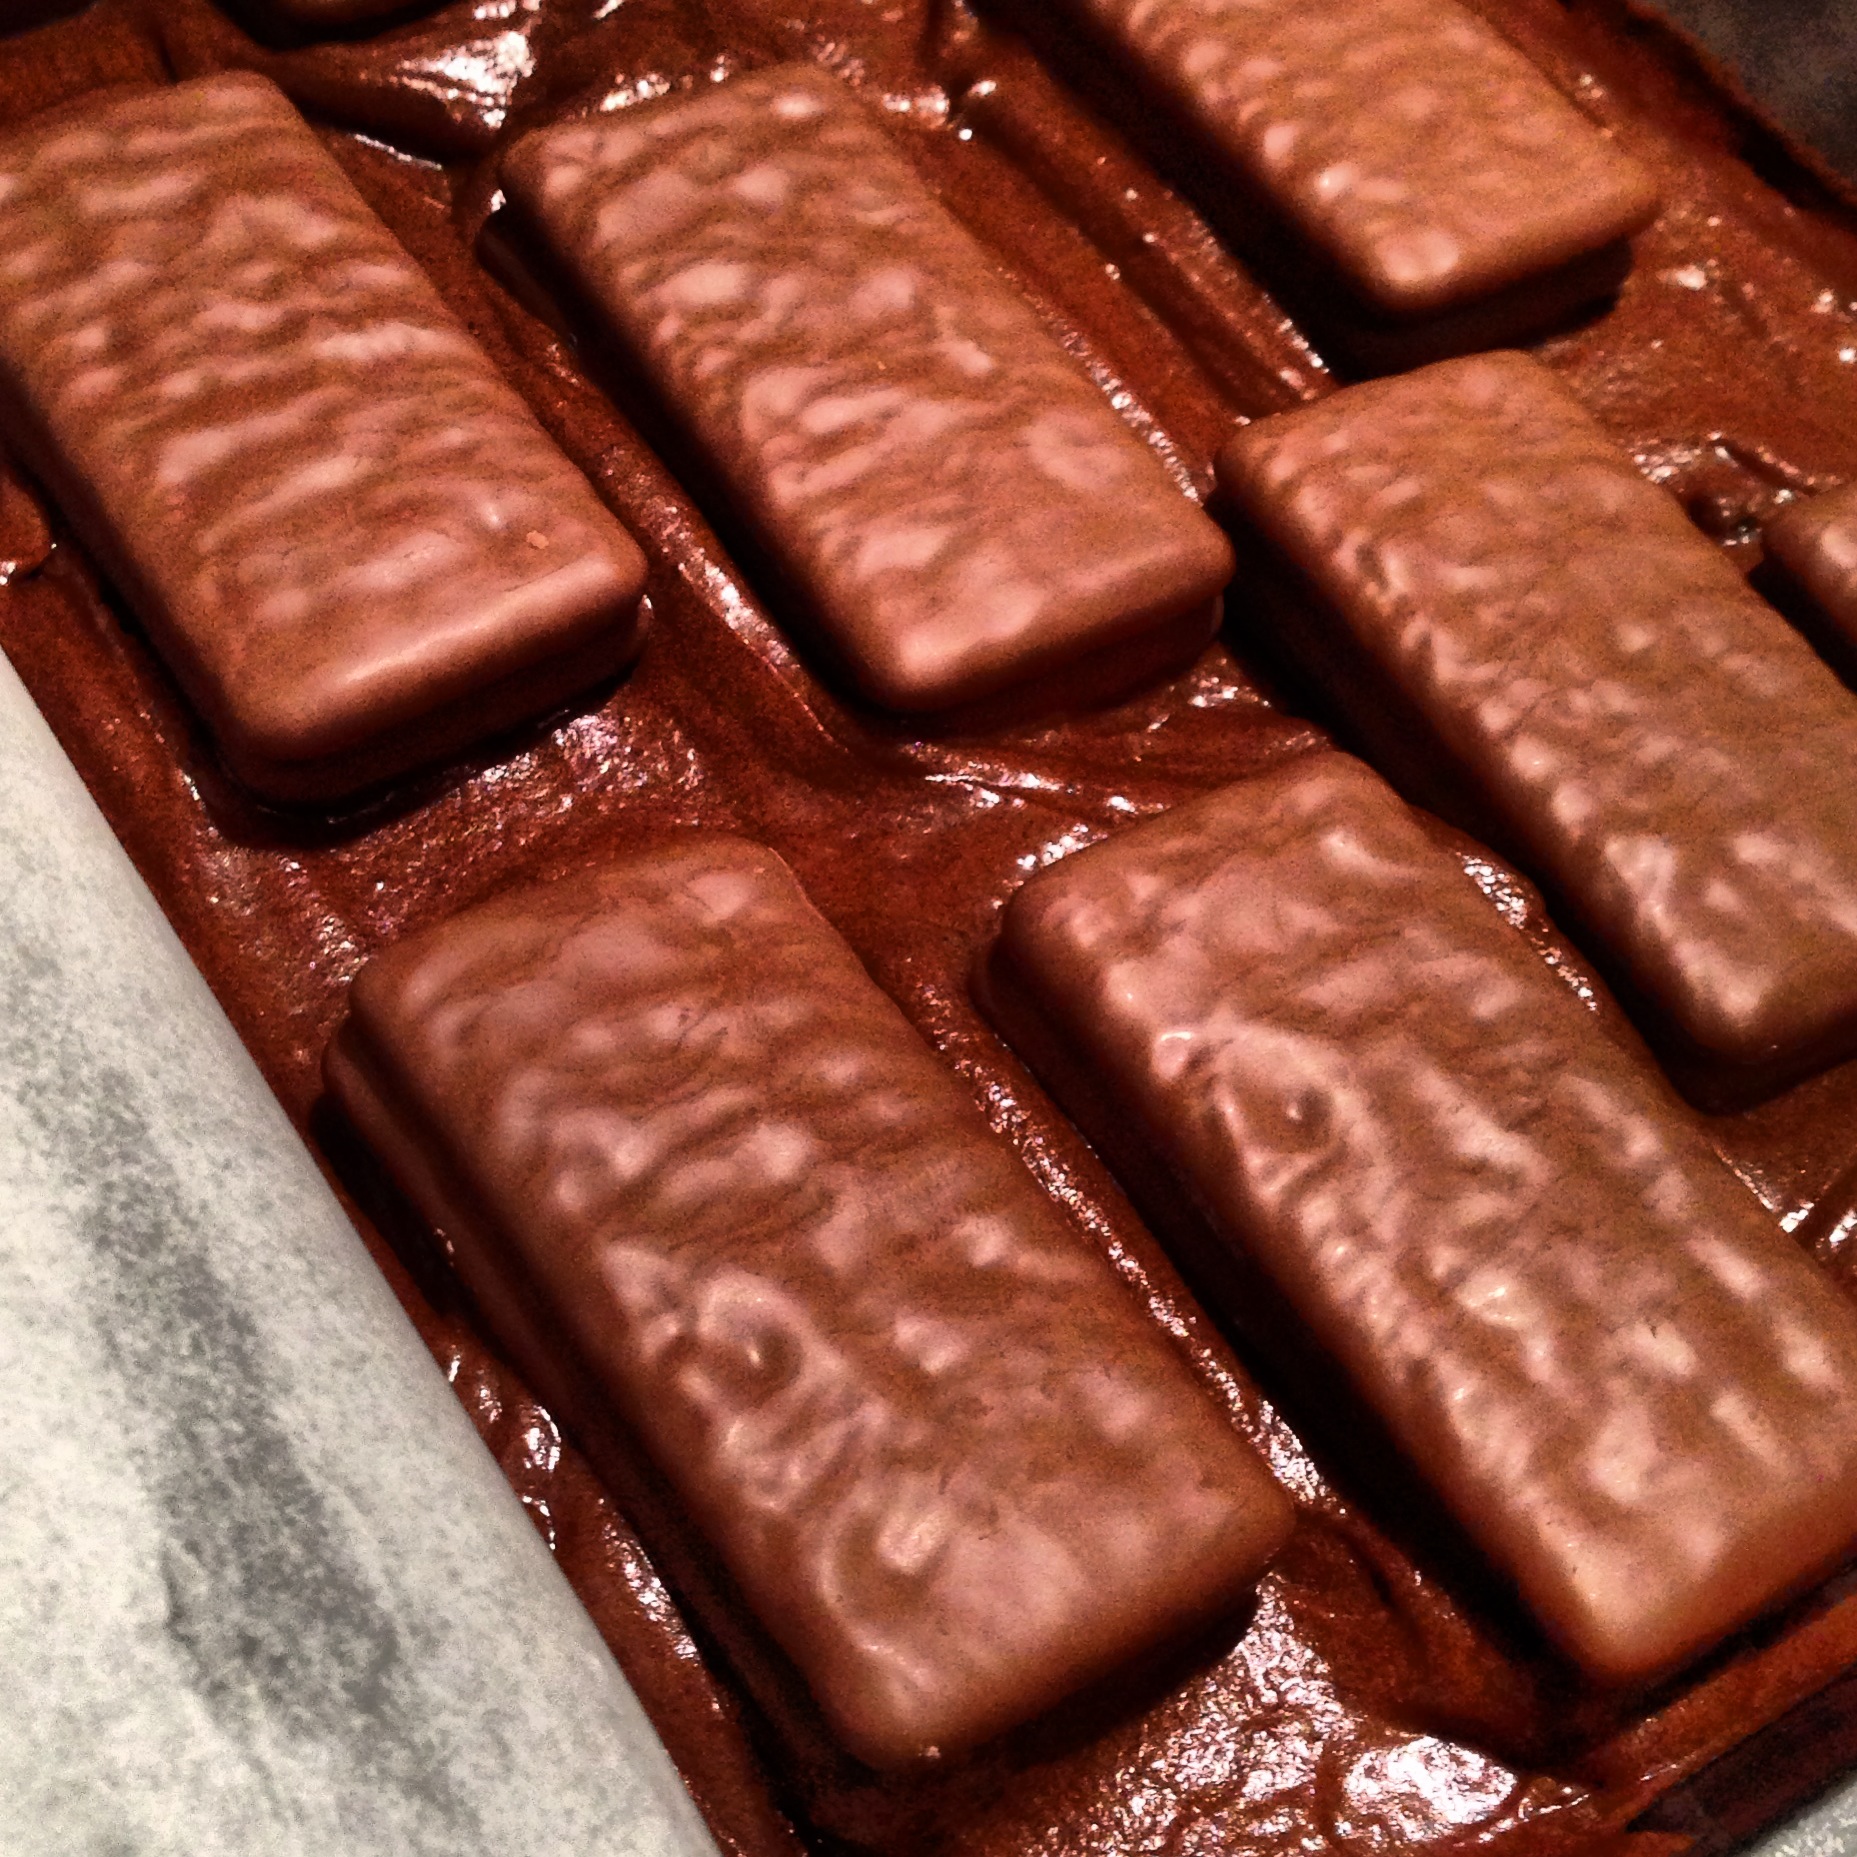
  5. Blend this mixture with the chocolate mixture and fold through all of the dry ingredients.
  6. Pour into lined tin and bake for around 30 minutes.
  7. Once completely cold, slice into portions, which if you have no will power to withstand, like me, share out or place in the freezer for a rough day.


Advertisement
book reviews · recipes

Sophie

It is with barely contained glee that I can announce, we saw the trailer for Spring 2015 here today!

Yes, all of the highlights – bird twittering, daffodil nodding, lawn mowing, cat sprawling and of course sun drenching – were condensed into the happy daylight hours of this late winter Saturday. And if the coming season is anything close to what this trailer alluded to, it’s going to be a cracker! So, inspired by this exciting preview, I thought it fitting that the opening image to this post about Sophie Hansen be the spring illustration from her book, Local is Lovely.

But before I continue, I just need to take a quick side-step up to a soap box, and restate my passionate belief yet again – we all need to continue to cook. We need to take produce from around us, where possible, in it’s simplest form and slice it, mix it, bake it, steam it, roast it, mash it or whatever needs to be done to it to produce nourishing, appealing food to fuel healthy lives. And most vitally, our children need to see this happening. They need to be exposed to basic raw materials being crafted into meals so that when their time comes to take responsibility for their own nutrition and/or the nurture of others, this will be their default. Because it’s what they saw.

They need not have seen elaborate haute cuisine, but simply, basic combinations of fruit, vegetables, proteins and grains with a measure of fats and oils keeping things balanced and delicious. If that means thick slabs of bread loaded with generous slices of tomato, fresh cheese and garden herbs, topped with some pan-crisped salami, then the job is done. And if it can’t happen this way each day because the pace of life takes precedence, then that’s ok – just so long as there are times when it does.

So this now brings me to Sophie, a food writer and one-woman cheersquad for the local farmers/producers in her neighbourhood, within which, her farm in Orange, four hours west of Sydney is located. She is a strong advocate for sourcing food locally not only for the deliciousness of it but also to support the local growers, whom she believes are the heroes of our land. In her beautifully laid out read, you will be taken through the seasons, inspired by earthy delicious cooking using seasonal produce and intrigued by a sprinkling of profiles of her local farmers.

local is love

As well a being just a pleasurable, inspiring read, Sophie’s message within these pages is clear, to source locally, cook seasonally and enjoy the process.

Now I realise that most of us may not be located bang smack in the centre of a regional food bowl, and the local supermarket may be as close as it gets to sourcing our produce, and that’s fine too. It is amazing though, if you attempt to sniff it out, there are sources of locally grown staples, even in inner urban areas that can be drawn upon. I have a free-range egg farm close by and I imagine that many of you have a monthly farmer’s market in your vicinity. Some of us have neighbours with fruit trees whilst others are making it their business to learn the art of foraging and finding wild delights ripe for the taking. My point is, use what is available to you when you can and become aware. It’s not about making sweeping overnight changes, but gradual shifts toward a healthier and therefore more enriched lifetime.

So while you ponder this, here is a Chocolate Blackberry Loaf, one of Sophie’s Winter Baking recipes (that you can receive in a free ebook that can be downloaded when you visit her and sign up for her newsletter) to enjoy.

1 cup plain flour
5 tbsp cocoa powder
1 tsp baking powder
1/2 tsp bicarb soda
good pinch salt
1/4 cup espresso coffee (I used one shot from our little machine at home but you could also make a really strong plunger coffee and use 1/4 cup of that)
1/2 cup natural yogurt
1 tsp vanilla paste
150g unsalted butter, softened
1 cup caster sugar
3 eggs
1 cup blackberries (raspberries or blueberries would also be good)

Preheat oven to 180C and grease and line a large loaf tin. Sift together the flour, cocoa powder, baking powder, bicarb and a good pinch of salt and set aside. In another bowl, combine the coffee, yogurt and vanilla and stir well. Now cream the butter and sugar together in an electric mixer, until pale and fluffy.
Add the eggs, one at a time, beating well between each addition. Add the yogurt mixture and mix in on low speed. Then, by hand, fold in the flour mixture and finally fold through the blackberries.
Spoon batter into the tin and bake for 45 minutes or until the cake is just pulling away from the tin’s sides and it feels firm to touch

Chocolate Blackberry Loaf

Postscript: and apart from the ethical, nutritional, sustainable and economic values Local is Lovely expounds, anyone who creates a cake recipe combining chocolate, coffee, blackberries and greek yogurt ought to be worth paying attention to.

homemaking · recipes

Stash

chocolate cherry nut refrigerator cake

At any time you care to name, there can be at least five of these chocolate biscuit slab cakes under our roof. As odd as that sounds, it is the plain truth, and if you would like this to be your reality, read further.

Once upon a time we had a dishwasher. Alas, on one dark and stormy night, to my horror it leaked everywhere and was certified beyond repair. My greatest fear was that we would never survive the interval of time that would elapse whilst a replacement was sourced and installed. It may be, that we would have to (gulp) wash dishes. In the kitchen sink. By hand.

As today’s therapists will purport, exposure therapy is the most effective treatment for eradicating irrational fear. Accordingly, we exposed ourselves to dirty crockery, soapy liquid and hot water and within a week I realised that not only did we survive without a dishwasher, life had become less complicated. Suddenly there was nothing to unpack, load or maintain. Our dishes were always ready to use, not backed-up waiting for a ”full load” and plunging hands into warm water whilst gazing into the garden through the kitchen window, was indeed pleasant. So the decision was made, family life would continue on without a dishwasher.

A simple enough solution but now, what to do about the gaping underbench void left by the departed.

Well this is what I did – I created a stockpile storage solution or as the children affectionately term it, the ”Doomsday Preppers Cupboard”. I simply fit out the space with an Ikea storage drawer system and concealed it with a pull across curtain. These drawers are filled with wonderful supermarket buys. Multiple purchases of nuts, canned food, pasta, dried fruit, cereals, and other assorted weekly staples, when the prices are really low. Having a healthy supply of all of the essentials without the pantry clutter is an effective way to operate in the kitchen.A stockpile to draw upon not only saves a considerable amount of money spent on the yearly grocery bill but enables you to pull together a Chocolate Biscuit Refrigerator cake at a moment’s notice. All of the ingredients for this recipe can be plucked from the stockpile, with the exception of eggs and butter, which are basics I always have on hand.

chocolate refrigerator cake 150g butter
100g golden syrup
200g dark chocolate ,chopped
1 beaten egg 350g plain sweet biscuits (Marie, Milk Coffee, Digestives etc), broken into chunks
60g walnuts
60g sultanas
100g glacé cherries
75g pecan nuts

  1. Line a square or rectangle baking tin with baking paper.
  2. Melt the butter and golden syrup together in a saucepan and bring to the boil.
  3. Add the chocolate, reduce the heat to its lowest setting and stir until the chocolate has melted.
  4. Gradually add the beaten egg and continue to stir until the mixture has thickened a little.
  5. Remove from the heat.
  6. Combine biscuits, walnuts, sultanas and half the glacé cherries in a bowl. Pour the hot chocolate mix over this dry blend and mix together.
  7. Spoon  the mixture into the prepared tin, pressing it down firmly.
  8. Put the pecan nuts in the bowl that contained the chocolate mixture and stir them around to coat them in the chocolate.
  9. Scatter the pecans and the remaining glace cherries over the cake,
  10. Refrigerate for three hours or until set, then cut into slices of the desired length,

Wash up your dishes – by hand.

a piece of chocolate refrigerator cakePostscript: Not only will your stockpile hold the constituents of a Chocolate Biscuit Refrigerator cake, but also the foundations of most week night family meals.

recipes

Sundae

chocolate fudge sundae

Washing flapping in the breeze, windows thrown open, lush green grass, blue skies and sunshine – time to move the heavy pudding basins to the rear and bring forward the delicate glassware. Lavishly topped ice-cream – a visual as well as a culinary feast. How could anyone spy an ice-cream sundae and not be transported to jubilant times? Springtime, term break and ice-cream – the holy trinity in our household.

The simplicity of a sundae – when these were made I couldn’t help but wonder why we don’t make them more often. Within ten minutes, everyone is digging furiously into lava topped vanilla mountains, enjoying shards of toasted nuts and sticky cherries in the process. Not only this, but with the lure of a sundae, all manner of promised household chores are miraculously completed.

For the maker, the ultimate comfort comes from the security of owning a shiny jar full of fudgy sauce, that at a moment’s notice can be warmed and poured.

chocolate fudge sauce

If you seek similar reassurance, this glossy rich chocolate sauce is easily blended and not only makes winning ice-cream sundaes but is perfect to dig a spoon into after everyone has gone to bed.

1 cup cream
3/4 cup condensed milk
1/2 cup brown sugar
1/4 cup cocoa, sifted
180g dark chocolate, chopped
50g butter
vanilla ice-cream
crushed nuts (toasted if you have the time and inclination)
maraschino cherries (or tinned, bottled or fresh)

  1. Combine cream, condensed milk, sugar and cocoa in a medium saucepan and stir over low heat until sugar dissolves and mixture is smooth.
  2. Increase heat to medium so that mixture is simmering and cook for 3-4 minutes, stirring.
  3. Remove from heat and add chocolate and butter, stirring until melted and smooth.
  4. Scoop ice-cream into individual dishes, pour over sauce and top with crushed nuts and cherries.

This lovely rich fudgy sauce goes a long way, so store in a glass jar in the refrigerator, and warm gently in the microwave when required.

fudge sundaes

Postscript: sundae dishes, relics of simpler times, are a dime a dozen in thrift shops. Pick up a matching set, or make up a mis-matched crazy collection. Should you tire of sundaes (unlikely) these dishes make great tapas, taco or antipasto accoutrement.

recipes

Tim Tam

Tim Tam Brownie

It is better to give than to receive. I know this because I had the opportunity to watch a friend blissfully devour umpteen pieces of brownie I baked her for her birthday. A work colleague actually,  from a neighbouring shore who has developed a passion for Tim Tams – what better birthday gift than to present her with a packet, hidden in a brownie?

There aren’t too many than can pass up a Tim Tam or a chunk of brownie either. Such a perfect match the two have made. Soft chewy brownie with crisp chunks of chocolate biscuit – a devilish treat. Combine this with the recipient’s pleasure and you’ve created yourself one happy day.

tray of Tim Tam brownie

Do you feel like indulging? Thought so. Here is how they are done. Start with the basic brownie recipe I use, and leave out the honeycomb. Once the batter is made, dab about four heaped spoonfuls onto the base of the lined tin and smooth over to form a bed for your Tim Tams. Lay out an entire packet of the biscuits over the base. Now top with the remaining batter and smooth over so the Tim Tams are hidden inside. Bake for 30-35 minutes, and when the brownie has cooled, slice into blocks. Dust with cocoa powder.

brownie mix

Postscript: and then it occurred to me that there are a host of other chocolate biscuits on the shelves ……

recipes

Succor

Chocolate self-saucing pudding

As Winter bares its ugly teeth there is little other recourse than to seek refuge in a huge helping of chocolate self-saucing pudding. Rising from a deep pool of steaming rich sauce, this robust pudding is so densely fortified with chocolate, cocoa and goodwill, it can ward off any biting chill in a single serve.

 To beat wolves from our door, we unleash this devilish dark pudding. As the rain beats against glass and wind buffets the external, all members of the clan dig in (and often two or three times). So, if ever there is a time to unearth the cherished pudding manuals, is doesn’t get any better than this.

And to flood your heavily shrouded home with the smell of baked chocolate, well after darkness has descended, is the very essence of how treasured olfactory memories begin.

If you have similar villainous elements that need to be kept at bay, this pudding is a magnificent way to armour your troops.

50g dark chocolate (I used Lindt 70% cocoa), chopped
50g butter, chopped
2 tbsp cocoa powder
2/3 cup milk
1 cup SR flour
1/2 cup caster sugar
1/2 cup brown sugar
1 egg, beaten

fudge sauce
1 1/2 cups water
50g butter chopped
1/2 cup brown sugar
1/4 cup cocoa

icing sugar to dust the top

  1. Preheat oven to 180 degrees celsius and grease a 6 cup capacity oven proof dish.
  2. Combine chocolate, butter, sifted cocoa and milk in a saucepan and stir over low heat until chocolate has melted.
  3. Sift flour into a large bowl and stir in the sugars. Add the chocolate mixture and egg – mix well.
  4. Pour mixture into baking dish.
  5. To make the sauce, combine the water, butter, sugar and sifted cocoa in a saucepan and stir over low heat until combined.
  6. Pour the sauce over the back of a spoon across the surface of the pudding mix.
  7. Bake for approximately 45 minutes or until firm.
  8. Serve dusted with icing sugar and cream or vanilla ice cream on the side.

dusted chocolate pudding

Postscript: and perhaps had the Starks (of Game of Thrones notoriety) been aware of the properties of the humble chocolate pudding,  the threat that ”Winter is Coming” may have been nullified.

recipes

Earl

Earl Grey Chocolate Cake

Certain days call for sophistication. Heels above trainers, straighteners in place of hair ties and tailored rather than swathed. Life may not be taking you anywhere special but sometimes you need to feel as though it is (and you are). When these days are upon us, not a detail should be overlooked, right down to the cuppa. This is the day to politely decline the everyday leaf – an Earl Grey will do very nicely thank you.

Opening a Twinings tea sachet always feels a bit luxurious. It seems to create a sense of occasion as a newly opened selection box of chocolates or a gift tin of biscuits will do. Perhaps this harks back to a long past era when these everyday indulgences were ‘special treats’ and like Pavlov’s dogs, our automated response of pleasure is ignited at the break of the seal. Whatever the precursor, it’s lovely to have a small collection of these packages sequestered in the pantry when the need for a little spoiling arises. On occasions such as these, a fragrant Earl Grey is my (and Nigella’s I believe) sachet of choice.

And as the glamorous assistants on the Chanel counter will advise, for maximum effect,  it is always best to layer your fragrances (ie purchase the entire range). So, in keeping with this prestigious advice, you can ‘layer up’ the Earl experience by baking one of these divine Earl Grey chocolate cakes to accompany your next EG brew. A lovely fudgey chocolate cake with the infusion of tea adding another dimension altogether.

With this powerhouse of an international ingredient list collaboration: (Swiss Lindt chocolate, British Twinings tea, Greek yoghurt, Danish Lurpak butter and Melburnian boiling water), how could this cake possibly fail to deliver anything other than the height of baked sophistication?

6 Earl Grey tea bags
1 cup boiling water
120g butter, softened
3 eggs
2 cups sugar
100 dark chocolate, melted & cooled
2 cups plain flour
1 tsp bicarbonate of soda
1 tsp baking powder
pinch of salt
1/2 cup plain yogurt
icing sugar for dusting

  1. Preheat oven to 180° C. Grease a bundt tin or large cake pan (this makes a generous cake).
  2. Brew the tea in the water 3 to 5 minutes. Remove the tea bags and set the tea aside.
  3. Cream the butter and sugar until fluffy and beat in the eggs, one at a time.
  4. Blend in the chocolate.
  5. Mix through the flour, bicarbonate of soda, baking powder and salt.
  6. Mix through the yogurt and tea alternately. Your batter will be light and fluffy. Pour into the pan.
  7. Bake for 50 minutes or until a skewer inserted into the cake comes out cleanly.
  8. Cool for  5 minutes, turn out of the pan and dust with icing sugar

a slice of earl grey chocolate cake

Postscript: And with the recent Gatsby mood infiltrating our consciousness, you can also pour a cup, cut a slice and channel your inner Daisy Buchanan.

recipes

Honeycomb

chocolate coated honeycomb

Ever wondered what to do with all that leftover honeycomb and chocolate you have? Nor have I, but if there’s ever a reason to stockpile it, this brownie recipe is the one. Shards of brittle caramelised sugar amongst fudgy chocolate brownie – pair this with a nice cup of tea and you have what I would consider to be the ultimate treat.

As autumn slides in, and with it the cooler evenings, what better way to see you through the complexities of Downton Abbey life than a cup of tea and a good chunk of this.

chocolate honeycomb brownie

In fact, I’m sure if Mrs Patmore had culinary associations with those ‘across the pond’, the resulting recipe exchanges would have made possible the serving of this racy brownie to the drawing-room, and all manner of crises may have been averted.

If only Tom could have chowed down on a piece of this scrumptious bake, I’m sure he would be less inclined to espouse his unpopular political opinions (unfortunately alienating him from his English in-laws). Edith’s recovery from her jilting would have been far more expedient had she been offered a slice,  and the stress caused by the recent financial crisis that almost had the Abbey thrust on the open market, would have swiftly been alleviated. Perhaps if Bates could have been slipped a piece through the bars, there would have been more joy in his life than simply Anna’s letters, and even the sourpuss O’Brien might have seen the positive after a good munch.

And, despite its American origins,  I’m sure Granny would have secretly loved it.

Not a Downton fan and haven’t a clue about anything I’ve just written? Don’t be concerned. If your blood is red (not blue) and you’re up for a bit of luxury in the evening, then here are the steps to take:

1 cup plain flour
3/4 cup cocoa
1 cup brown sugar
1 tsp baking powder
180g butter
200g dark chocolate
3 eggs, beaten
100g chocolate coated honeycomb, roughly crushed

  1. Preheat oven to 160 degrees celsius and line a rectangular pan with baking paper.
  2. Combine flour, cocoa, sugar and baking powder. Mix well.
  3. Melt butter and chocolate and pour into dry mix with the eggs. Mix until smooth.
  4. Stir through 3/4 of the honeycomb. Pour into baking pan.
  5. Sprinkle remaining honeycomb evenly over the top and bake for 35 minutes or until firm. Slice when cool.

instagram cadbury

Postscript: Just wanted to include a snap of an old friend who has accompanied me on many baking adventures and who gave a standout performance in this batch of brownies – Cadbury.

recipes

Vintage

Chocolate Ripple Log

As a child of the 70’s, any mother who produced a chocolate ripple cake for the ”sweets table” at a local function, won my everlasting respect.

Not sure if it’s the fact that its made from my favourite childhood biscuit, it’s delicious on a hot day straight from the fridge Nigella style, or it’s sheer simplicity, but this would be one childhood dessert that has carried over into adulthood for me, without skipping a beat. Sandwiching biscuits together with cream and making a log – it doesn’t come much simpler than that.

So with temperatures currently in the high 30’s, I could think of nothing nicer than opening the refrigerator to a chilled chocolately log at sunset. Extended setting time is required to allow the cream to seep into the biscuits and become all cakey. So, first thing in the morning, once everyone has vacated, pour yourself a coffee and trowel yourself a creamy log. The sense of accomplishment you’ll radiate by 9.30am will astound.

To get your chocolate ripple cake up and running, here is the recipe, straight from the crinkly pack – and if you feel the need to slip on a kaftan before you begin, by all means do.

1 x 250g packet Arnott’s Choc Ripple biscuits
500ml thickened cream
1 tsp caster sugar
1 tsp vanilla essence
cocoa powder

  1. Using an electric mixer, whip together cream, sugar and vanilla until stiff.
  2. Spread a little of the cream along a long serving plate to make a base. Spread one biscuit with 1 ½ teaspoons of cream then top with another biscuit. Top with another 1 ½ teaspoons cream then place biscuits on their side onto the cream base on the serving plate. Repeat until all biscuits have been used to form a log.
  3. Spread remaining cream over entire log. Cover loosely with foil then refrigerate for a minimum of 6 hours to set. Just before serving, dust log with cocoa or sprinkle with grated chocolate if desired. Cut cake diagonally to serve. Serve with seasonal berries.

chocolate ripple sliced

Postscript: A friend will routinely pulverise a packet of chocolate ripples into powder, scoop the resulting crumbles into individual containers, throw in a scattering of sour worm lollies, and market them at fetes and cake stalls as ”Worms in Dirt'” …. just so you know.

recipes

Upside-down

If you can find a recipe that allows you to switch the ingredients according to what you have, you prefer or is seasonal, then I’d say you have a keeper.

These little upside-down cakes fit that profile perfectly. Blueberries too pricey? Replace with strawberry halves. Don’t like chocolate (what!!!) then use this butter patty cake recipe instead. The bottom line is, you decide which fruit is going to feature and what flavour cake batter will be supporting it.

Apricot halves and peaches make a delicious base and as we have just launched into the stone fruit season, they are right at our fingertips. The tender baked fruit that becomes the topping of your cakes provides the moisture and sweetness that icing would normally account for.

For those who are explorers by nature, I’m sure you will come up with some startling combinations.

Over to you.

30g butter, melted
1 tbsp brown sugar
125g blueberries
125g butter, softened
¾ cup caster sugar
2 eggs, lightly beaten
1 teaspoon vanilla
11/4 cups SR flour
1/3 cup cocoa
2/3 cup milk

makes 12

  1. Distribute melted butter evenly between muffin tins. Sprinkle brown sugar over the base of each. Drop approximately seven blueberries into each hole.
  2. Cream the remaining butter and sugar together until light and fluffy. Add the eggs and vanilla and beat well. Fold in the sifted flour and cocoa alternately with the milk until combined.
  3. Spoon over the top of the blueberries.
  4. Bake in a moderate oven 160°C for 20 minutes or until cooked when tested. Cool before turning out of tins.

Postscript: Packet cake mix has come a long way in recent times. If you need these babies in a hurry, complete the fruit step and spoon the packet mix over the top.