gardening

Nasturtium

Yellow nasturtium

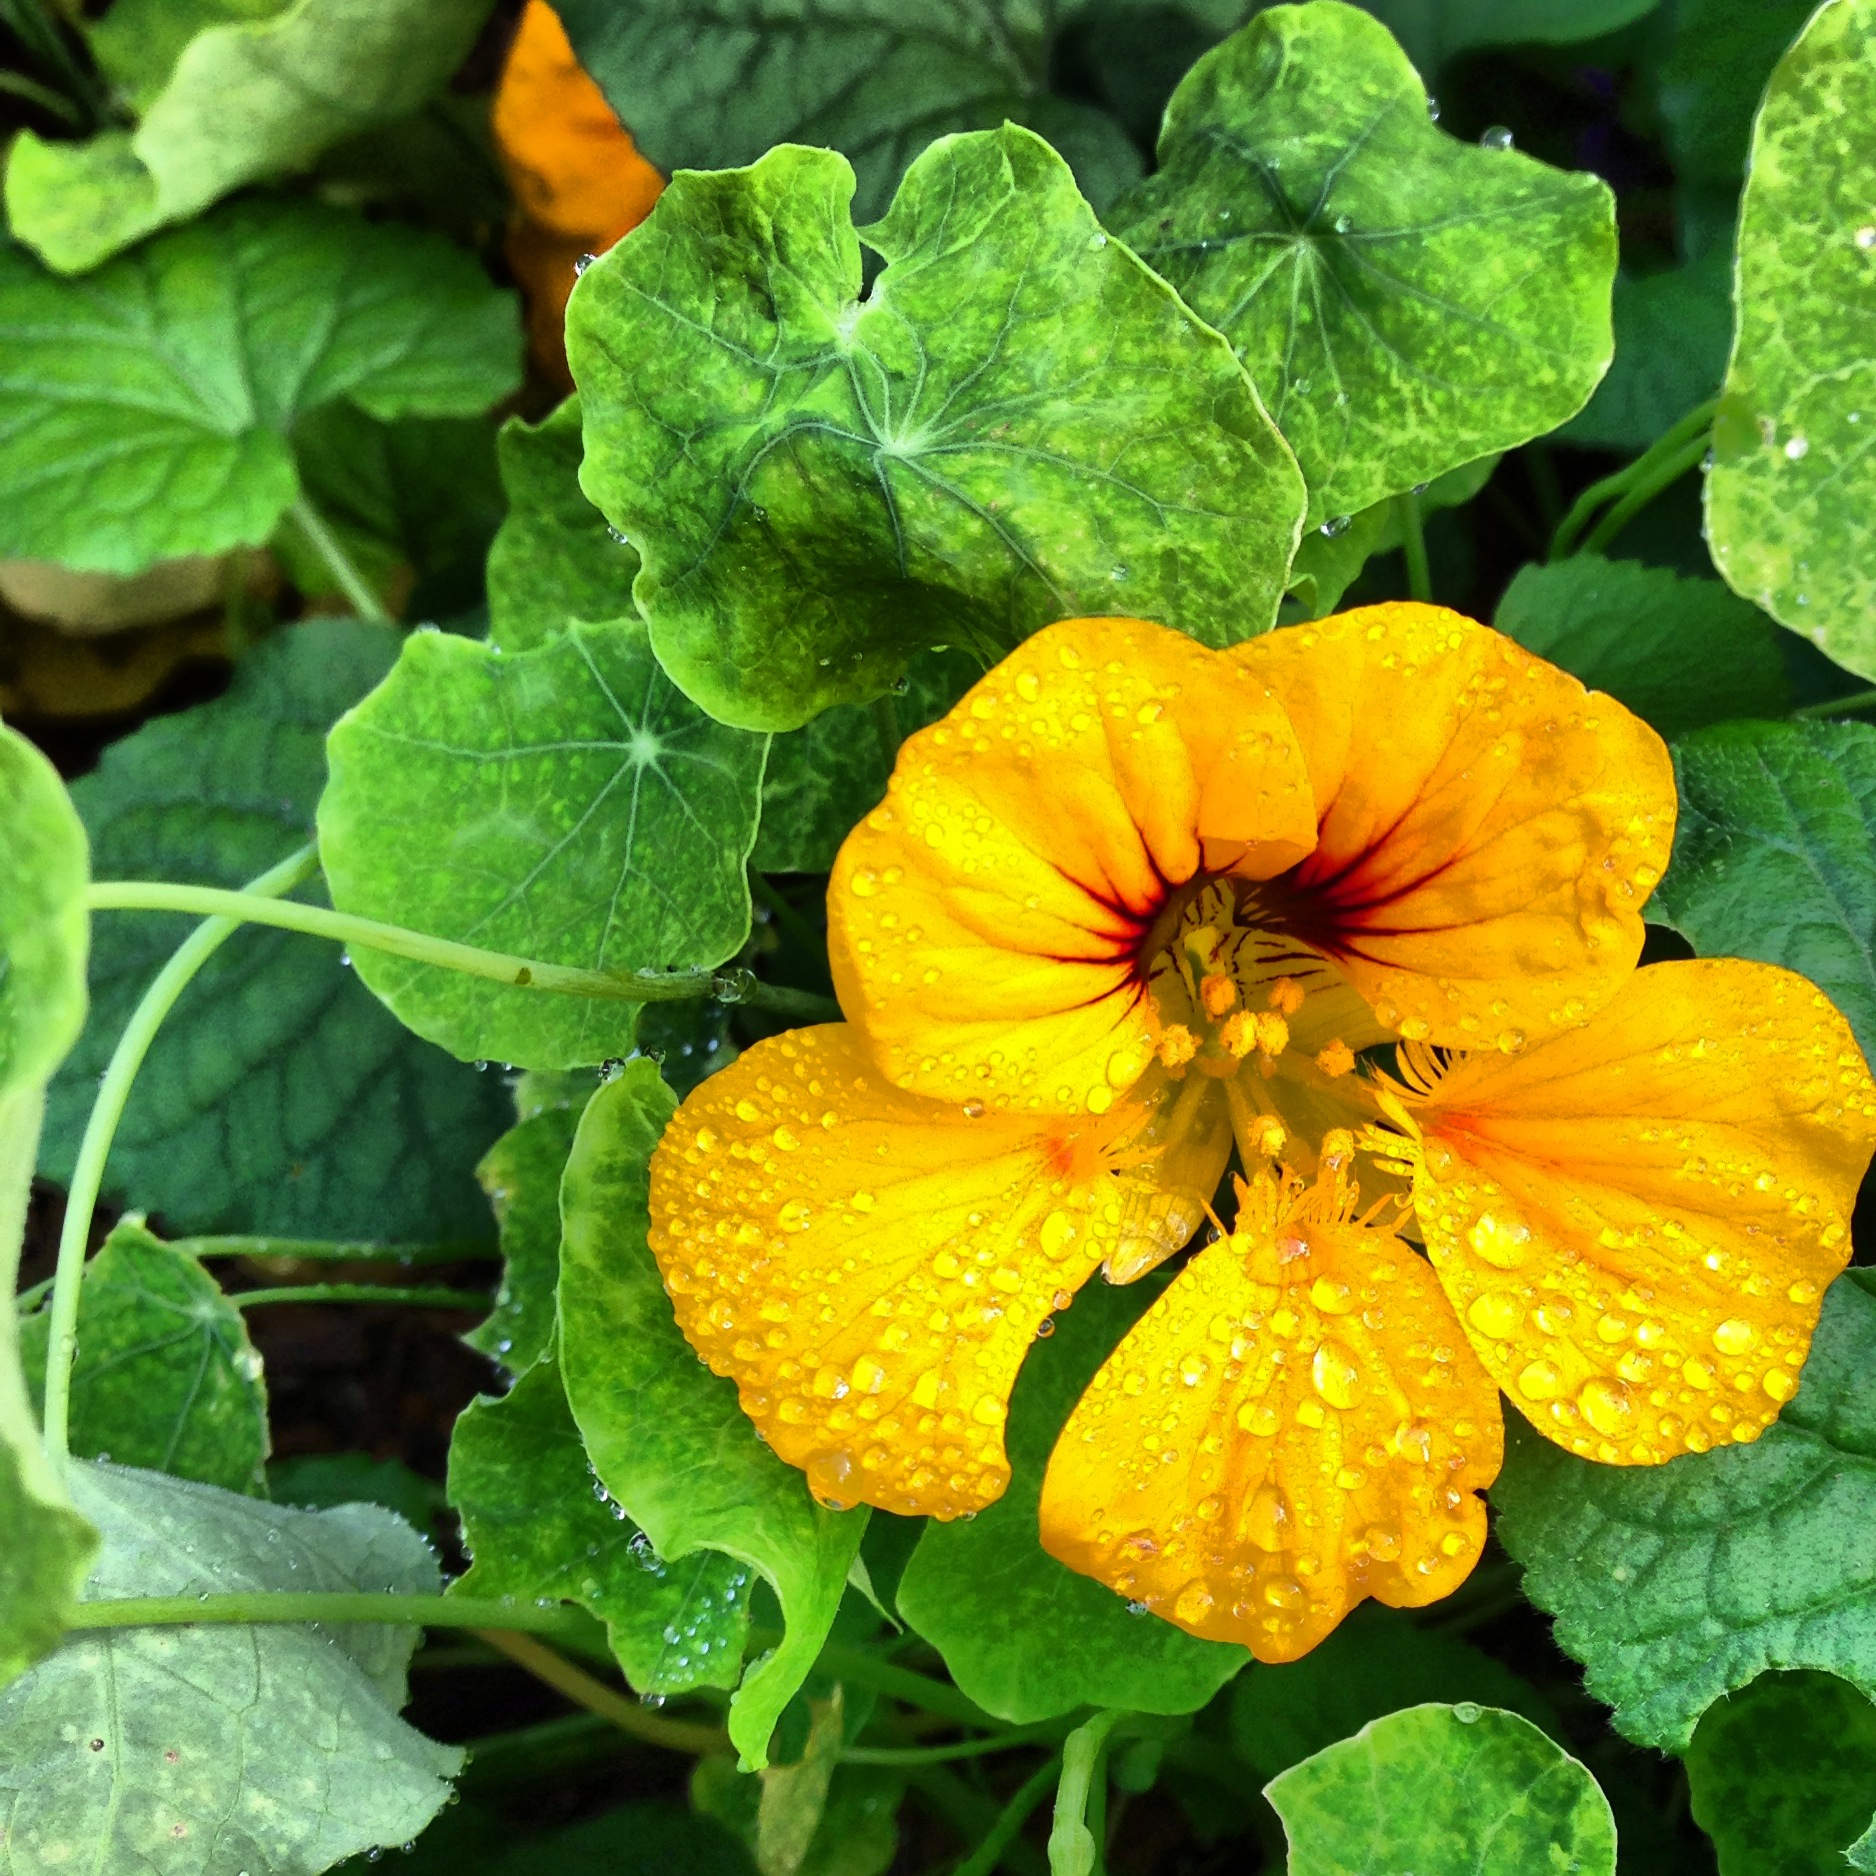
How are you at cultivating weeds? Excellent, then you will have little trouble enjoying a thriving horticultural relationship with the nasturtium.

A simple matter of pressing a handful of seeds into less than average soil and applying a generous spray of water will in very little time, result in the appearance of tiny rounded pumpkin-esque leaves. These tender beginnings will only continue to develop into greater wandering vines seeking optimum aspect to settle for bud burst. Turn your attention to matters of the indoors for several days only to be pleasantly surprised, on the unplanned day you chance to pass this patch once more, now lavish and beaming with the rusty orange and golden yellow jewels this secretive perennial has been longing to astonish you with. And astonish you it will.

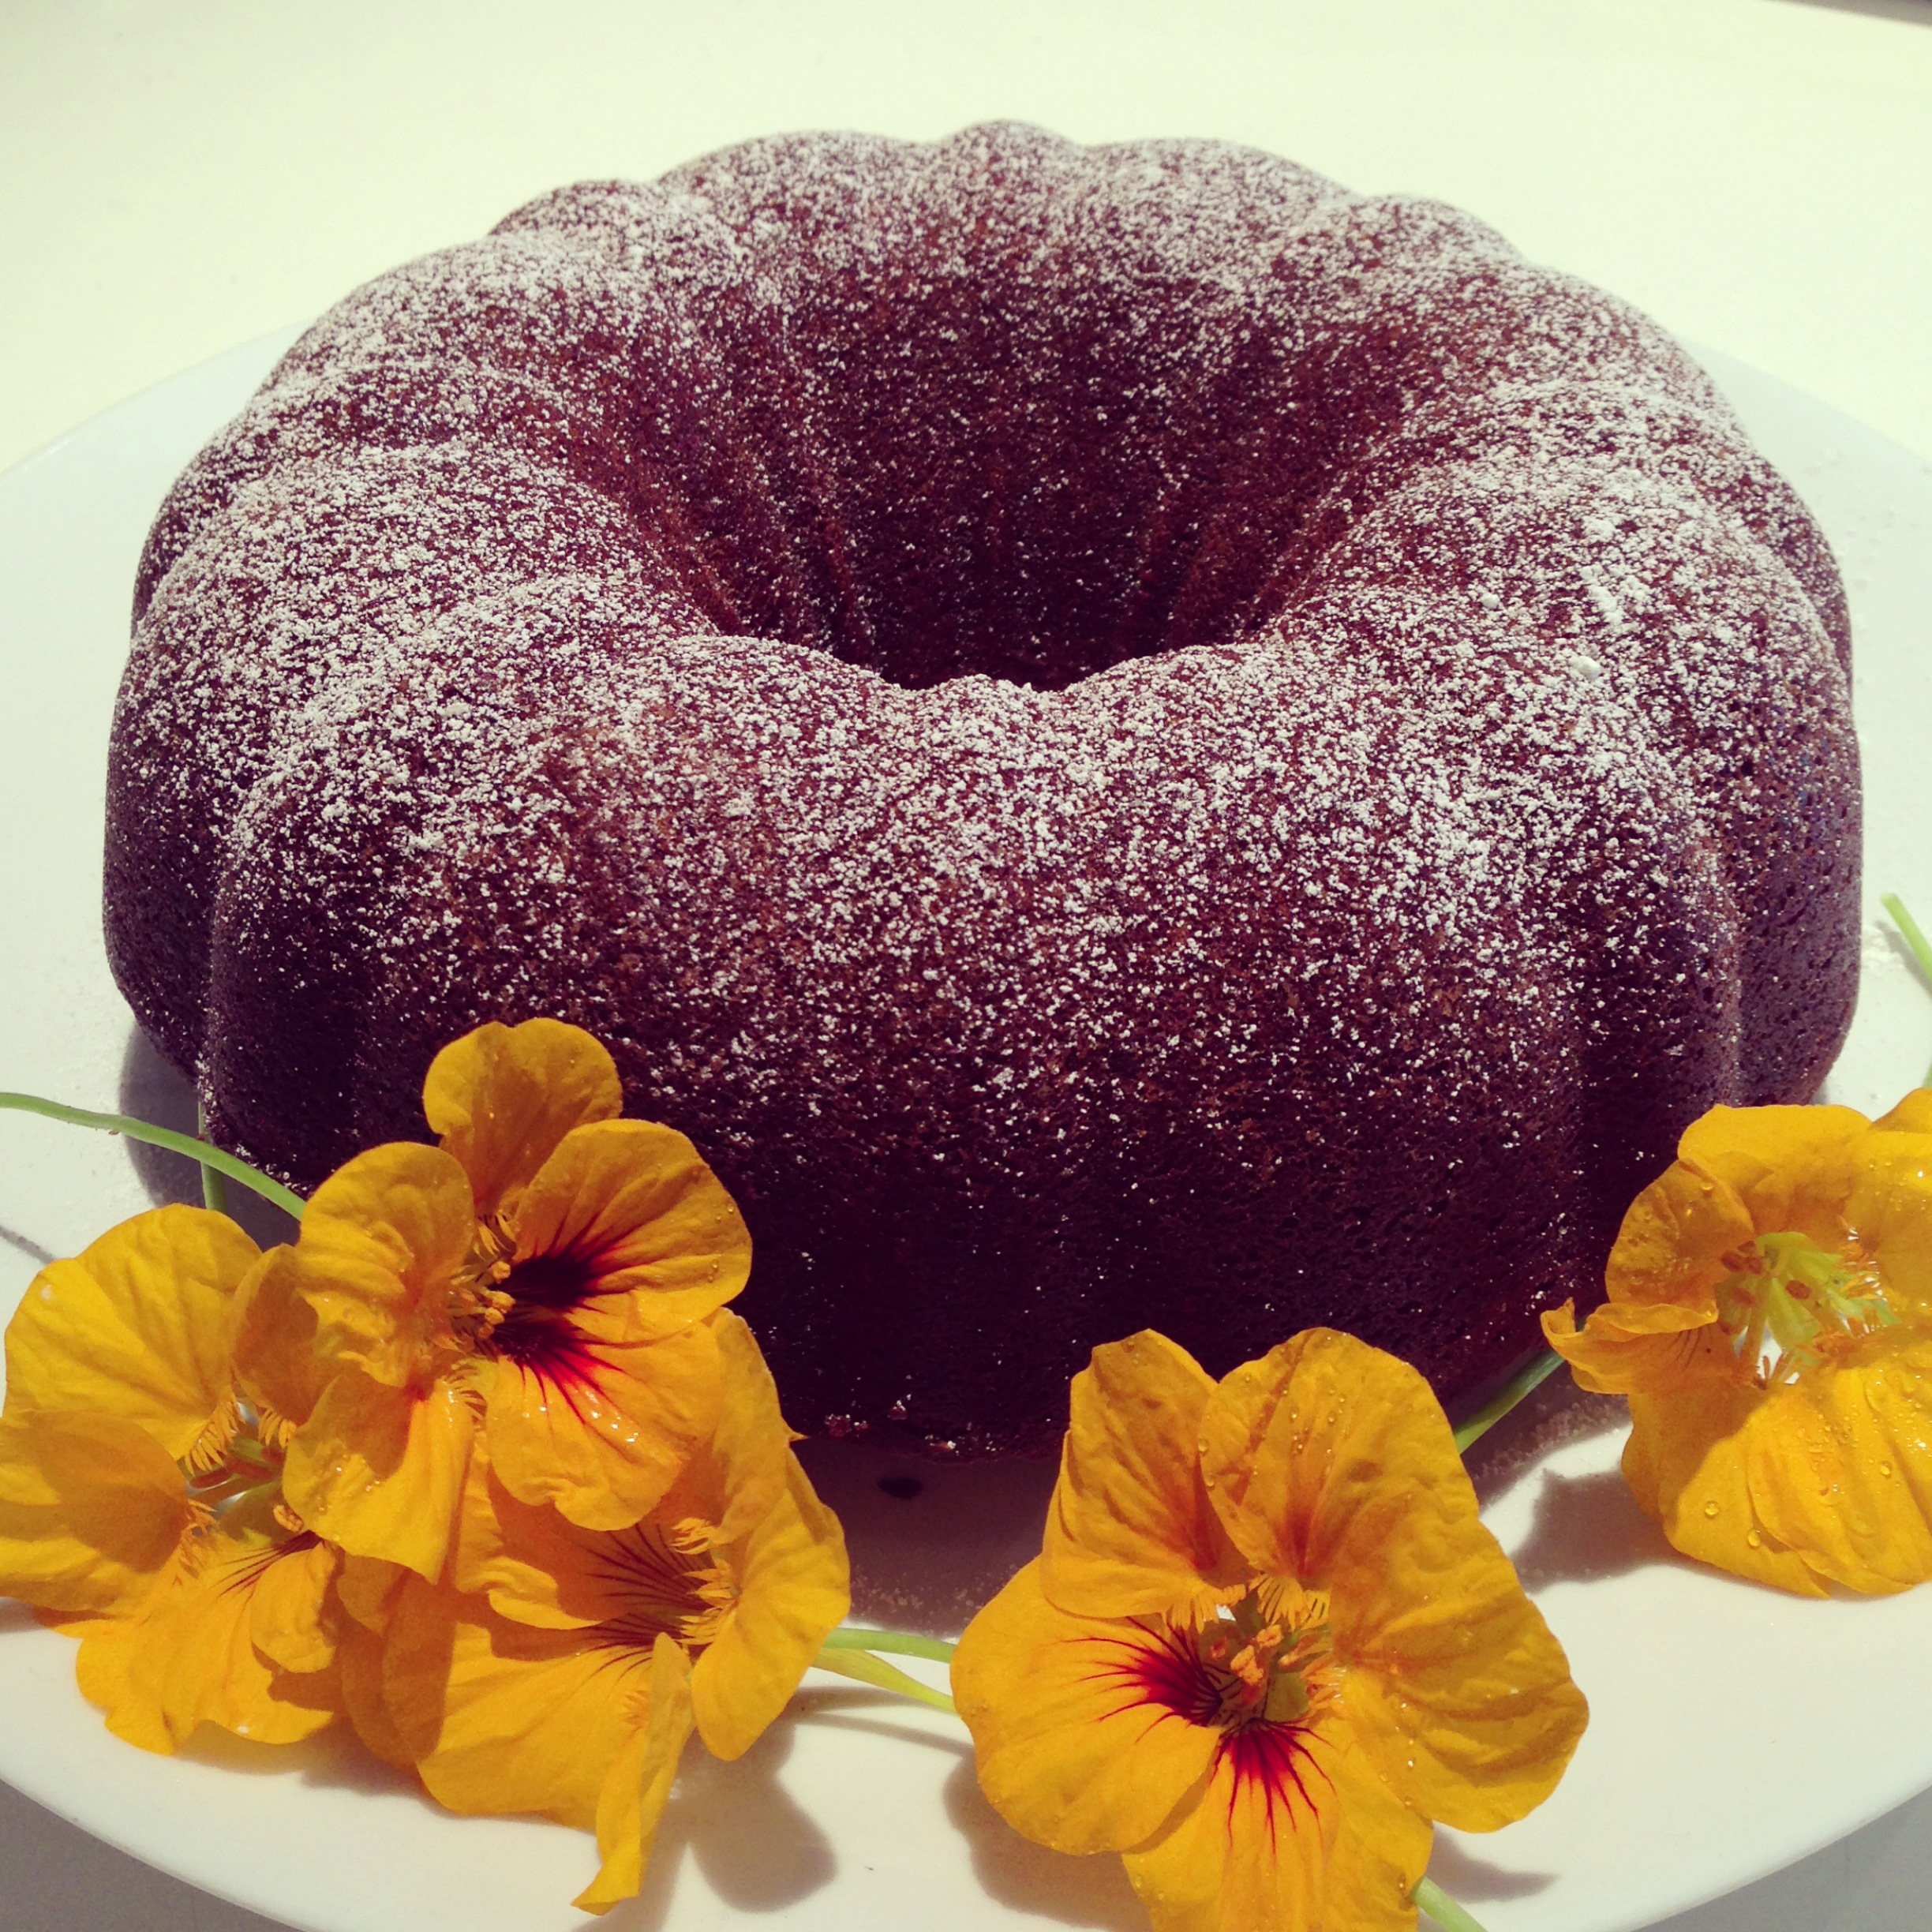
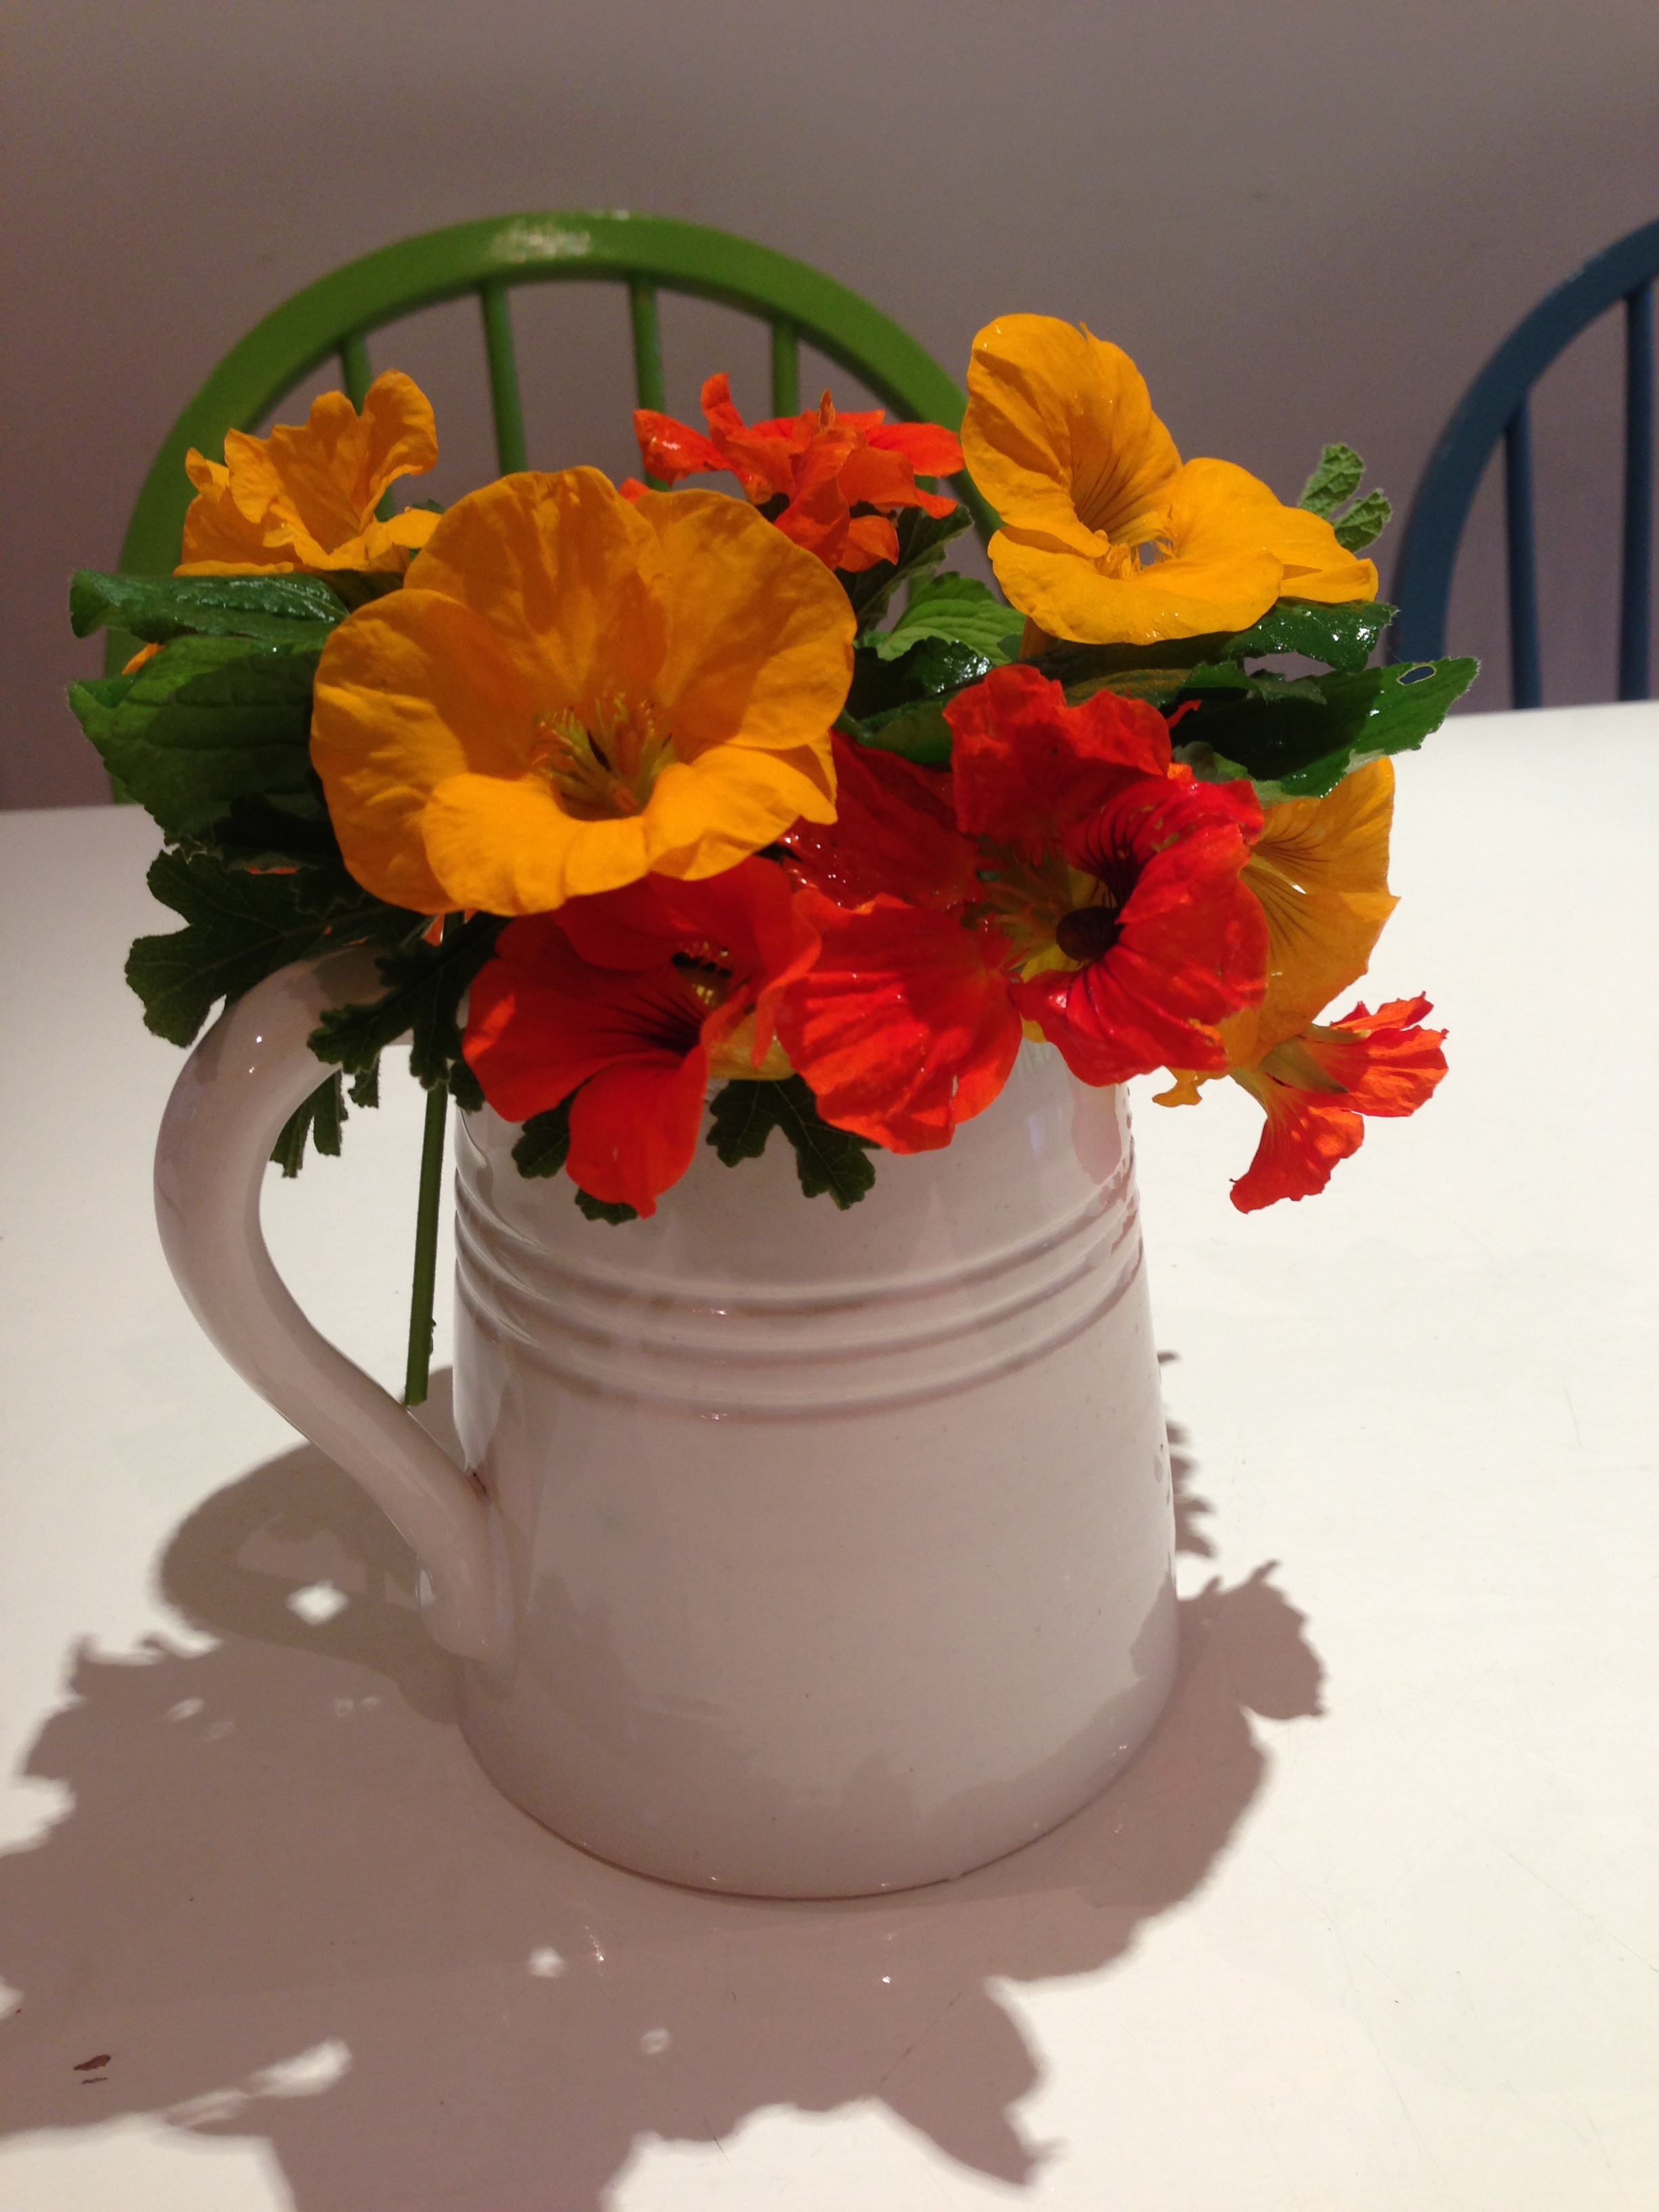
Let not the display remain outdoors, but gather small handfuls of the gems to be spaced with sprigs of generic winter garden greenery, filling orphaned milk jugs to brighten the bleakness. Interestingly, well after the pricey bunch of hot-housed tulips have dropped their heads, with a swift freshening of the supporting green, the little nasturtium posy shines on.

nasturtium jug

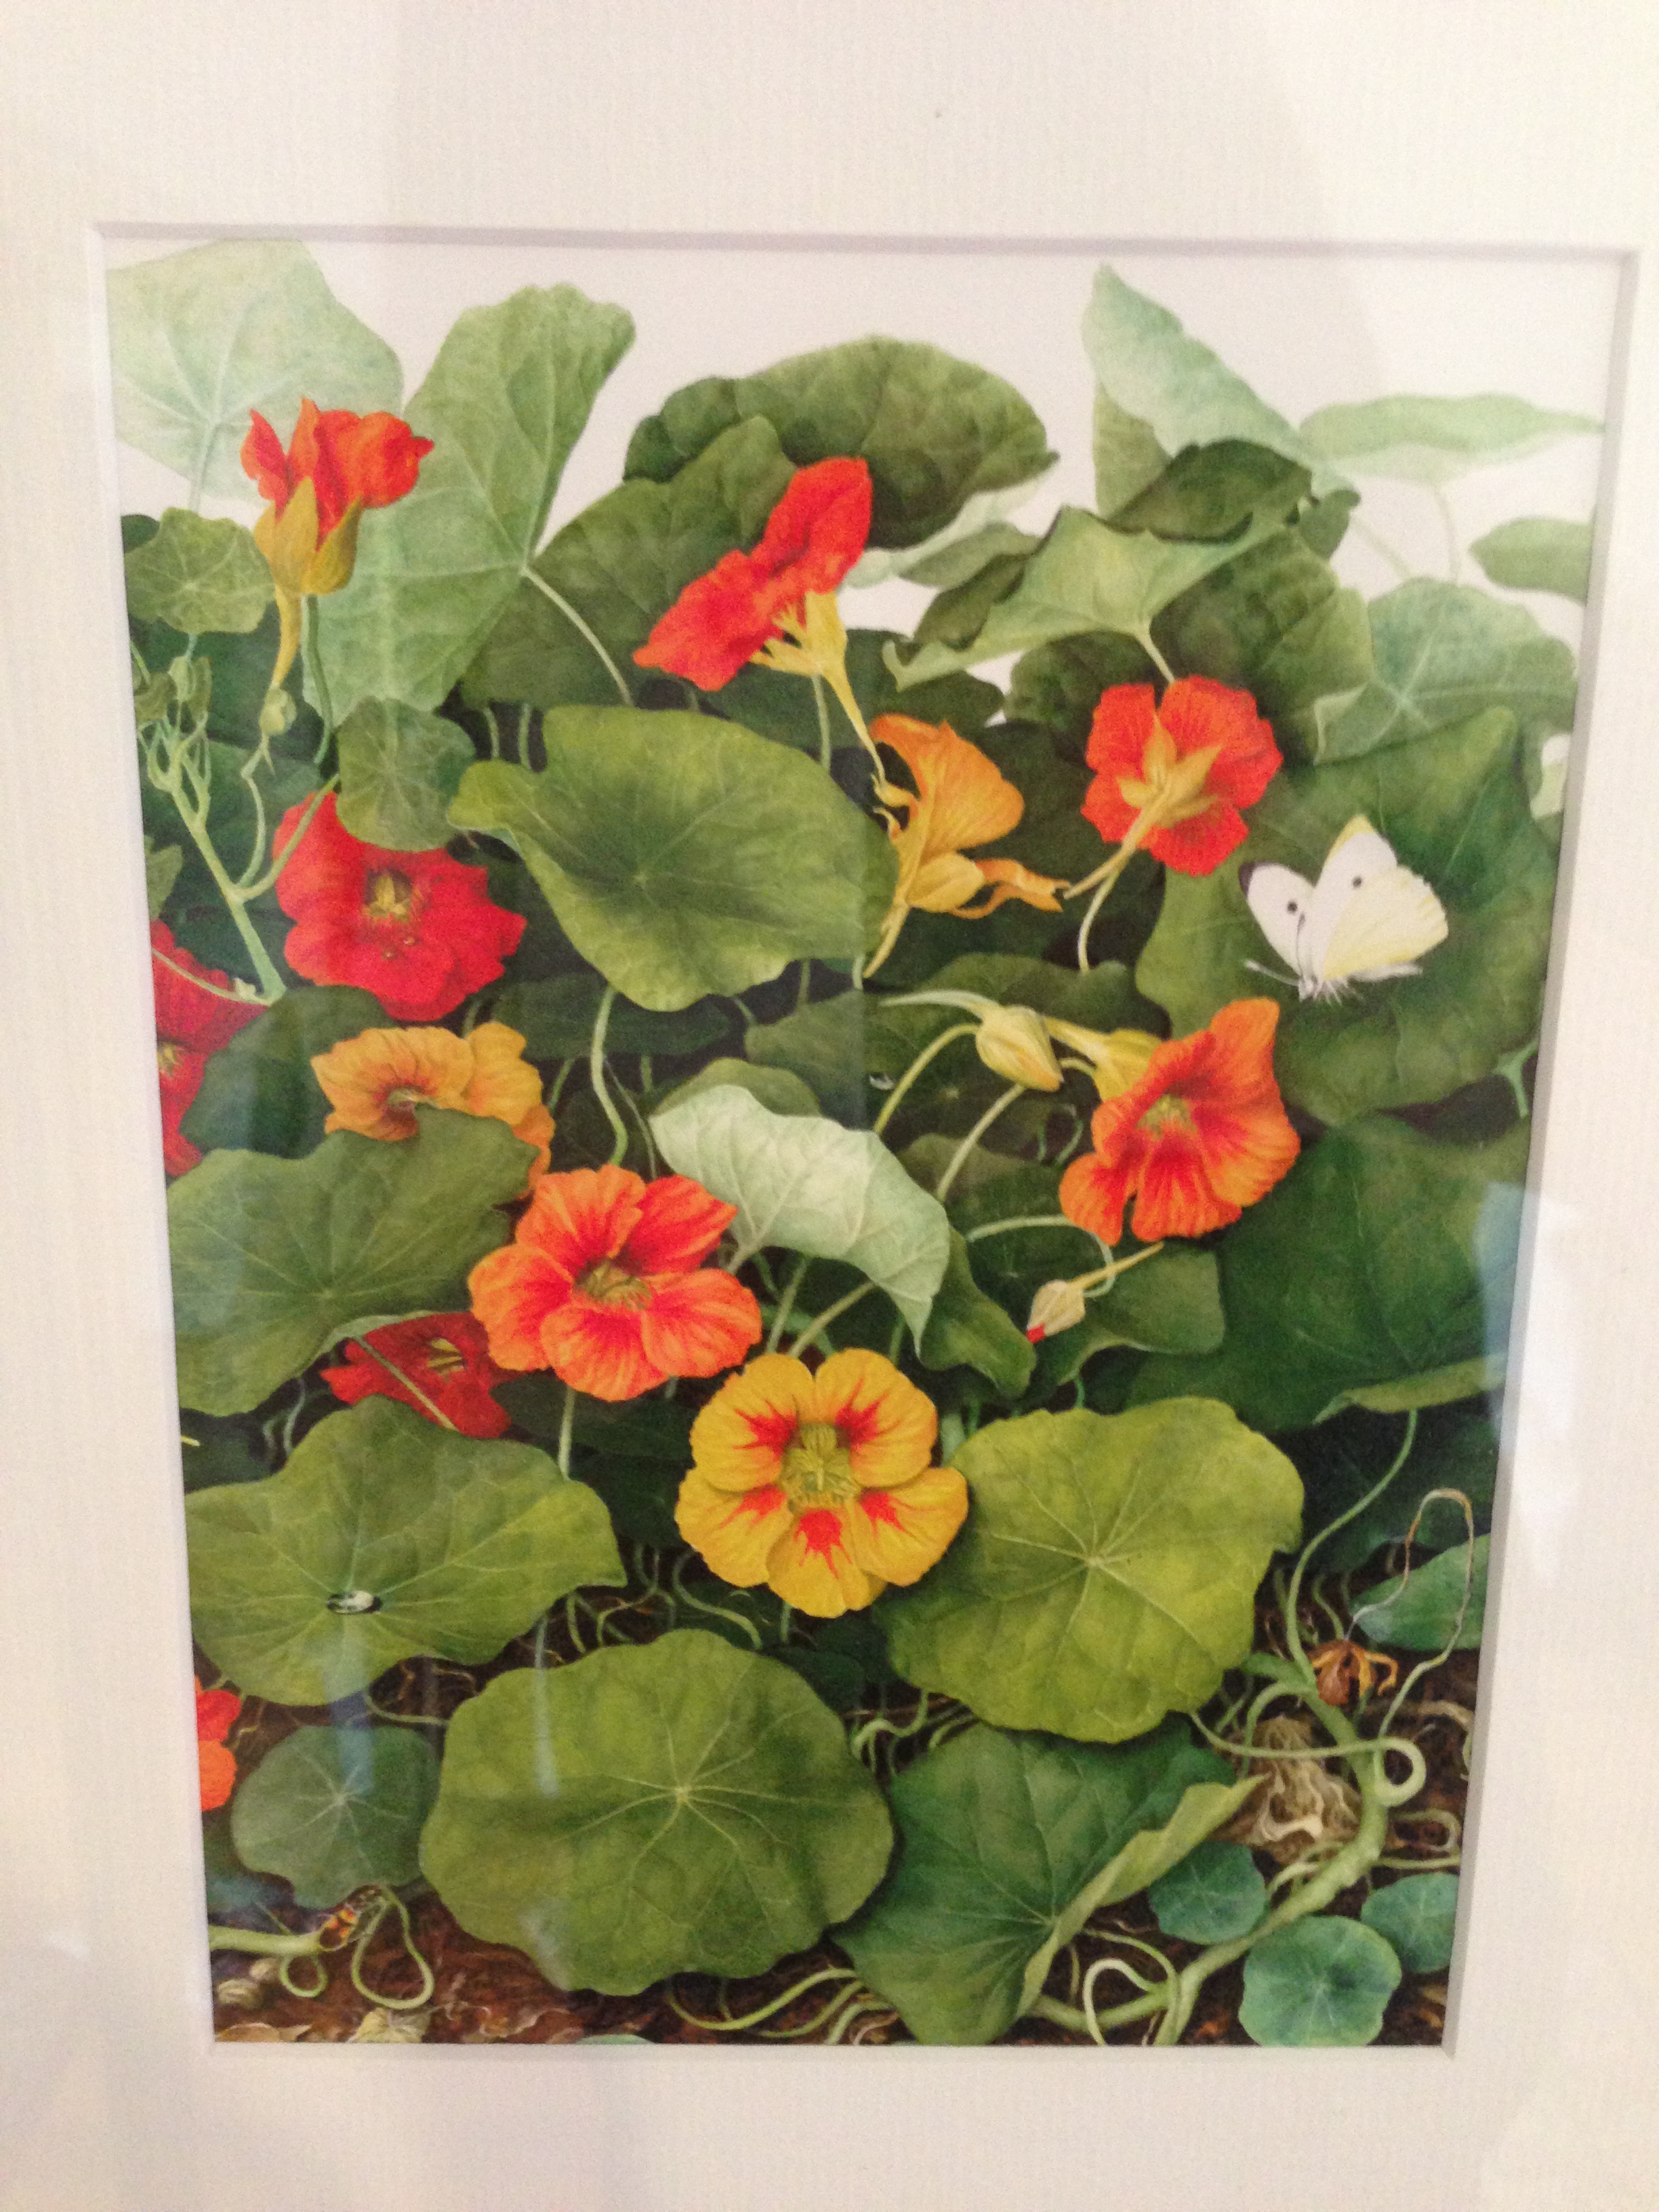
For me, nasturtium fondness traces back awhile. Back in fact to the base of a mission-brown stained paling fence with a northerly aspect, flanked by a thickness of orange blooms set off by the vivid green. This is the visual I have of the dividing line distinguishing the boundary between my childhood home and the neighbourhood path.  With the fence and the home a distant memory,  it was therefore without hesitation, when I saw this artwork in our local gallery that I purchased a print. Complete with cabbage moth, who shares an equal affection for the plant, this print provides a restful scene to reflect upon before the bedside lamp clicks off, punctuating the end of another day.

nasturtium art

Postscript: Is it too late to add, that both leaves and blooms are wonderful additions to simple tomato, cucumber and lettuce salads? (once you have trained the uninitiated palettes into the ‘appreciation of the peppery’ of course)

nasturtium salad

gardening · recipes

Bay

Bay leaves

An unsung hero from the herb clan that any braise or casserole worth its salt would be lost without. Yet rarely does this leaf receive a sliver of the attention it deserves – while pantries across the globe hoard them in packets and jars. Seldom appearing in the weekly shop, yet always managing to be on hand – the bay leaf, our culinary Winter herb.

It is not uncommon for stock of milk, butter or Milo to exhaust in this household, but bay leaves are forever in ready supply. Other than the fact that two are only ever required for a dish, my mother is the keeper of a bay tree and visits regularly. (We are therefore secure in the knowledge that should we fall on difficult economic times, we shall never be without them). She recently delivered a branch, which has been stripped of its foliage, which now sits drying in an open jar. It is quite lovely to reach in and pluck out a few to pop into the stew du jour.

The law of bay leaf use however, is that prior to ‘plating up’ they must be removed from the dish, as the nature of their flavour enhancing role is of background chorus rather than centre stage. Unfortunately busy cooks will forget laws. So in response to this, under this roof new dinner table lore has evolved –  and is evidenced by the exclamation, “Look, I got the lucky bay leaf!”

For your next ‘stew du jour’ this Moroccan-style Oxtail braise will ensure two of your lucky leaves will be put to good use.

ox tail braise

3kg oxtail pieces trimmed of fat
plain flour for dredging
1 tbsp ground ginger
4 tbsp olive oil
2 onions, chopped
2 cloves garlic, finely chopped
3 stalks celery, chopped
1 tsp ground cinnamon
8 cloves
800g can crushed tomatoes
2 bay leaves
zest of 1/2 an orange
2 cups beef stock

  1. Mix together the flour and ginger and coat the oxtail pieces. Dust off excess.
  2. Heat oil in large heavy based pan and add meat in small batches to brown all over. Transfer to slow cooker.
  3. Add onions, garlic, celery, cinnamon and cloves and cook for 1-2 minutes.
  4. Add tomatoes, bay leaves, orange zest and stock. Cook for another couple of minutes.
  5.  Pour this mixture over the ox tail and cook on low for up to 6 hours or until meat is tender.

(This can also be done in a casserole dish in the oven. Simply add 1 1/2 cups of red wine with the stock and cook at 160 degrees celsius for 2 hours or until meat is tender and falling off the bone.)

Dried bay leaves

Postscript: This post is dedicated to Z and her new slow cooker.

recipes

Gourd

IMG_2512

Apart from providing glamorous pre-midnight transportation to royal balls, pumpkins are a wonderful kitchen staple. Restaurants are incredibly inventive with them, delivering burnished coulis, sorbet, and ravioli to their anticipative patrons.  At our place, these orange stalwarts typically convert to soups, scones or roasted accompaniments – and are equally appreciated.

It was the perfect squat shape and the speckled skin, rather than shopping list requirement that ensured this weighty vegetable’s place in the trolley this week. There’s something quite reassuring about the sight of a big pumpkin on the kitchen bench. Perhaps it is the promise of soup and scones to come, or simply the rustic, homely image. Definitely those, but also something quite intangible yet equally significant. With the ever-increasing availability of pre-cut, prepackaged green grocery these days, the uniqueness of bringing home an uncut, unwrapped vegetable is so gratifying. And like a trophy for the wholesome shopper, worthy of proud display.

This week, haul your prize home, position it prominently and allow at least a day or two of solid admiration before applying your sharpest blade to provide your family with the spoils.

2 kg pumpkin cut into wedges with skin on
6 cups chicken stock
2 tbsp honey
1 tbsp Dijon mustard
fresh coriander

  1. Preheat oven to 200 degrees celsius.
  2. Place pumpkin in roasting dish and bake for up to an hour until soft and skin begins to crisp.
  3. Remove flesh from skin and place half in a blender with one cup of the stock. Blend until smooth and repeat with remaining flesh.
  4. Put all of the soup in a large pot with remaining stock, honey and mustard. Simmer for 10 minutes until heated through.
  5. Season with salt and pepper. Pour into bowls and garnish with coriander leaves.

Pumpkin scones

and for the scones….

2 cups SR flour
pinch salt
50g butter, chopped
1/4 cup cooked, mashed pumpkin
1 egg, beaten lightly
milk for brushing

  1. Preheat oven to 220 degrees celsius. Grease baking tray.
  2. Sift the flour and salt into a bowl. Rub in the butter.
  3. Add the pumpkin and egg.
  4. Mix into a dough then turn out onto a lightly floured surface and knead briefly. A little extra flour may be required.
  5. Pat out into a round and cut with scone cutter. Place on prepared tray and brush tops with milk.
  6. Bake for 2o minutes or until risen and golden.

Postscript: we all have our ways with pumpkin soup and pumpkin scones. For me, it is to roast the pumpkin off before pureeing into soup, for depth of flavour. For the scones, as they are to be paired with the soup, sugar is deliberately omitted.

recipes

Enid

Cherry Almond cake

Oh for the days when you could pack the children off to a nearby forest with jam sandwiches and ginger beer for sustenance, only for them to return famished at dusk, to scoff drop-scones and cocoa before falling into bed to dream wonderous dreams of their adventure-filled day. How simple the meal plans, grocery shop and cooking would have been, not mention all that independent time to be had whilst they were up the Faraway tree somewhere or other.

I am of course, referring to the fantasy tales created by Enid Blyton – the ones that shaped my childhood from The Enchanted Wood through to The Secret Seven. I always longed to have midnight feasts of homemade chocolate cake and toffees in boarding schools, picnics of orange aid and macaroons in tree-houses or returning home to a ‘tremendous steamed pudding, with lashings of treacle’.

It seems another much respected writer of mine, Angela Mollard, has also been touched by Enid’s writing. Angela is equally fascinated with the food depicted in Blyton’s novels. She states, “It’s all “great slices of cherry cake”, melt-in-your-mouth shortbread and gingerbread described as “dark brown and sticky to eat”. Indeed, it’s a measure of Ms Blyton’s talent that she even makes “potted meat”, “tongue sandwiches” and “lashings of hard-boiled eggs” sound like lovely picnic fare.”

Upon reading that phrase “great slices of cherry cake”, I knew what would be coming out of my oven on the next available baking day….

And just so you know, this Cherry Almond cake really is scrumptious – with or without the lashings of ginger beer.

185g butter, room temperature, chopped
3/4 cup castor sugar
3 eggs
2 cups SR flour
2 tbspn almond meal
1/4 cup milk
200g glace cherries

  1. Preheat oven to 180 degrees celcius and grease a loaf tin.
  2. Place all ingredients, EXCEPT cherries in a mixing bowl and using an electric mixer, beat on low speed until all ingredients are combined.
  3. Increase speed to medium and beat until mixture is smooth and changed in color. Stir in cherries.
  4. Spread mixture into tin and bake for 50-60 minutes.
  5. Cool and dust generously with icing sugar.

cherry cake and Secret Seven

Postscript: and being that this is the 100th post for Plain and Simple Blog, it seemed fitting to reference such a magical and prolific writer as Enid Blyton (some sources quote her published tales were in excess of 7500!) Since October last, this blog has catalogued one hundred examples of the plain and simple elements of living – Enid has certainly set the bar high.

recipes

Medley

Fruit salad

We load our crispers enthusiastically as the week opens with good intention, virtuous feelings of nurturing and nutritional piety – and abundance of fruit. By mid-week, health promises and resolutions lay broken like pie crust and the crispers are still groaning. As you stare down the barrel of the coming week-end, with fruit in quantities far too excessive to clear out into unsuspecting lunchboxes, it’s time for fruit salad.

And this week, we did just that. An assembly of refrigerator pickings gathered on the chopping board. After the halcyon days of summer stone fruit, what now remained was a fairly pedestrian selection. However, once the ‘pedestrians’ were chopped and a few early winter newcomers were included, we had quite a sunny bowl before us. Topped with a delicious orange syrup, helpings disappeared in record time.

As a result, the crispers were cleared, nutritional equilibrium was restored and children retired to their beds on bowls of fruit rather than ice-cream. I’d say some self-righteousness was in order.

But before I topple off the edge of this moral high ground, here is how to produce the lovely, sweet orange syrup that covered it all…..

1 cup sugar
1 cup water
1 tsp vanilla essence
finely grated rind of one orange
juice of one orange

  1. Place all of the ingredients into a medium saucepan, and mix together.
  2. Place over medium heat and stir until sugar has dissolved and the mixture comes to the boil.
  3. Reduce heat and simmer for approximately 15-20 minutes or until the liquid has become syrupy.
  4. Chill well before pouring over large serving bowl of fruit salad.

fruit salad with orange syrup

Postscript: As we prepare to undergo the next season of Masterchef where no doubt we shall be encrusted, caramelised, deglazed and trussed, at least we know that performing the ‘chop, mix and pour’ trilogy will have us savouring fresh produce at its simplest and best.

recipes

Floret

Cauliflower cheese

Autumn gradually segues into Winter, and as it does by 5.00pm kitchens throughout our suburbs begin to emit aromas of succulent roasted cuts. As to what constitutes a ‘roast dinner’ is as unique to each family as the padprints of its members. Raise the topic and prepare for an onslaught from passionate folk who will wax lyrical over their family’s version.

Life is busy and as a consequence, meals are pared down. Let’s not allow our sacred roasts to become casualties of modern times. What was originally a family meal with many accompanying side dishes, is sometimes reduced to meat and basic veg. Coursing through the bloodlines of our particular family roast ancestry, are baking dishes of golden cauliflower cheese. So, when I spied these beauties at our local supermarket this week, a culinary genome was activated.

cauliflowers

That night, positioned beside a crispy golden bird, roasted potatoes and blanched greens sat a piping hot baking dish of Cauliflower Cheese. And as the metal serving spoon broke through the crust to scoop out the  florets nestled in their creamy sauce, I’m sure I heard a collective gasp from the heavens.

1/2 large or 1 small cauliflower
40 g butter
2 tbsp flour
1 cup milk
generous handful of grated cheese
1-2 rashers bacon

  1. Slice cauliflower into manageable florets and steam or microwave until tender. Arrange in baking dish.
  2. Melt the butter over medium heat.
  3. Remove from heat and stir in the flour until lumps disappear. Return to heat and cook for 1 minute.
  4. Add milk and increase heat, stirring constantly until sauce thickens. Add cheese, reduce heat and keep stirring until sauce is smooth and thick (add extra milk if required).
  5. Pour sauce over cauliflower and sprinkle bacon over the top.
  6. Place in a 180 degree celsius oven and cook until sauce begins to brow and bacon crisps – about 15 minutes.

cauliflower cheese with roast potatoes

Postscript: This side dish is but one of many that families across the globe serve with their roasted meats. I wonder what yours is.

recipes

Earl

Earl Grey Chocolate Cake

Certain days call for sophistication. Heels above trainers, straighteners in place of hair ties and tailored rather than swathed. Life may not be taking you anywhere special but sometimes you need to feel as though it is (and you are). When these days are upon us, not a detail should be overlooked, right down to the cuppa. This is the day to politely decline the everyday leaf – an Earl Grey will do very nicely thank you.

Opening a Twinings tea sachet always feels a bit luxurious. It seems to create a sense of occasion as a newly opened selection box of chocolates or a gift tin of biscuits will do. Perhaps this harks back to a long past era when these everyday indulgences were ‘special treats’ and like Pavlov’s dogs, our automated response of pleasure is ignited at the break of the seal. Whatever the precursor, it’s lovely to have a small collection of these packages sequestered in the pantry when the need for a little spoiling arises. On occasions such as these, a fragrant Earl Grey is my (and Nigella’s I believe) sachet of choice.

And as the glamorous assistants on the Chanel counter will advise, for maximum effect,  it is always best to layer your fragrances (ie purchase the entire range). So, in keeping with this prestigious advice, you can ‘layer up’ the Earl experience by baking one of these divine Earl Grey chocolate cakes to accompany your next EG brew. A lovely fudgey chocolate cake with the infusion of tea adding another dimension altogether.

With this powerhouse of an international ingredient list collaboration: (Swiss Lindt chocolate, British Twinings tea, Greek yoghurt, Danish Lurpak butter and Melburnian boiling water), how could this cake possibly fail to deliver anything other than the height of baked sophistication?

6 Earl Grey tea bags
1 cup boiling water
120g butter, softened
3 eggs
2 cups sugar
100 dark chocolate, melted & cooled
2 cups plain flour
1 tsp bicarbonate of soda
1 tsp baking powder
pinch of salt
1/2 cup plain yogurt
icing sugar for dusting

  1. Preheat oven to 180° C. Grease a bundt tin or large cake pan (this makes a generous cake).
  2. Brew the tea in the water 3 to 5 minutes. Remove the tea bags and set the tea aside.
  3. Cream the butter and sugar until fluffy and beat in the eggs, one at a time.
  4. Blend in the chocolate.
  5. Mix through the flour, bicarbonate of soda, baking powder and salt.
  6. Mix through the yogurt and tea alternately. Your batter will be light and fluffy. Pour into the pan.
  7. Bake for 50 minutes or until a skewer inserted into the cake comes out cleanly.
  8. Cool for  5 minutes, turn out of the pan and dust with icing sugar

a slice of earl grey chocolate cake

Postscript: And with the recent Gatsby mood infiltrating our consciousness, you can also pour a cup, cut a slice and channel your inner Daisy Buchanan.

family · recipes

Press

Forcer Biscuits

Autumnal rain, while gratefully received, does tend to curb weekend activity. However, where a door to outdoor occupation closes, a window of indoor opportunity opens – a chance to assemble the biscuit forcer and press out an intricate array of delicate little icing sugar sprinkled treats.

If you’ve never been acquainted with a biscuit forcer (or more recently, cookie press) before, there is a creative pursuit waiting to be explored. With little culinary skill required, it is simply a case of mixing up a buttery dough – recipes accompany the kit – rolling it into a sausage and feeding it into the cylinder. Choosing the patterned discs dictating the biscuit shape is the only challenge – the press chef is provided with quite an extensive collection. (Where a number of chefs are involved ie house bound young, this stage can become quite interesting).

Once arbitration and conciliation is complete, it’s time to start pressing. Suddenly a baking sheet full of dainty shapes appear, which when removed bronzed from the oven and dusted with icing sugar, provide an irresistible plate of afternoon treats.

Plate of pressed cookies

My observation of cookies these days, is that they are of ever increasing dimension and far outlast any cup of tea or coffee they were originally designed to complement. These little forcer biscuits scale back this recent up-sizing trend and are a reasonable representation of the portion size a treat was intended to be.

Readily available on Ebay or the like, a biscuit press may well add a new dimension to your life.

Ampia biscuit press

Postscript: Once the simple process of individual pressing is mastered, the logical progression is to create pairs for sandwiching with icing and jam for homemade melting moments – bring on the rain I say.

craft · personal style

Snood

snood

If you subscribe to the school of Carrie Fisher and like her, believe that instant gratification takes too long, then clicking up a snood for yourself this winter will be just the ticket. Done in a night, if you keep your eyes on the needles rather than on the screen, a snood may spark your knitting journey or kick-start a long stalled one.

Apart from being an overnight product, snoods can significantly improve your scarf-wearing life. They stay on, they don’t dangle in the washing up water and you’ll never suffer the same fate as Isadora Duncan (an American dancer of the early 1900’s). Duncan’s fondness for long flowing flamboyant scarves led to her death in an automobile accident in France, when she was a passenger in a car. As she motored along in her open top vehicle, her silk scarf, draped around her neck, and flowing freely behind her in the breeze,  became entangled around the open-spoked wheels and rear axle, breaking her neck.

Snoods in all their guises can be found at Ravelry but rather than being blinded by overwhelming choice, here is a small one to tackle first.

handknitted snood

Gauge: 8 sts and 12 rows to 10 cm

2 x 100g balls of chunky/bulky yarn (I used Lincraft Luxe but any yarn that comes close to the above gauge will work)
1 long pair of 12mm needles

Cast on 56sts
Row 1: knit
Row 2: purl
Repeat rows 1-2 five times
Shape snood
Row 13: k1, ssk, knit to last 3 sts  k2tog k1 – 54sts
Row 14: purl
Repeat  rows 13-14 four times – 46 sts
Row 23: knit
Row 24: purl
Repeat rows 23-24 three times
Cast off
Sew side seam using mattress stitch

knitted snood in progress

Postscript: Be assured, that the simplicity of this project will ensure that it will not be discovered in a cupboard in 18 months time still attached to its needles.

recipes

Miss Drake

Miss Drake's Home Cookery

How wonderful it was for newly married women of the 1950’s (and decades prior) to have the wisdom of Miss Lucy Drake to see them through any cookery challenge that may have presented. Armed with her Diploma of Domestic Economy and a Trained Teacher of Domestic Arts, (awarded in Melbourne no less), this accomplished domestic champion was qualified to see these lasses through any boiled fowl in egg sauce, diplomatic pudding or jellied rabbit situation that may have arisen, without even having to refresh the lipstick. As it happened, my mother was one of those fortunate brides, as evidenced by our well-worn copy of The Original and Only Miss Drake’s Home Cookery, ever at the ready in the kitchen of my upbringing.

I guess then, it was no accident that Miss Drake had a hand in my early cookery development. With Miss D’s guiding hand, I learned the art of the Lemon Meringue Pie, so often in fact that the book would fall open to the spattered page. So for old time’s sake, this millennium family was treated to one this evening. Here is how Miss Drake directs one:

”LEMON TART. This quantity for big sandwich tin; half this for small tin. I lb. plain or good short crust (page 120). Interior for Tart.—2 lemons, 2 eggs, 5 tablespoons sugar, 5 tablespoons cold water, 2 dessertspoons butter, 1 dessertspoon arrowroot blended with 2 dessertspoons cold water. Reserve the whites of eggs to whip stiffly for the top; then fold 3 dessertspoons castor sugar into stiff whites, 1 cherry and little angelica. If eggs and butter are dear, half this quantity of interior is sufficient. Method— 1. Light oven. Make short crust. 2. Shape tart. Whilst it is cooking, get ingredients for interior. Put water, egg yolks, sugar, butter, blended cornflour, grated lemon rind and juice all into a small saucepan. Stir over fire till it boils and thickens. When tart is cold put in the mixture. Whip whites stiffly, fold the castor sugar in. Decorate the top like icebergs. Return to oven just to tint. Decorate with cherry and angelica.”

Miss Drake's Lemon Meringue Pie

For me, following Miss Drake’s directions was an indulgent exercise in nostalgia, but you may not find the vintage terminology as endearing. Therefore, here is a Lemon Meringue Pie in modern terms (from another domestic matriarch, Margaret Fulton), that you may be more comfortable with.

Shortcrust Pastry (frozen sheet)
3 egg yolks
1/2 cup caster sugar
2 tbsp Plain flour
grated rind and juice of two lemons
4 tbsp water
3 egg whites
pinch cream of tartar
1/4 cup caster sugar

  1. Line your pie dish with shortcrust pastry sheet and pinch the edges for decoration. Weight down with rice or dried beans and bake for 15 mins at 180 degrees celsius. Remove weight and bake for a further 5-10 minutes or until golden.
  2. Make filling by mixing the egg yolks, sugar , flour and lemon rind in a heavy based saucepan and gradually stir in the lemon juice and water.
  3. Cook, stirring constantly, over medium heat until the mixture is smooth and thick. Cool, then pour into cooled pastry shell.
  4. To make meringue, beat the egg whites with the cream of tartar until thick. Gradually add the sugar, 2 tablespoons at a time, beating until the mixture is thick and glossy and the sugar is dissolved.
  5. Spread over the filling in the pie shell, sealing it completely with the meringue.
  6. Bake in a 180 degrees celsius oven for 8-10 minutes or until meringue is golden. Serve cold.

Lemon Meringue Pie

Postscript: I would love to be able to tell you our old ”Miss Drake”‘ lives on in my kitchen, but alas not. All is not lost however, as I have recently discovered that some wonderful people at Swinburne University, have archived this book within their image bank and have made the entire publication available as a downloadable PDF – so Miss Drake can assist you too, with your next Boiled Jam Roly.